This is a 30-minute timer that starts to countdown right away and as soon as the page loads. You also have the option to reset this timer by clicking the “Reset” button.
The countdown timer starts without any sound. But if you wish to play a clock TikTok, click the “Enable Sound” button. Also, you can pause/stop the sound by clicking the “Disable Sound” button. You can switch back and forth with the timer sound.
Once the 30-minute countdown finishes, the timer will turn from green to red color. And the sound will stop if it was enabled.
In a nutshell, I made this countdown timer as user-friendly as you need. Also, screen readers and disabled persons can easily navigate through the user interface.
However, if you have any suggestions to improve this timer, please let me know. So I can get ideas to add more necessary features to this timer (if there are any). To share your ideas with me, please send me an email to [email protected]
It’s mobile responsive and works on all major web browsers. I tested this timer on Android, iPhone, iPad, Chrome, and Firefox.
How to create this exact 30-minute timer using HTML, CSS & JavaScript?
In this section, I will show how you can create this exact 30-minute timer using only HTML, CSS & JavaScript. Also, I will give you all the source code so you can create a countdown timer just like this one.
If you are a web developer or designer or if you have an interest in learning these skills, this post will help you.
Let’s get started.
Project structure – create the necessary files and folders
Before I explain or give you the sample code for this 30-minute countdown timer, it’s important to show you the project structure first. Otherwise, your file paths may mismatch with mine.
Create a project folder named “timer” anywhere on your computer. Then create 3 files named “index.html, style.css & script.js” and another folder named “files.” This “file” folder will contain the audio file for the clock TikTok sound. See my project structure below.
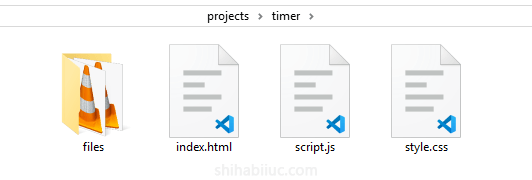
For the timer tiktok sound, download the following two files and save them into the “files” folder:
Now your project structure will look like the following screenshot:
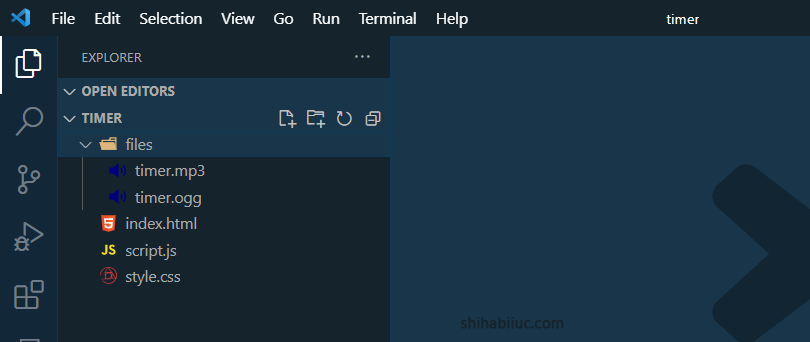
I am using VSCode text editor but you can use anything that you like.
Link your stylesheet & JavaScript file
Open your index.html and write the following line to add the stylesheet (style.css) to your index.html
<link rel="stylesheet" type="text/css" href="style.css">This line will go anywhere in between the <head> tag. For more detailed instructions, see how to add a stylesheet to an HTML file.
Now, before the closing </body> tag, write the following line to link the JavaScript file (script.js):
<script src="script.js"></script>HTML (write the actual HTML to index.html file)
You need some HTML elements/tags such as <time>, <button>, <audio>, etc. Also, you need some IDs & classes to style each of the HTML elements and manipulate the DOM using JavaScript.
I did all of that for you. Here is the HTML for this timer:
<section class="countdown-timer-container">
  <h2><time id="timer">30:00</time></h2>
  <div class="button-container">
    <button id="reset-btn" data-tooltip="Need to reset it again? Reload this page.">Reset</button>
    <button id="ES" onclick="enableSound()" type="button">Enable Sound</button>
    <button id="DS" class="disabled" onclick="disableSound()" type="button">Disable Sound</button>
  </div>
  <audio id="timer-sound" controls autoplay loop>
    <source src="./files/timer.ogg" type="audio/ogg">
    <source src="./files/timer.mp3" type="audio/mpeg">
    Your browser does not support the audio element.
  </audio>
</section>
The reason I have two different <source> tags is the browsers’ preferences. These two audio files are the same but their formats are different. Most web browsers will use the OGG format and some others may prefer the MP3 format. Whatever browser the end users use, I wanted to make sure that my timer works well everywhere.
You can also copy this exact HTML and paste it into your index.html file (within the <body> tag).
CSS (add some basic style to the timer)
You have the skeleton for the timer. Now it’s time to add some styles to it and make it appealing to its users. But do not over-style it and make sure that it’s user-friendly.
I already have written the CSS and you can copy-paste it into your style.css file.
.countdown-timer-container {
  background-color: #ffeeed;
  border: 1px solid #eb4034;
  padding: 30px 15px;
  text-align: center;
}
.countdown-timer-container h2 {
  font-family: Candara, Calibri, Segoe, Segoe UI, Optima, Arial, sans-serif;
  margin: 0 0 60px;
  font-size: 5em;
}
@media (min-width: 768px) {
  .countdown-timer-container h2 {
    font-size: 10em;
  }
}
.countdown-timer-container h2 time#timer {
  color: #249444;
}
.countdown-timer-container h2 time#timer.time-over {
  color: red;
}
.countdown-timer-container .button-container {
  display: -ms-grid;
  display: grid;
  -ms-grid-columns: (minmax(250px, 1fr))[auto-fit];
      grid-template-columns: repeat(auto-fit, minmax(250px, 1fr));
  gap: 30px;
}
.countdown-timer-container .button-container button {
  font-family: Candara, Calibri, Segoe, Segoe UI, Optima, Arial, sans-serif;
  background-color: #E14D43;
  border: 1px solid #eb4034;
  color: white;
  font-size: 1.25em;
  text-transform: uppercase;
  cursor: pointer;
  padding: 10px 5px;
  border-radius: 25px;
  -webkit-transition: background-color .4s ease-in-out;
  transition: background-color .4s ease-in-out;
}
.countdown-timer-container .button-container button#reset-btn[disabled] {
  background-color: rgba(225, 77, 67, 0.3);
  color: rgba(255, 255, 255, 0.4);
  border-color: rgba(235, 64, 52, 0.4);
  cursor: default;
}
.countdown-timer-container .button-container button#reset-btn[disabled]:hover {
  background-color: rgba(225, 77, 67, 0.3);
}
.countdown-timer-container .button-container button#reset-btn:hover {
  background-color: #910d04;
}
.countdown-timer-container .button-container button#ES {
  background-color: #7AD03A;
  border-color: #249444;
}
.countdown-timer-container .button-container button#ES:hover {
  background-color: #249444;
}
.countdown-timer-container .button-container button#ES.enabled {
  pointer-events: none;
  background-color: rgba(36, 148, 68, 0.3);
  color: rgba(255, 255, 255, 0.4);
  border-color: rgba(36, 148, 68, 0.4);
}
.countdown-timer-container .button-container button#DS {
  background-color: #EE7C1B;
  border-color: #db6c0d;
  color: white;
}
.countdown-timer-container .button-container button#DS:hover {
  background-color: #db6c0d;
}
.countdown-timer-container .button-container button#DS.disabled {
  pointer-events: none;
  background-color: rgba(238, 124, 27, 0.3);
  color: rgba(255, 255, 255, 0.4);
  border-color: rgba(219, 108, 13, 0.4);
}
.countdown-timer-container #timer-sound {
  position: absolute;
  left: -99999px;
}
If you’re familiar with CSS, you’ll see that I have a media query (768px). It means that I changed some styles for large devices such as increased font sizes.
I have some vendor prefixes to make sure that all the styles work well on all types of web browsers.
Not to mention, the control attribute of the <audio> tag will display the audio player including the play, pause, and volume. But in this timer, it’s not important or necessary to display the audio players since they will be controlled with the buttons. So I pushed it back way far from the viewport using the position: absolute and left: -99999px.
JavaScript (make a real timer)
Only the HTML & CSS can not make a countdown timer. You must need JavaScript or frameworks. In this timer, I did not use any frameworks. I only used plain JavaScript sometimes known as vanilla JavaScript. It also does not need any dependencies.
// audio sound play/stop
var audio = document.getElementById("timer-sound");
function enableSound() {
  audio.autoplay = true;
  audio.load();
}
function disableSound() {
  audio.autoplay = false;
  audio.load();
}
// timer
const timer = document.getElementById('timer');
const resetBtn = document.getElementById('reset-btn');
let timeLeft = 1800; // 30 minutes in seconds
let timerId;
// Start the timer
function startTimer() {
	timerId = setInterval(() => {
		timeLeft--;
		updateTimer();
		if (timeLeft === 0) {
			clearInterval(timerId);
			timer.classList.add('time-over');
			audio.pause();
			resetBtn.disabled = false;
		}
	}, 1000);
}
// Update the timer display
function updateTimer() {
	const minutes = Math.floor(timeLeft / 60);
	const seconds = timeLeft % 60;
	timer.innerHTML = `${minutes}:${seconds.toString().padStart(2, '0')}`;
}
// Reset the timer
function resetTimer() {
	clearInterval(timerId);
	timeLeft = 1800;
	updateTimer();
	timer.classList.remove('time-over');
	audio.currentTime = 0;
	audio.play();
	resetBtn.disabled = true;
  startTimer()
}
// Event listeners
window.addEventListener('load', () => {
	updateTimer();
	startTimer();
});
resetBtn.addEventListener('click', resetTimer);
// add additional classes to the buttons on click
// Get references to the buttons
var enableButton = document.getElementById("ES");
var disableButton = document.getElementById("DS");
// Add event listeners to the buttons
enableButton.addEventListener("click", function() {
  // Add the "enabled" class to the body element
  enableButton.classList.add("enabled");
	disableButton.classList.remove("disabled");
});
disableButton.addEventListener("click", function() {
  // Add the "disabled" class to the body element
  disableButton.classList.add("disabled");
	enableButton.classList.remove("enabled");
});
resetBtn.addEventListener("click", function() {
  enableButton.classList.add("enabled")
	disableButton.classList.remove("disabled")
});
I added lots of comments in this JavaScript so you can understand it clearly. Therefore if you have any questions, please let me know.
You can copy-paste my JavaScript to your script.js file.
You’re almost done!
After you save all the files, drag & drop your index.html file into a web browser. And you’ll see that you have the exact same timer as mine. This is how you can make a 30-minute timer using HTML, CSS & JavaScript.
| Learn & practice CSS with real-world examples |
|---|
| Learn basic CSS from the ground up. |
| Build real projects in HTML CSS. |
Conclusion
I created this timer for my visitors and anybody who needs a 30-minute timer. Also, I gave all the codes and explained them to developers who want to learn to create such a countdown timer. So this post can help both parties.