This post will show you how to create an FTP account & how to use it (using FileZilla). This process of creating FTP accounts will work on Bluehost, Hostgator, GoDaddy, and any other hosting platforms that have cPanel.
How to create an FTP account?
Follow the steps below in order to create an FTP account.
Step-1:
Login to your hosting account. Navigate to the cPanel and look for “FTP Accounts.” You will find it under the “Files” section.
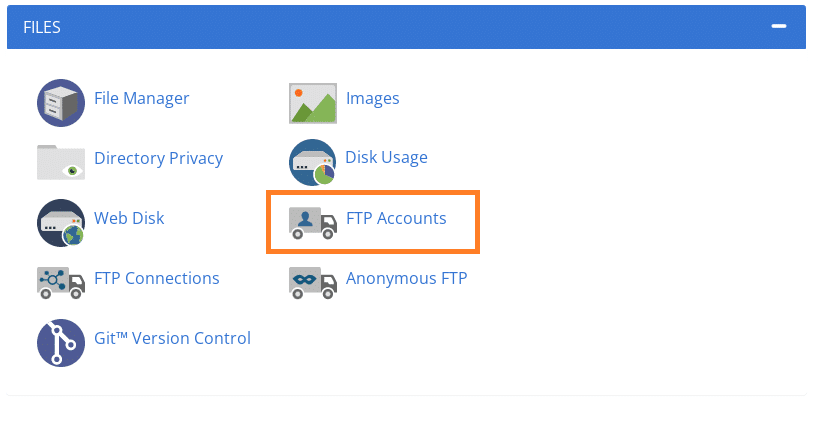
Click on the “FTP Accounts“. Here you will find all of your FTP accounts (if you have previously created some). But if you don’t have an FTP account yet, you can create one.
Step-2:
Choose a username (login) for your FTP account, choose the correct domain name, set your password, and leave the directory blank. See the screenshot below.
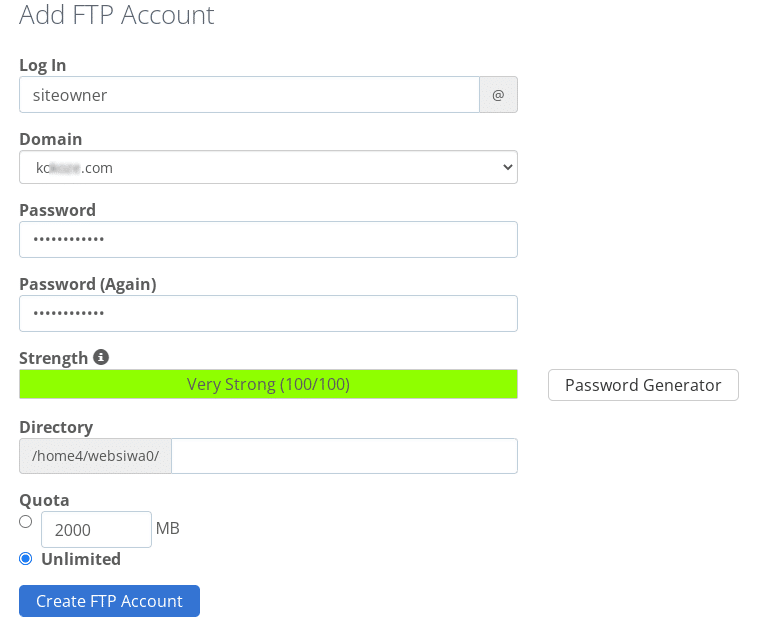
You can limit or assign access to a specific folder, you can do it from the “Directory.” But if you’re creating the account for yourself, then leave it blank and by doing this, you will have full (root) access to every file & folder for the website.
Once you’re done, hit the button “Create FTP Account.”
This is how you can create an FTP account.
Your cPanel/hosting interface may look different than mine but it’s not that hard to figure it out.
If you have a hard time creating an account, you can reach out to your hosting customer support.
How to use an FTP account?
You have created an FTP account and now it’s time to use it.
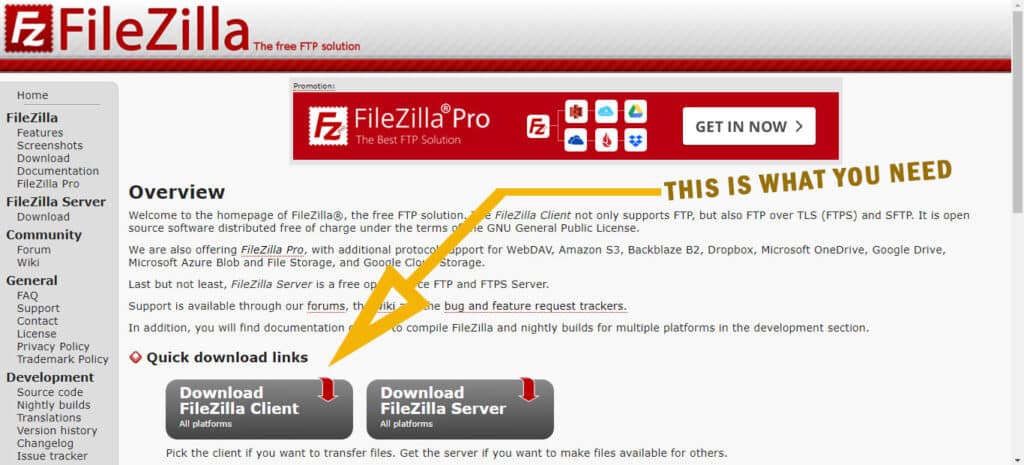
There are a couple of third-party software/protocols. You can use any one of them but my recommendation is FileZilla. It’s free FTP software and works very nicely. I have been using it since 2016 without any trouble.
Go ahead and download & install it. You need the “FileZilla Client” and not the “FileZilla Server” (see screenshot below for clarification).
Once you open the FileZilla, you’ll see an interface like the below screenshot:
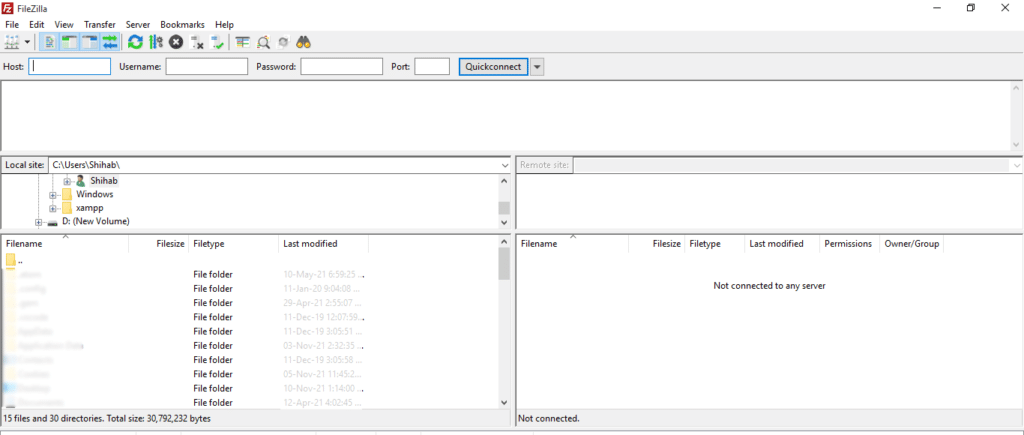
You have 4 (four) fields in FileZilla: Host, Username, Password & Port.
The “Host” is the website URL (domain only) that you chose while creating the FTP account. It also can be an IP address. In my case, it’s the domain. So put your domain name on the “Host” field. For example: yoursite.com
The “Username” is confusing. Let me clarify it. It’s the login name that you chose while creating the FTP. In my case, it’s “siteowner”. But if I put only the “siteowner”, it will not work. You have to put/write “[email protected]”. It’s a placeholder and don’t forget to replace the “yoursite.com” with your actual domain name.
The “Password” is pretty self-explanatory. I will not tell you mine 🙂
The last field is “Port”. Leave this blank. It is generally “21” and in some rare cases it’s “22”. Leave this “Port” field blank and click the button “Quickconnect”.
And boom!
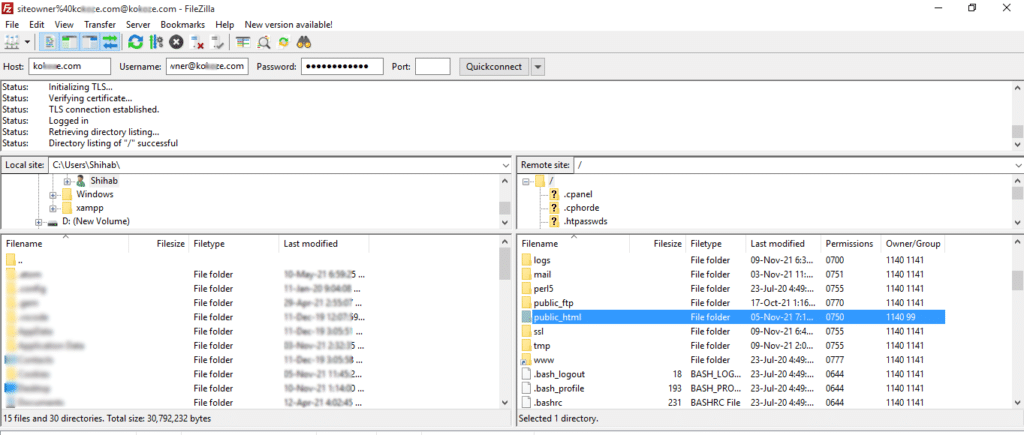
Now you are logged in to your FTP account. You will see all the folders on the right side. Find the folder called “public_html“ and double-click to open and navigate through this process. Any problem, let me know.