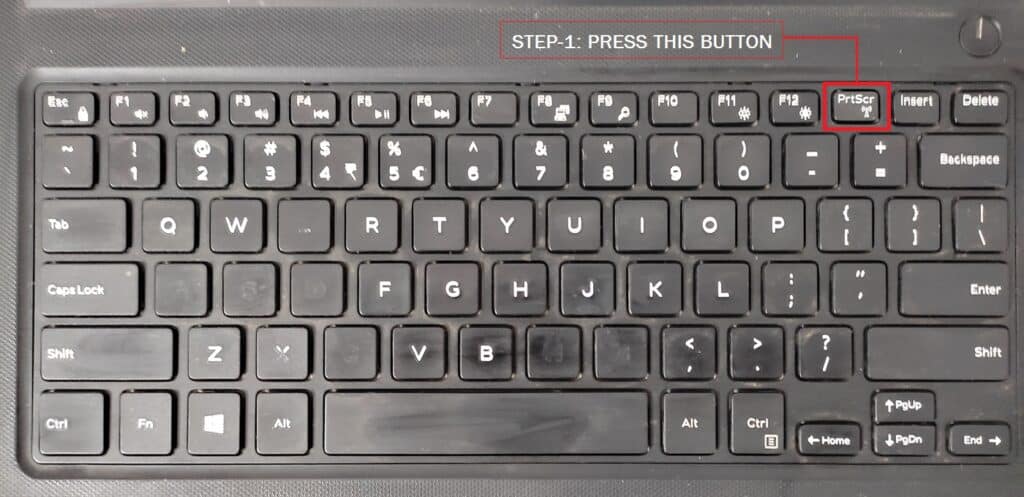
To take a screenshot on Windows press the “PrtScr” button on your keyboard. This will copy the current screen on your clipboard. In the next step, paste your clipboard wherever you want.
You can paste it on Microsoft Word, Excel, Paint, Adobe Photoshop, etc.
In this post, I will show you how to capture screenshots on a Windows computer and paste them anywhere.
And this is the exact technic that I have been using for more than 10 years and found very helpful.
How to screenshot on windows?
The user interface may be a little different based on the versions such as Windows 7, Windows 8, Windows 10, etc. However, the ultimate process is the same for everyone.
You can use this same approach on older and newer versions of Windows.
Let’s get started in more detail.
Step 1: Press the “PrtScr” (Print Screen key)
First, press the “PrtScr” button. You will find this button on the top-right edge of the keyboard (between the F12 & Insert).
For further clarification, see the screenshot below:

By pressing the PrtScr button, it will take a copy of the current screen (as I mentioned earlier). Now you can paste it anywhere.
Step 2: Paste your clipboard where you want
As mentioned earlier, you can paste your clipboard anywhere. It could be MS Office Word, MS Office Excel, Paint desktop app, Adobe Photoshop, etc.
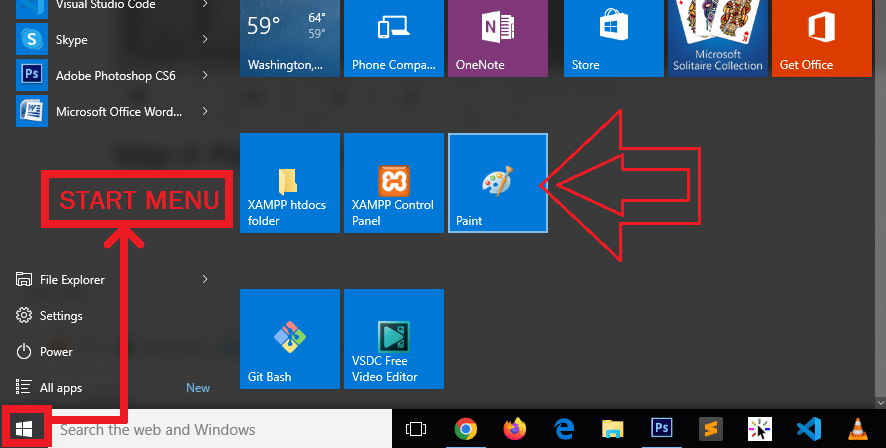
However, Paint is a default app on Windows that allows you to edit pictures. Since it is installed by default, so you don’t have to download & install it manually.
If you’re not sure, go to the “Start” menu on your computer and search for “Paint.” After you opened it, paste your clipboard by pressing “Ctrl + V“

The above screenshot has taken from Windows 10 computer. So your interface may look different if you’re using any other version than it. But the process is the same for everyone and even for Windows XP users.
That’s it!
Conclusion
Now I would like to hear from you.
Were you able to capture a screenshot on your Windows computer?
Or maybe it was confusing?
Either way, let me know in the comment below right now.


