In this post, I will show you how to change the WordPress admin email. Also, I will walk you through some troubleshooting if you do not receive the confirmation email. Let’s get started.
Steps to change WordPress admin URL
After you log in to your WordPress admin dashboard, follow the simple 3 steps to replace the existing email with a new one.
1. Find the “Administration Email Address” field
Navigate to “Settings → General” and find the field named “Administration Email Address” (see the following screenshot).

2. Replace the existing email with your desired one and save your changes
As you see in the above screenshot (Administration Email Address), remove the existing email address and type your desired (new) email.
Scroll down the page (until the very bottom) and hit the button “Save Changes” (as you see in the screenshot below).

3. Click the verification link in your email
After you save your changes, you will receive an email from your website to the new email. But this is not the end of this process and you have one more last step remaining. There will be a pending changes status and you have to verify your new email ownership.

Go to your new email account and you will see that you received an email from your website. This might take a minute or two.
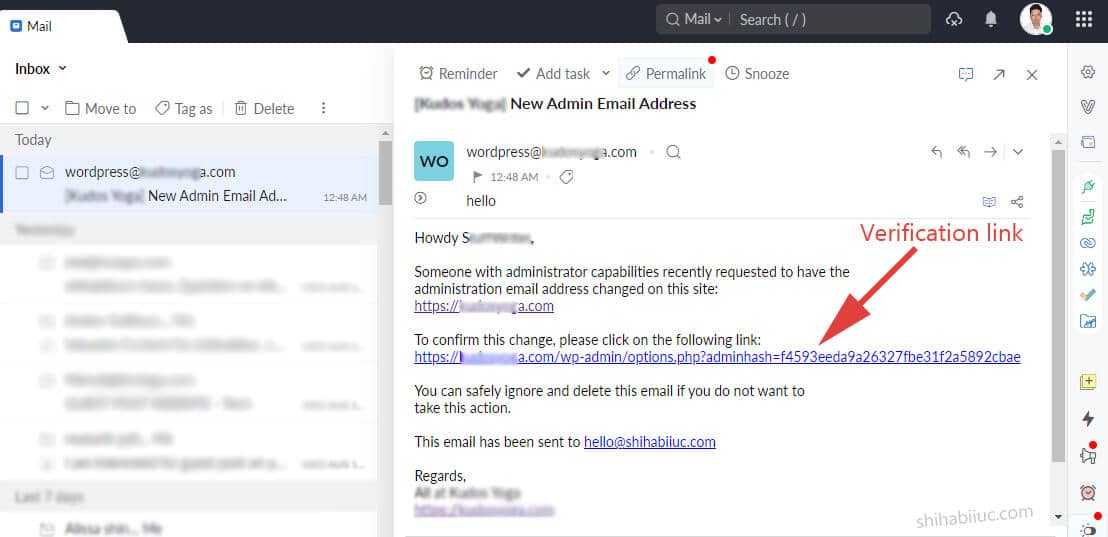
After you open the email, you will find a verification link in the email body and you have to click the verification link.

That’s it!
Now you’ll see that the WordPress admin email has been changed.
Troubleshooting
In some cases, a few of you may not receive the verification email. This generally means that your website is not sending emails.
There are two ways to get around this situation.
Install & configure an SMTP plugin
The first and most reliable way is to install & configure an SMTP (simple mail transfer protocol) plugin. There are numerous free SMTP plugins in the WordPress repository. Such as FluentSMTP, WP Mail SMTP by WPForms, etc.
However, configuring an SMTP plugin can be tricky if you’re not a developer as this require a couple of technical information and inputs. Such as Application Client ID, Application Client Secret, etc. It also depends on the email provider.
Get the admin email verification link using a plugin
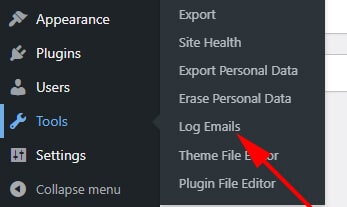
You can install and activate a plugin called “Log Emails.” After activating this plugin, you will get a new menu under “Tools” (as seen in the screenshot below).

After activating this plugin, once again go to “Settings → General,” replace the email, and save changes.
Then navigate to “Tools → Log Emails” and you’ll find the list of outgoing emails. Open the admin email-related email from the list and click on the verification link. This will also work.
I have more detailed instructions for testing emails on localhost that you can check (if needed) but this process also works for live websites as well.
Conclusion
This is a very simple and easy-to-follow process. But some people find it very hard. Many of my past clients asked me this question and struggled with changing the admin email address. So I decided to write this post.
If you also have the same question or if you do not receive the email from your website, you can follow my guideline.


