In this post, I will show a couple of things related to the Elementor image. Such as how to make a rounded (circle) image, add a circular border to the image, etc.
How to create a rounded image in Elementor?
Login to your WordPress dashboard and open any page or post with Elementor page builder. Drag & drop an “Image Widget” into the page.
Not to mention, if you want to make a fully rounded image with a 90-degree angle to each corner, you have to upload a square size image. Otherwise, the may not look great and it will not become a full circle.
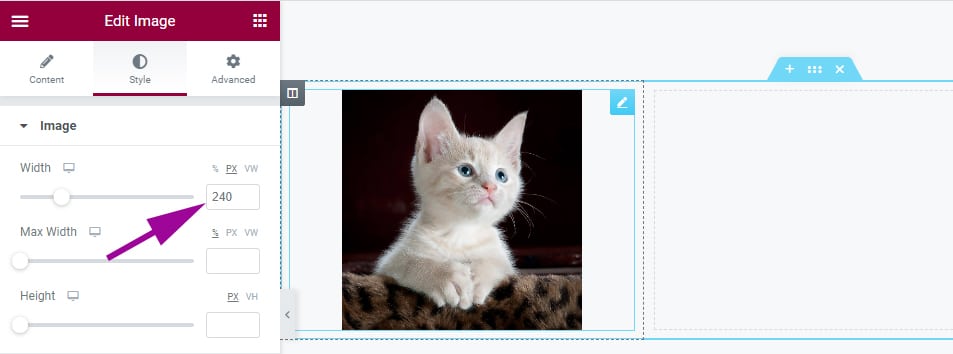
Anyways, once you uploaded the image through the Elementor ‘Image Widget,’ go to the “Style” option of the image.
Specify the width of the image. In my example, I uploaded a square image and specified the width as 240px. Feel free to use any width value as you see fit. You don’t need to specify the height because it’s “auto” by default.

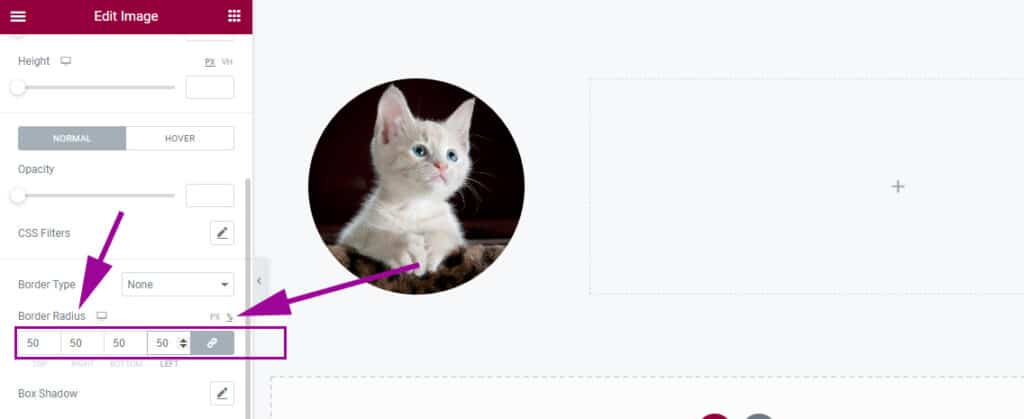
Look at the bottom until you find the option “Border Radius.” Once you find it, make sure the “%” (percentage) is selected and give it a 50% border-radius from all 4 directions. See the screenshot below.

This 50% border radius will make the image fully rounded (if the actual image is square in size). This is how you can make a circle/rounded image in Elementor.
How to add a circular border to the image (Elementor)?
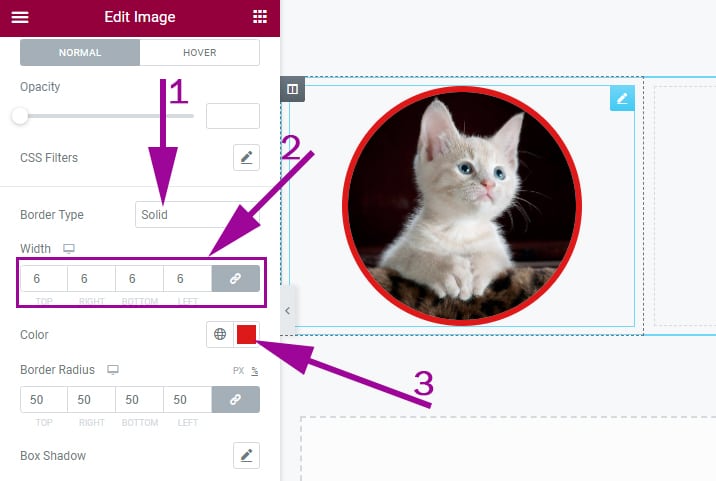
Now find the option “Border Type” just before the ‘Border Radius.’ Select the “Border Type” to “Solid.” Choose an equal border width in all four directions. In my example, the border width is 6px.
Finally, choose a border color whatever you want. See the screenshot below for more clarifications.

That’s it! This is how you can add a circular border to the image in Elementor.
If you still have any questions regarding the circle image in Elementor or border, let me know.


