
You have three main elements in the footer of your Divi theme. These are widgetized areas, footer credits, and social icons/links as you see in the picture below:

Together we will go through each of the elements and see how you can edit the footer precisely.
As mentioned above, the default footer in Divi has three main elements. Let’s see how you can edit & customize them accordingly.
Edit the widget area in the Divi
In the above screenshot, you see an area that has a red border. It’s the widgetized area in Divi. It can contain one or more widgets. In my example (in the above screenshot), I have 3 widgets.
If you want to change the number of columns/widgets in this area, navigate to “Divi – Theme Customizer.”
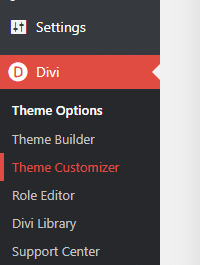
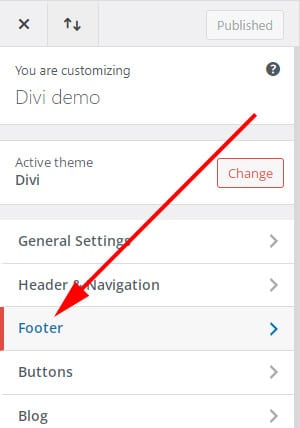
Next, click on “Footer” as you see in the screenshot below:
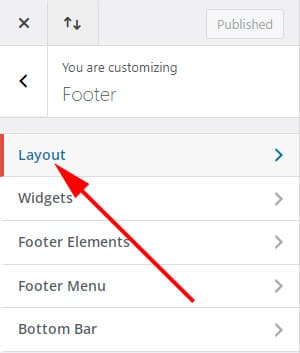
Next, click on “Layout” as you see in the screenshot below:
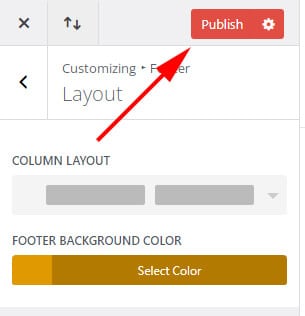
Next, choose your preferred column layout (as you see below).
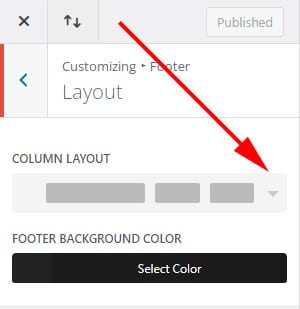
This is where you can choose the layout of your footer and change the number of columns & their sizing.
Also, you can change the background color of the footer by selecting a different color as you see in the above screenshot (FOOTER BACKGROUND COLOR).
Once you are satisfied with your changes, hit the “Publish” button.
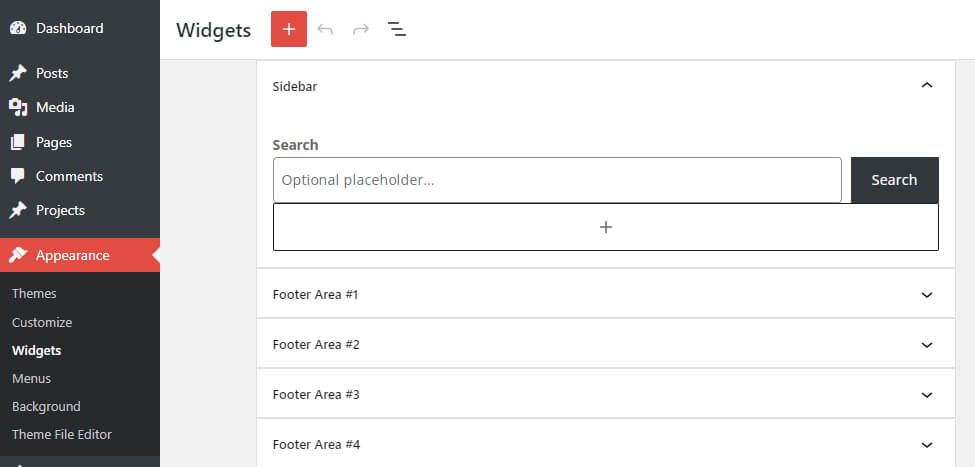
In your WordPress admin dashboard, navigate to “Appearance – Widgets” and click the down arrow to the “Footer Area #1” and so on.
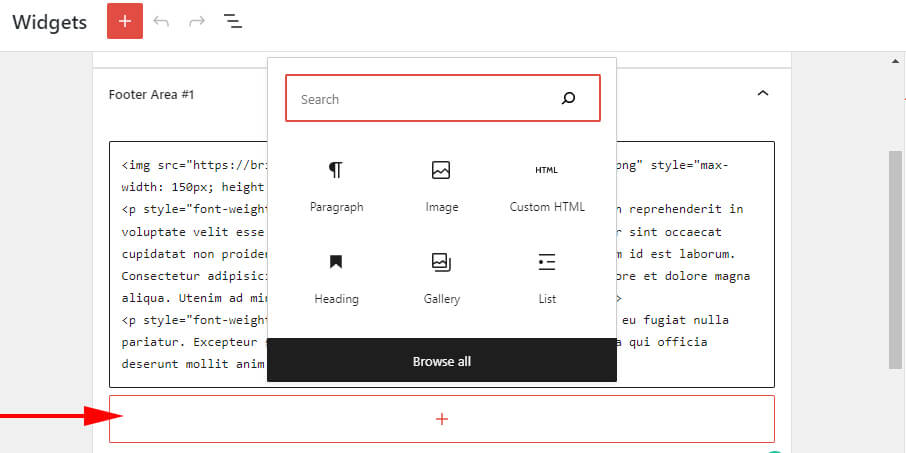
After expanding a footer area, you will be able to insert a new block to the widget (by clicking the plus icon as you see in the screenshot below).
You have to follow the same approach multiple times. If you selected 3 column layout in the past section, then you have to fill out three footer widgets. If you chose 4 then you have to fill out 4 widgets and so on and so forth.
You will have up to “Footer Area #6” but you don’t need to fill out all of them. If you chose 2 column layout in the last section, then ignore the rest of the last 4 footer areas.
You can insert any type of Gutenberg block into the widget such as a paragraph, image, custom HTML, etc.
And once a single widget can contain multiple Gutenberg blocks.
This part of the footer lives in the “Bottom bar.” To edit the footer credits in your Divi theme, go to your WordPress admin dashboard, navigate to “Divi – Theme Customizer” and then click on “Footer” as you did in the past. If you’re not sure, let me share the two previous screenshots once again below:


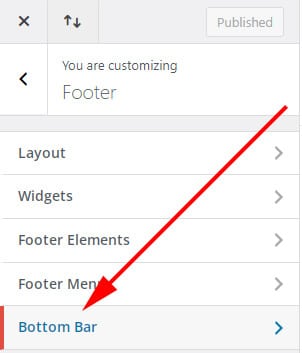
Next, click on “Bottom Bar” as you see in the screenshot below.
Then scroll down until the very bottom. Here you’ll find a field called “EDIT FOOTER CREDITS.” This is the option where you can change the footer credits or copyright texts.
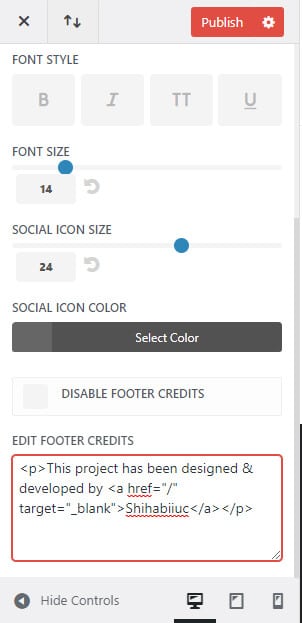
Note that it also accepts HTML and as well as plain text.
Once you’re satisfied with your changes, hit the “Publish” button.
These social media links or icons also live in the “Bottom Bar.”
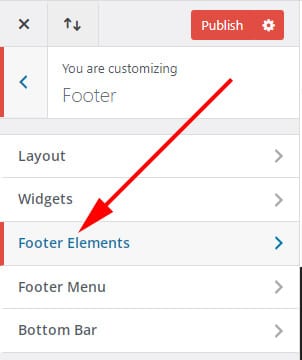
To remove the social media links or icons from the footer, navigate to “Divi – Theme Customizer”, then click on “Footer” and then “Footer Elements.”
Next, uncheck the “SHOW SOCIAL ICONS” option and hit “Publish” as you see in the screenshot below.
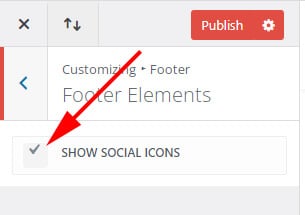
This will remove the social media icons from the footer (bottom bar).
To edit social media links in the footer, navigate to “Divi – Theme Options” and scroll a little. Here you will find the option to turn on or off Facebook, Twitter, Instagram, etc and you will be able to input your own social media links.
See the screenshot below as a reference:
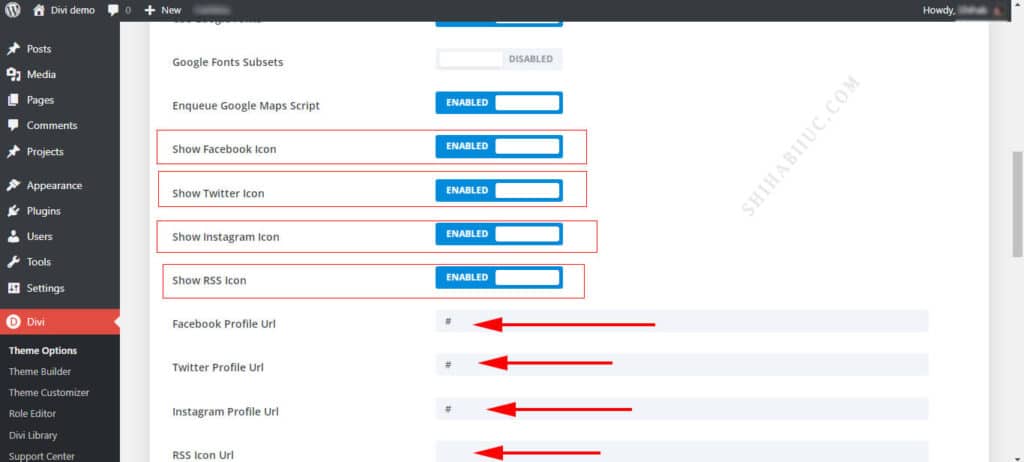
Whatever you do here will be applied to the front-end of your website including the footer and secondary navigation.
This is how you can completely edit the footer in your Divi theme.
| Footer Templates (downloadable) |
| How to Edit Footer Credit in Extra Theme? |
| Footer Templates (downloadable – HTML CSS) |
Conclusion
I tried to make this guideline as simple as possible and provided screenshots of all the steps. Therefore if you have any questions, please feel free to reach out.
