For the Elementor Mailchimp integration, you need an API key. That means you have to get your API key from the Mailchimp account in the first step. And then you have to store the API key on your Elementor website to connect with your audience (previously it was named List).
To make this integration/connection, follow the steps below.
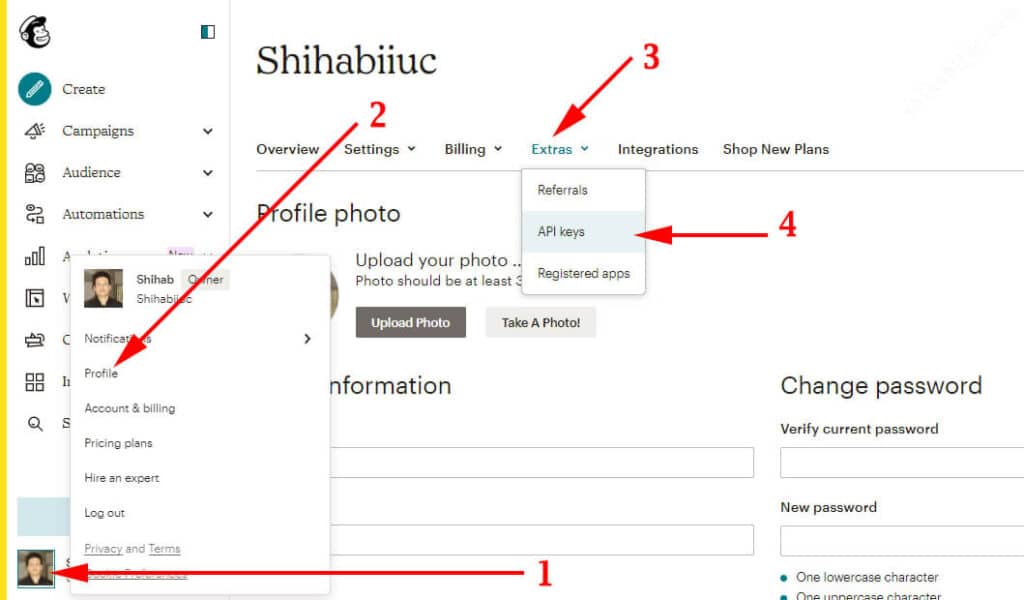
Step 1: Get your Mailchimp API key
After you log in to your Mailchimp account, click on your profile picture at the bottom-left corner, then click on “Profile“, then “Extras” and finally click on “API keys” (as you see in the screenshot below).
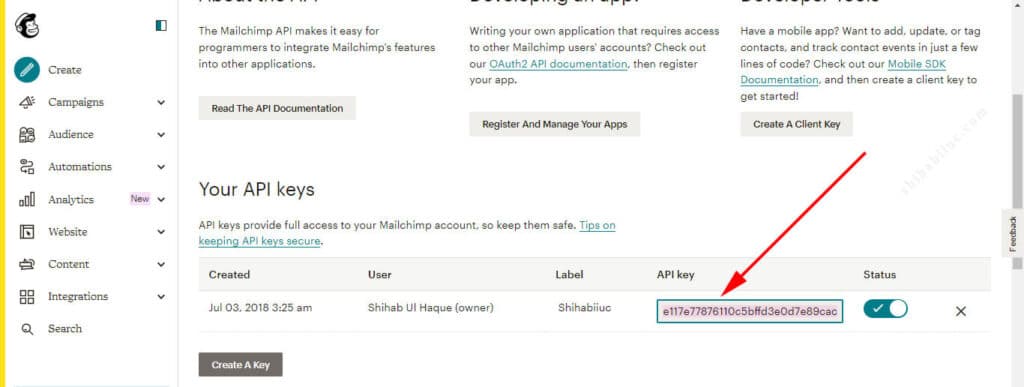
From there, copy the API key as you see below, and go back to your WordPress website.
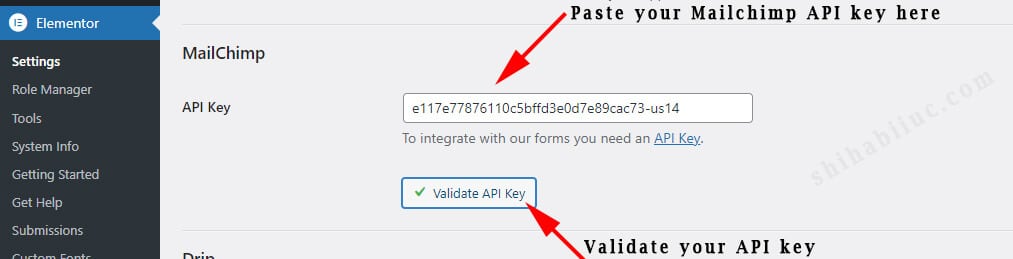
Step 2: Connect Mailchimp with your Elementor forms
After you log in to your WordPress admin dashboard, navigate to “Elementor – Settings – Integrations.” Scroll down a little until you find the option “MailChimp.” Paste your API key in the field and hit the button “Validate API Key” as you see below.
But wait! Don’t forget to save the changes. Scroll down until the very bottom and hit the button “Save Changes.” Many people do this mistake and leave the page without saving it. If you leave this page without saving your changes, Elementor won’t be able to connect your Mailchimp account.
Alright, once you save the changes, you’re all set!
This is how you can make the Elementor Mailchimp integration very easily.
Now go to any of your Elementor subscription forms and you will be able to connect them easily. That means your setting has been made globally. And you don’t have to connect the Mailchimp API key separately each time.
How to use this global integration for any opt-in forms?
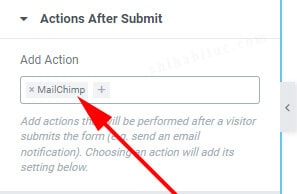
Go to any of your Elementor forms, right-click to edit it, and click the “Action after submit” & choose “MailChimp” from the available options. See the screenshot below as a reference.
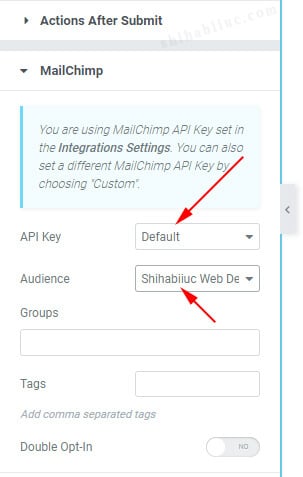
After you choose to add MailChimp, you will get a new option underneath with the same name (Mailchimp). From there, choose the “Default” as the API Key, and choose your preferred audience (List). See the screenshot below for more clarifications.
You’re all done!
Optional fields
Aside from these two fields (API Key & Audience), the rest of the fields are optional. Such as you can turn on Double opt-in, adding a group (if you already have created a group on your MailChimp audience), etc.
However, you can add “Tags” directly here on the Elementor options. If you add a tag here, it will be automatically added to your MailChimp form.
To give you a practical use case of the tag, let’s say you have 2 different opt-in forms on two pages. One form is on the “About” & the other one is on the”Contact” page.
Now if you want to see which pages are getting more subscribers. In this type of case, you can add two different tags to those forms to see the data on your MailChimp account.
Another way to connect your Mailchimp account with Elementor
In the above section, we made a global connection between Elementor & Mailchimp. But it does not mean that you always have to connect this way.
You can also connect your Mailchimp account in a single form without making the Global connection that we did earlier.
To do that, go to any of your Elementor forms, right-click on it to edit the form, and next click on “Actions After Submit”, and choose “MailChimp” just like you did in the earlier section.
In the MailChimp settings, choose “Custom” for the “API Key” option. And write/paste your MailChimp API key in the “Custom API Key” field. See the screenshot below.
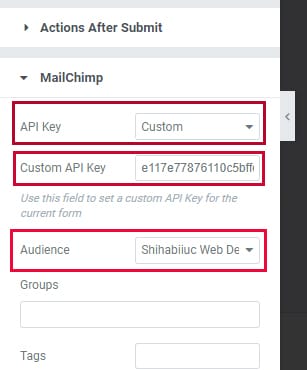
From there, you can choose an “Audience” as shown in the above screenshot, and save the form/page.
This is another way to connect your Elementor form using a custom API key.
Conclusion
Now you know how to do Elementor Mailchimp integration using two different ways. But the first (global) method is better than any others as you can integrate it once and use it multiple times. Also, you need a premium version of Elementor to follow along with any of these processes.