
You need a PRO version of Elementor in order to create a popup and subscription form. There are three different ways you can trigger the popup with conditions, dynamic tags, and CSS selectors. I will show you all these methods.
If you prefer video instructions, watch the video below or keep reading.
| Table of contents |
|---|
| 1. How to create an Elementor popup |
| 2. Connect Elementor form with email platforms like MailChimp |
How to create an Elementor Popup?
To create the popup in Elementor, follow these steps:
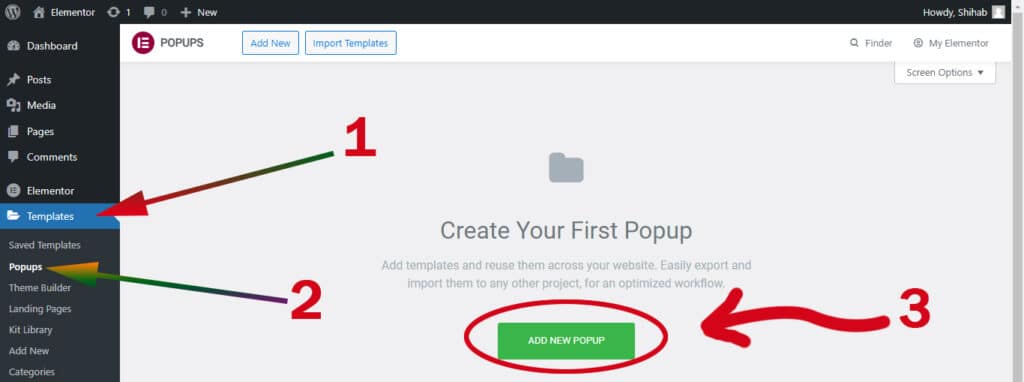
1. Add a new popup from the ‘Template’ menu
After you login to your WordPress dashboard, head over to “Templates → Popups” and click the button “ADD NEW POPUP” (see the screenshot below for more clarifications).
2. Name it anything you like and create the template
In this window, you have the option to choose the name of the popup template. You can name it anything. The name is optional but if you leave it, Elementor will give it a random name that generally looks ugly. So, give it a name that is meaningful to you and hit the button “CREATE TEMPLATE.”

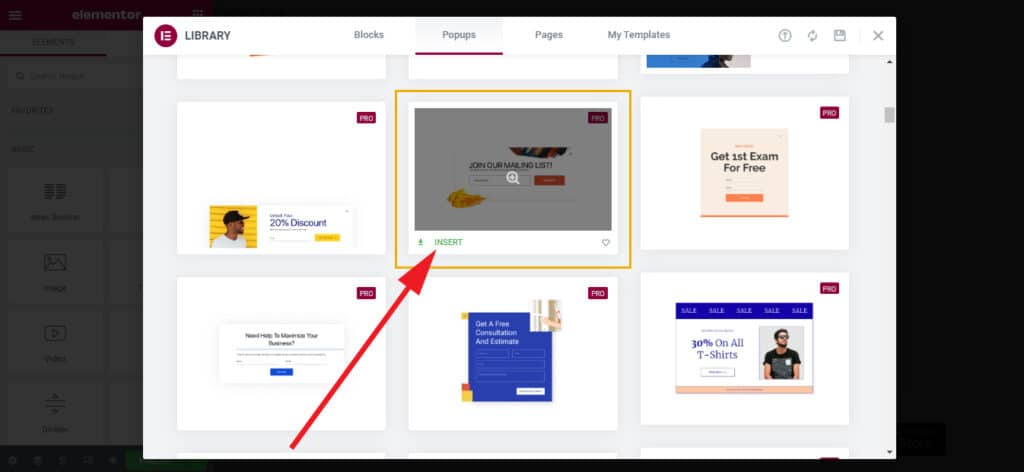
3. Choose a template or create a new one from scratch
In the 3rd window, it will show you lots of premade popup templates that you can choose from. Also, you have the option to create a new popup from scratch.
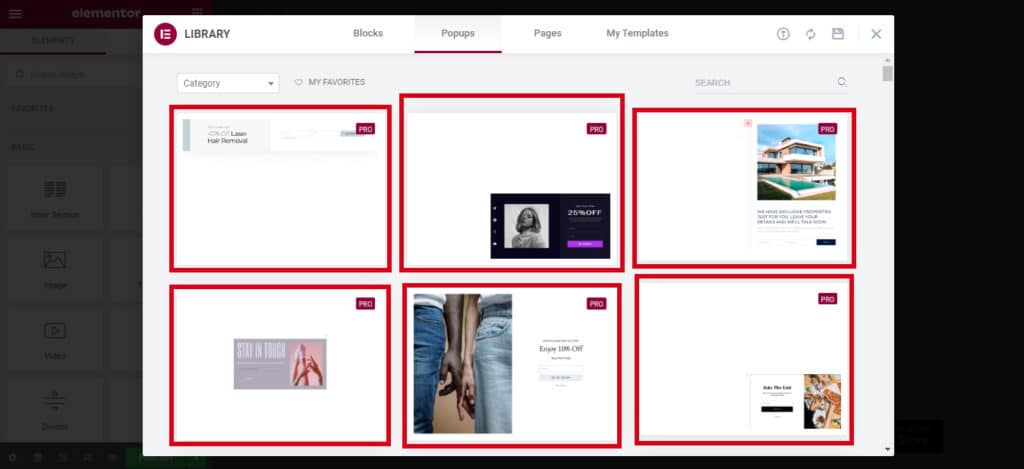
Option-A: To use a premade template, click the “Insert” link. And then you can edit the template as you see fit.
Option-B: To create a popup from scratch, close the premade template window (click the top-right edge close icon) and start building your own popup.
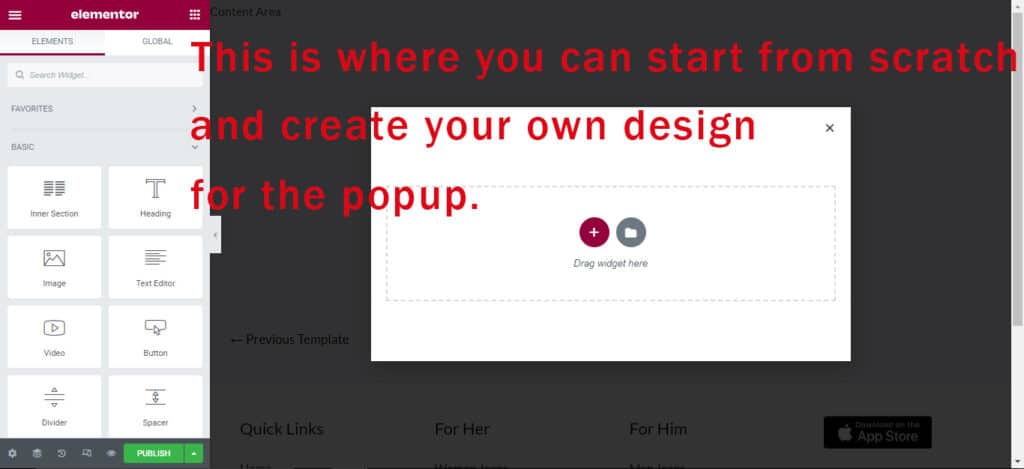
Add new sections from the “Plus” icon, and drag & drop widgets that you need. It’s the exact same process as you build other pages using Elementor.
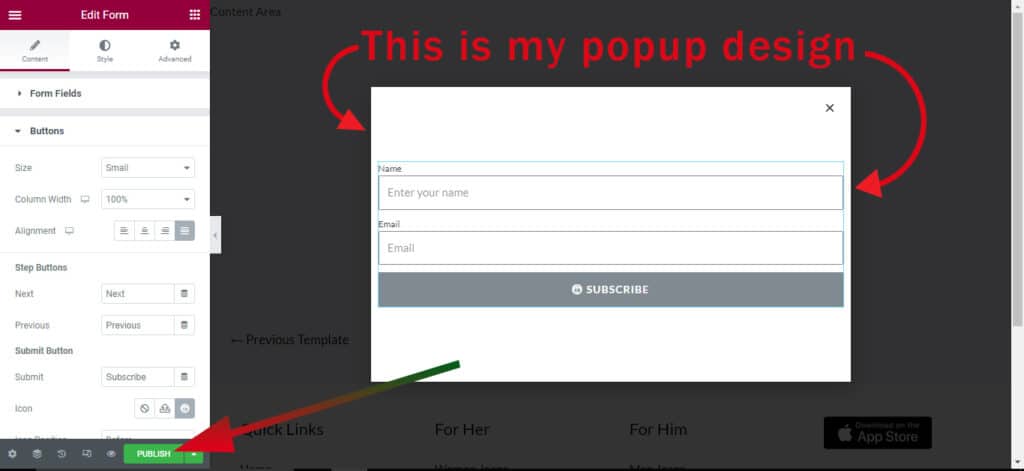
For this demonstration and as you saw in the above video, I took a section and dragged & dropped a “Form” widget into the section.
No matter if you choose the premade template or created the design yourself, hit the “Publish” button on the bottom-left corner. See the screenshot below.
4. Set conditions and triggers
After you completed the design and hit the “Publish” button, it will take you to a new window where you can set the conditions, triggers, and advanced rules. On this screen, click the “ADD CONDITIONS” button. See the screenshot below.
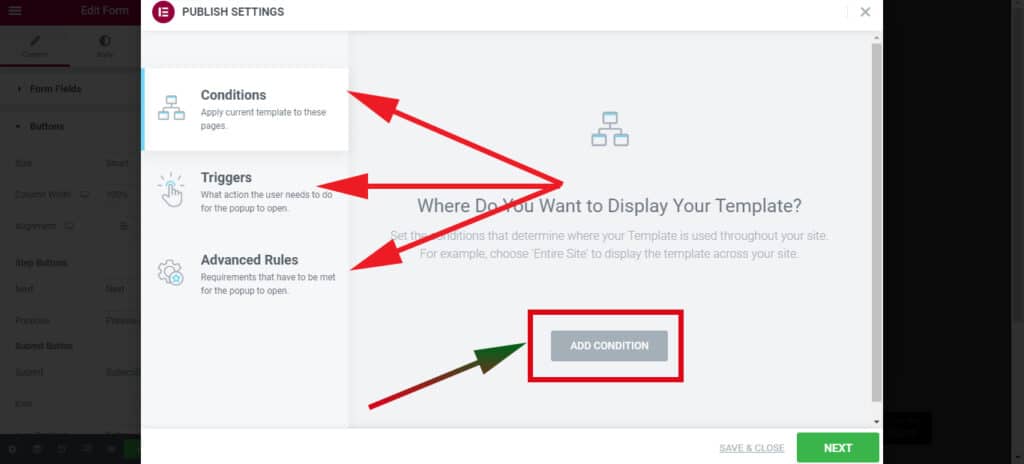
5. Add Elementor popup conditions
Under the “Conditions Tab,” one or many conditions. This is your opportunity to set the exact place (page, post, archive, etc) to show the popup. You can both include and exclude conditions.
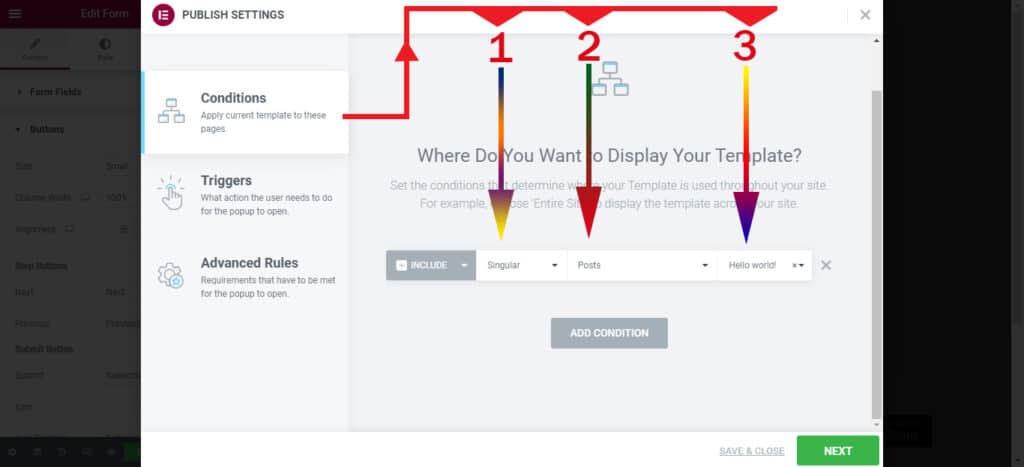
In this example, I want to trigger the popup on a single post that is called “Hello World” and I only want to trigger the popup when someone pretends to exit the page.
So, I included the conditions in the following manner “Singular → Posts → Name of the post (hello world).” After setting up all your conditions, click the button “NEXT” on the bottom-right edge. See the screenshot below.
6. Add popup triggers
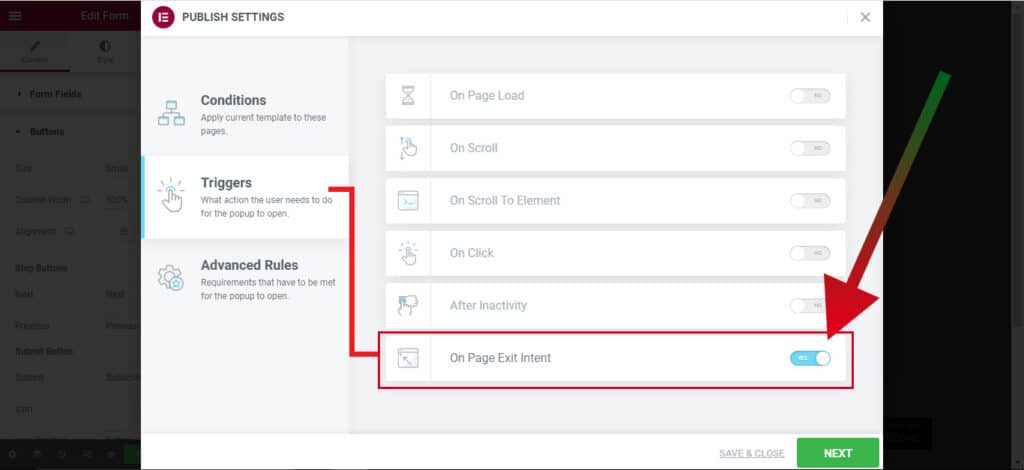
In the previous step, I added the conditions which mean I chose a post/page to show the popup. But yet I have not made the setup for the timing. So when exactly the popup will trigger? This is what you have to do in the “Triggers Tab.”
As I mentioned in the 5th step, I want to trigger the popup when someone pretends to exit the page or pretends to close the page.
So I turned on the option called “On Page Exit Intent.” But you can choose your preferred trigger. Once you’re satisfied with the triggers, click “NEXT.”
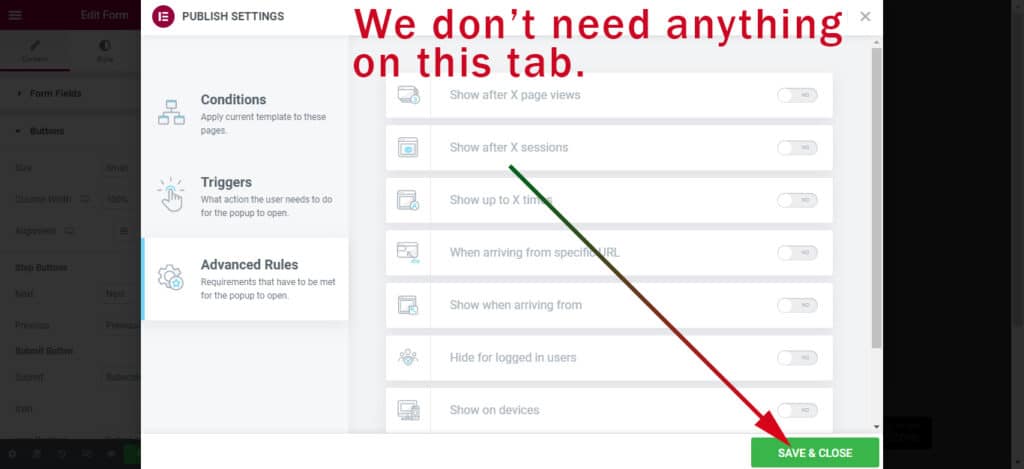
7. Set advanced rules if needed and save the changes
Most of we and most of the time, we don’t need anything to do in the “Advanced Rules” tab. Just hit the button “SAVE & CLOSE” on the bottom-right edge.
And it will publish your Elementor popup form. That means you made the popup form that is now live & working.
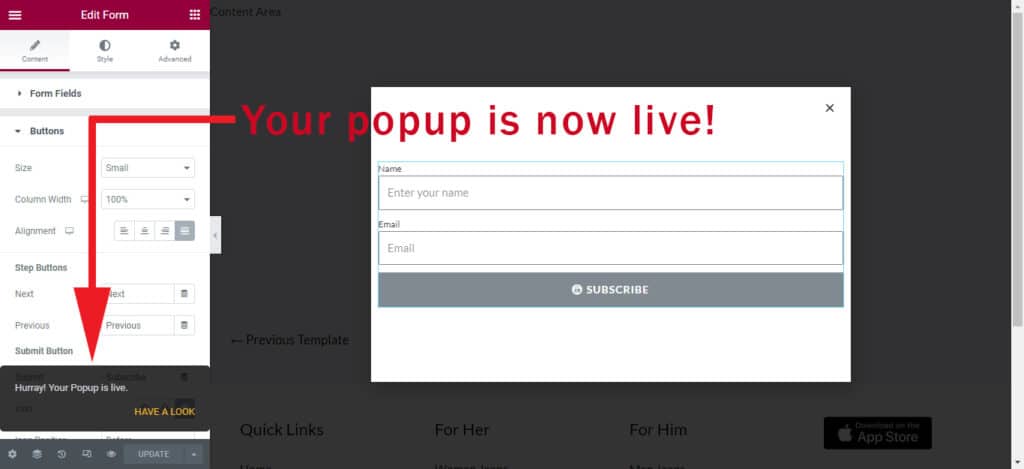
You’re done with the popup.
How to create a subscription form in the Elementor popup and connect it with email marketing platforms?
In the above, I created a popup & it contains a form. But it is not ready yet to collect leads. To collect emails/leads, we need to connect the form with a marketing platform like MailChimp, Drip, ActiveCampaign, etc.
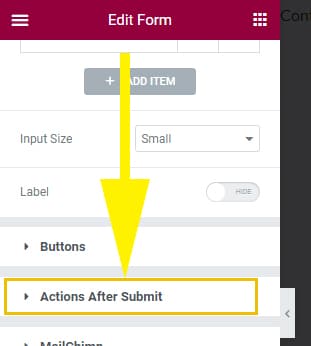
After creating the Elementor popup, take a “Form” widget within it. Right-click on the form and find the option called “Actions after submit.”
In the “Actions after submit,” remove the default actions such as “Submit collections, Emails.” And add/choose your desired email marketing provider such as MailChimp, ActiveCampaign, or whatever you use. In my case, it’s MailChimp.
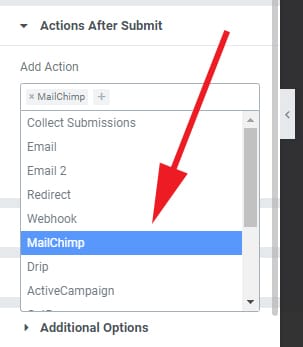
After that, you’ll find a new option underneath the “Action after submit.” In my case, it’s MailChimp. If you choose ActiveCampaign, then it will be ActiveCampaign as the new option.
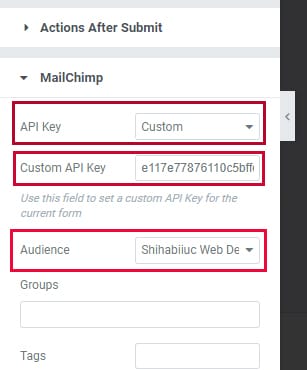
Depending on your email marketing platform, choose the “API Key” option to ‘Custom,’ copy & paste your API key (that you will get from your email marketing company), choose your desired list/audience, and hit “Update.”
See the detailed and step-by-step process of Elementor Mailchimp integration.
For more clarification, see the video below.
If you still have any questions, let me know.
Frequently asked questions
1. How to edit Elementor popup conditions?
To edit the Elementor popup conditions in the future, open the popup (in editing mood) with Elementor and look at the small chevron icon on the bottom-left edge (alongside the ‘Update‘ button). See the screenshot below.
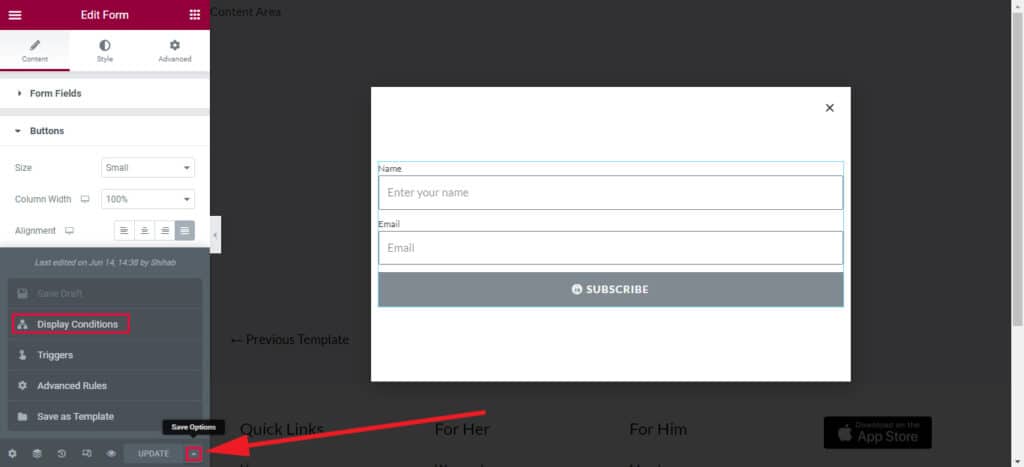
After you click the small icon, you’ll find the “Display Conditions, Triggers, Advanced Rules.” From there, click the “Display Conditions” to edit it.
If you still have any questions related to the Elementor popup, subscription form, or anything related to this post, please let me know.