You can create a transparent header in the free version of Elementor in a different way than this post. However, in this post, I will show you how to make an Elementor transparent header in the premium version.
Also, I will give you downloadable headers (JSON files) so you can import them to your website and make necessary edits. The final two products will look like the following screenshots.


Let’s get started.
After you create a custom header in your “Theme Builder” follow the steps below.
How to create Elementor transparent header?
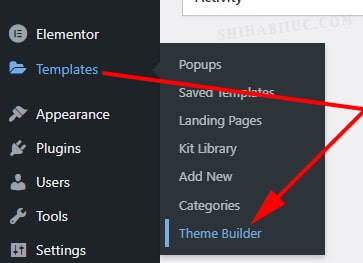
In your WordPress admin dashboard, navigate to “Templates – Theme Builder” as you see in the screenshot below.
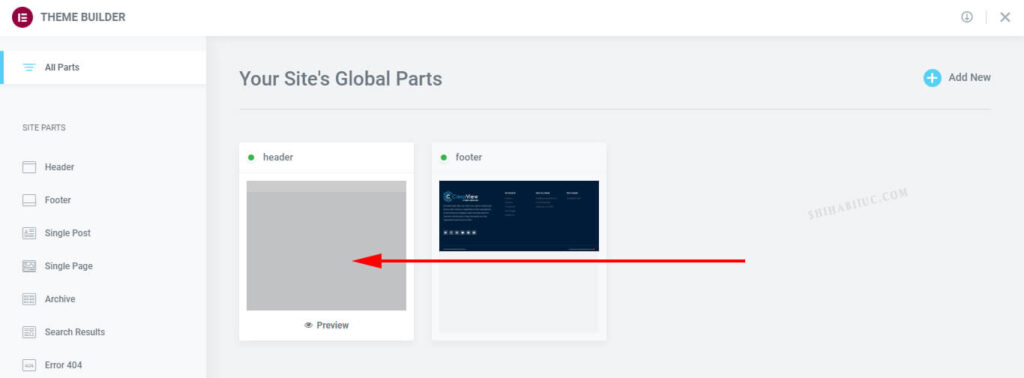
Find the header template that you built and click to edit it.
Right-click on the “Edit Section”

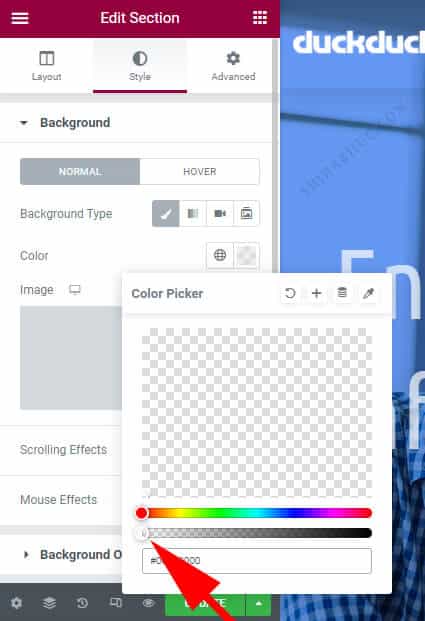
On the “Style” tab, choose any background color and set its transparency to “0” (zero).
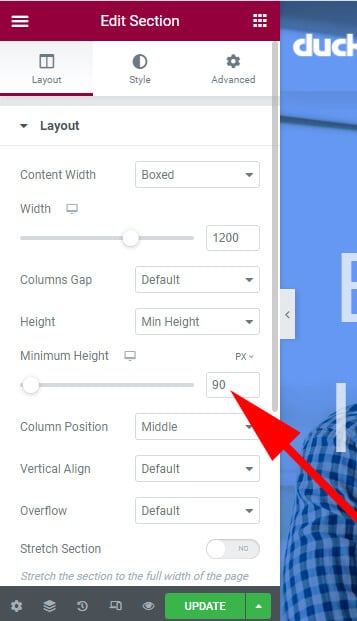
Go back to the “Layout” tab and set your required “Minimum Height.” In my example, it’s 90px.
Go to the “Advanced” tab and set the exact negative bottom margin as the minimum height. In my case, it’s -90px.
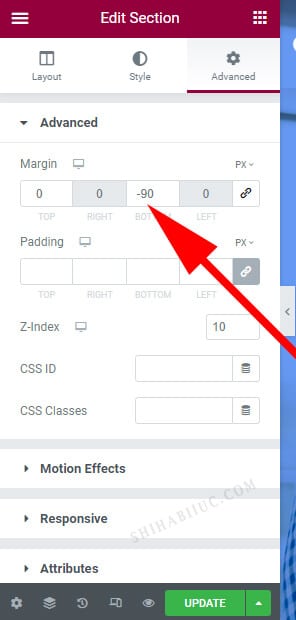
This negative margin will pull your page content to the very top.
That’s it! This is how you can make an Elementor transparent header.
If you want to use this header template on your website, download the ZIP file and extract it & upload the JSON file to your website.

After you download this file, you’ll get a zip file named “elementor-transparent-header.zip”
Right-click on the zip file and extract it. Then you’ll get another file named “elementor-transparent-header.json” inside the zip file.
Go to your header builder and import the JSON file. After that you will get a transparent header exactly as you see in the screenshot above.
Download Elementor transparent header template »How to create Elementor sticky transparent header?
To create a sticky transparent (semitransparent) header in Elementor, go to the header section setting. On the “Advanced” tab, click on “Motion Effects”, set “Sticky” to the “Top”, “Effects Offset” to “15px”, and “Entrance Animation” to “fade-in”
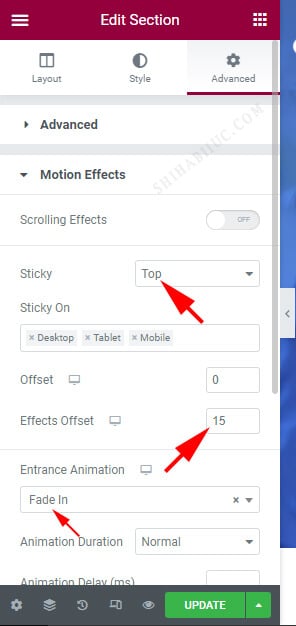
And write the following CSS to the “Custom CSS” field.
selector.elementor-sticky--effects{
  background-color: rgba(147, 0, 60, .7) !important;
}
selector.elementor-sticky--effects .elementor-container{
  max-height: 50px !important;
}
selector.elementor-sticky--effects >.elementor-container li a{
  font-size: 10px !important;
  font-weight: 300  !important;
  padding: 0;
}
selector >.elementor-container{
  transition: all .9s ease !important;
}
selector.elementor-sticky--effects >.elementor-container a img{
  max-width: 138px !important;
  height: auto;
  transition: max-width .3s ease !important;
}
This will make your header sticky with a nice animation that will shrink the height, logo size & navigation links/texts. See the sticky semitransparent header below.

You can also download & use this semitransparent header template on your website.
You’ll get a zip file called “elementor-sticky-transparent-header.” After extracting the zip file, you’ll get another file called “elementor-sticky-transparent-header.json.” Import this JSON file to your website and make necessary edits to change colors, transparency, font size, etc.
Also, you don’t need to write the additional CSS to the “Custom CSS.” After you import the JSON file, you will have everything in place.
Download Elementor sticky transparent header »You may need to adjust the logo width, background color, font size, etc depending on your own branding. If you find any issues, don’t hesitate to reach out.
I have other header templates available to download but those are not sticky/transparent. Feel free to check the other header templates.


