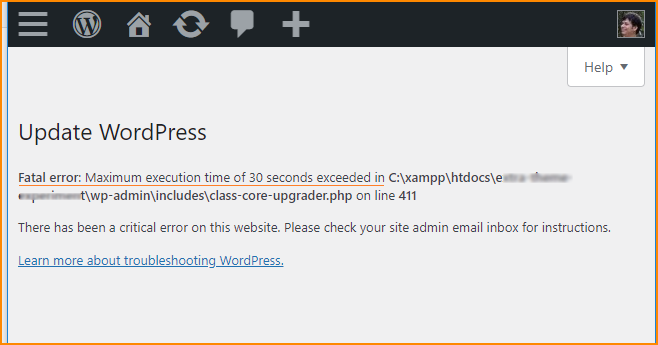
You’ll see this fatal error of “Maximum execution time of 30 seconds exceeded in….” when you try to update your WordPress theme, plugin, or WordPress itself. This error generally occurs in Localhost. However, 30 seconds is enough to execute any good script but in your localhost (XAMPP/WAMP/MAMP/etc) it may take more than 30 seconds.
The problem can also happen on live websites as well. And sometimes you may have issues uploading photos and other files to the WordPress media library.
Also, page builders like Divi, Elementor, etc need a minimum PHP max_execution_time such as 120. And if your site does not have sufficient PHP max_execution_time, you may not able to save your progress/changes to Divi, Elementor, and other page builders.
I will also show you how to increase the PHP max_execution_time on a few specific hosting where the process is different from the general process.
Time needed: 5 minutes
How to fix Fatal error: Maximum execution time of 30 seconds exceeded
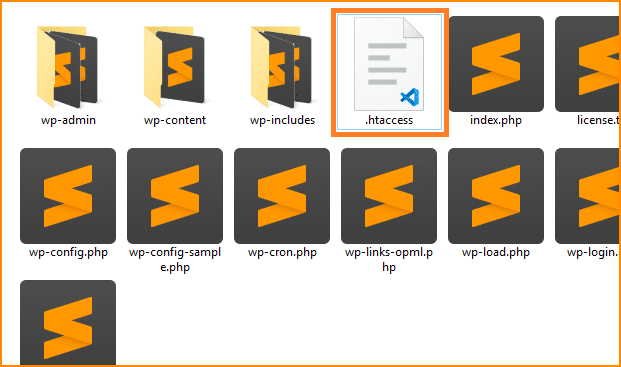
- Open the HTACCESS file in a text editor
This “.htaccess” file lives in the root directory where ‘wp-admin, wp-content, wp-includes’ live. Open the file in a text editor.

- Increase the maximum execution time
Write the following one line of code at the bottom of your “.htaccess” file to increase the maximum execution time up to 300 seconds.
php_value max_execution_time 300
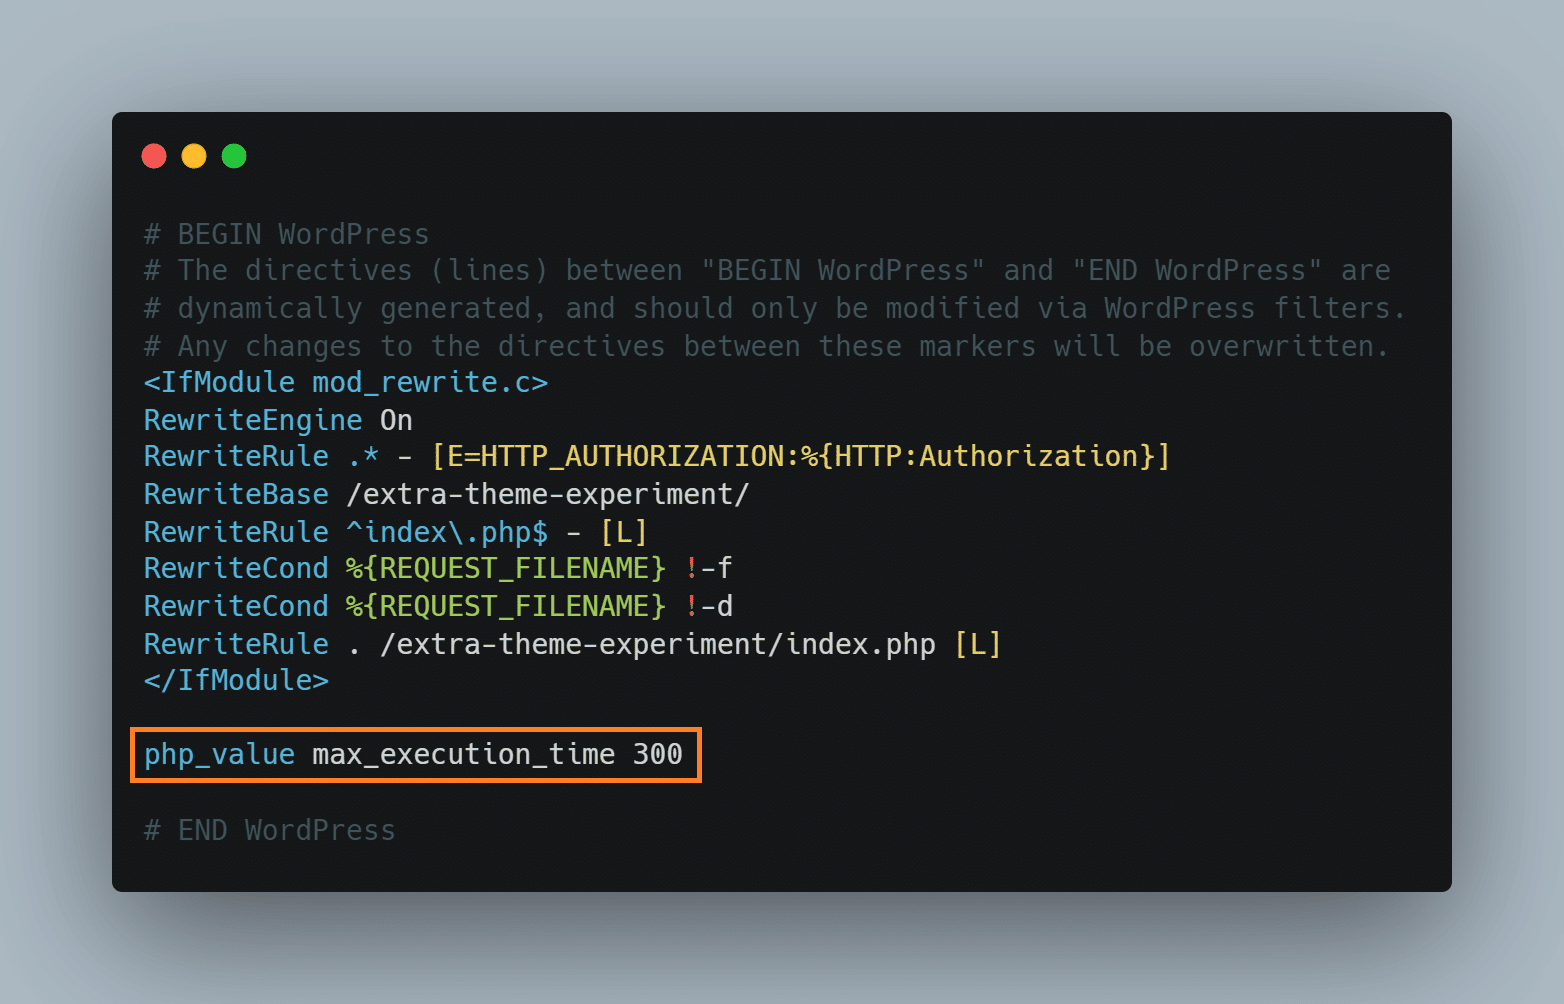
#add the bellow line at the bottom of your .htaccess file
php_value max_execution_time 300
Don’t forget to save your file.
Now go back to your WordPress dashboard and try to update whatever you need. I am pretty much sure it will solve the fatal error of maximum time execution. Therefore, if you still have issues, let me know.
How to increase PHP max_execution_time on IONOS hosting?
As a developer, I have to work with a lot of different hosting companies. I first discovered this issue on IONOS hosting when I was working on a Divi website. Frequently the site was causing issues especially when I was trying to upload pictures and save my changes with Divi page builders.
Then I checked the minimum requirements for the Divi theme to work with. You can check this by going to “Divi – Support Center” and looking for “System Status.”
In my case, the PHP max_execution_time was 30 and the minimum requirement was 120. I tried to increase the PHP execution time as I always do with most other hosting companies. But it was not working.
Then I searched for IONOS-specific documents and found some help on their platform. The IONOS documentation was good but it was not clear enough to increase the limit quickly. So I dig deeper and tried a lot of things.
According to IONOS documentation, you need to edit the “php.ini” to increase the execution time. But the problem is there were multiple php.ini files. I tried editing the file that lives in the project root where the WordPress system files live. However, it did not work.
I tried to edit the “.HTACCESS” file to increase the PHP max_execution_time but it causes a 500 internal server error.
The actual solution:
Finally, I found another “php.ini’ in the “wp-admin” folder. I downloaded the file and edited and re-uploaded which worked and increased the PHP max_execution_time successfully. And you should follow the same process as mine.
After you log in to the IONOS, navigate to “Hosting – Use Webspace – clickandbuilds – Go to your project – wp-admin – php.ini” and paste the following line anywhere on the “php.ini” (wp-admin/php.ini). See the picture below the code.
max_execution_time=120;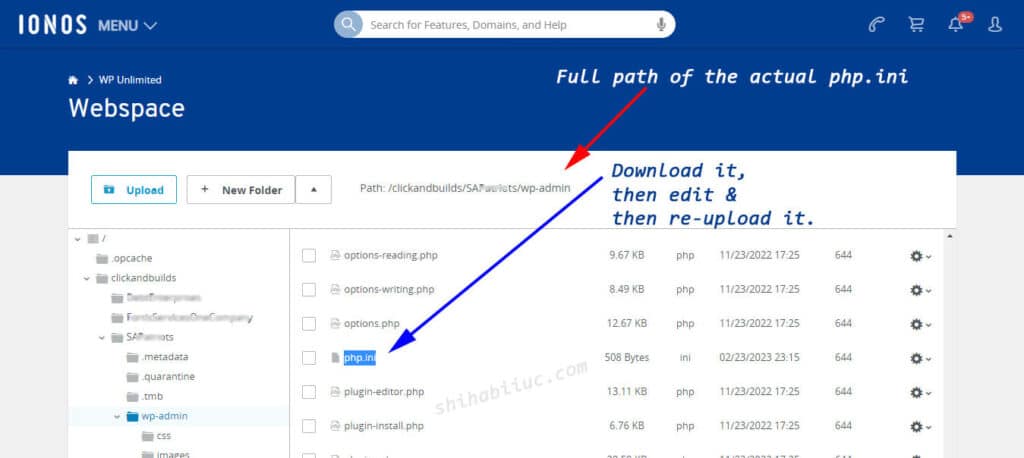
IONOS does not have any MultiPHP INI Editor dashboard as you normally see on some other shared hosting like Bluehost. So you have to do it using “php.ini” and there are no other alternatives (at least I don’t know).
How to increase PHP max_execution_time on Bluehost?
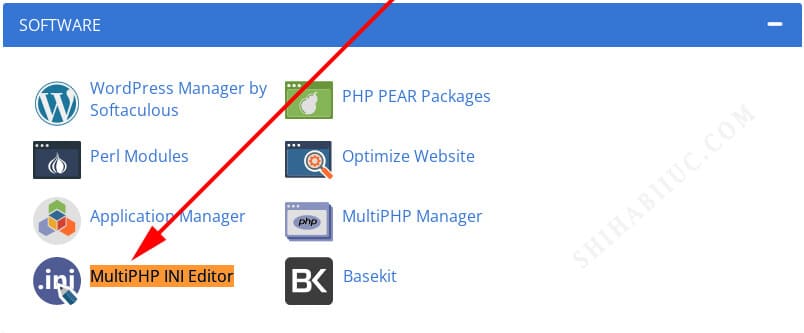
After you log in to your Bluehost account, navigate the “Advanced” and look for an option called “MultiPHP INI Editor” as you see in the screenshot below.
Click on it and select the domain that you need to increase the PHP max_execution_time in the next window.
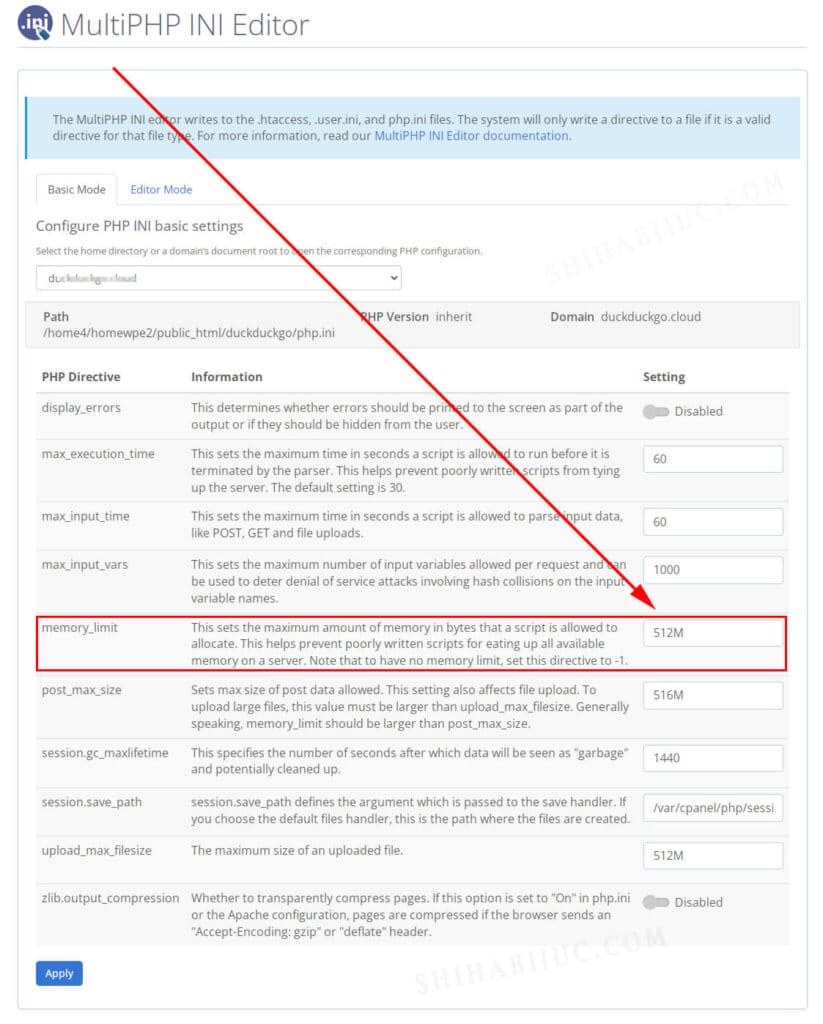
After you select a domain, you will find lots of options to edit. Look for an option called “max_execution_time” (it’s mostly the second option) and increase the limit as you need to. If you’re not sure, increase the number to 120 and click the button “Apply” at the very bottom.
The screenshot below shows the full list of MultiPHP INI Editor options on Bluehost and the red arrow indicates the memory_limit. However, overlook this red arrow indication and look for the second option called “max_time_execution.”
This is how you can increase the PHP max_execution_time on Bluehost.
Is there any other hosting where you get stuck? Let me know so I can keep improving and adding solutions to it.