
To add Google fonts to your website, visit fonts.google.com and choose the font(s) that you want to use. Note that you can choose multiple fonts at the same time. Also, you can select different font styles such as font weights like 400, 600, etc.
For your inspiration, see Google font pairs (combination).
Choose a font you want to use
Anyway, once you’re on the home page, click any of the fonts. For example, Roboto is an example. After clicking a font, it will take you to the detail page. From there, you can choose/select as many styles as you want.
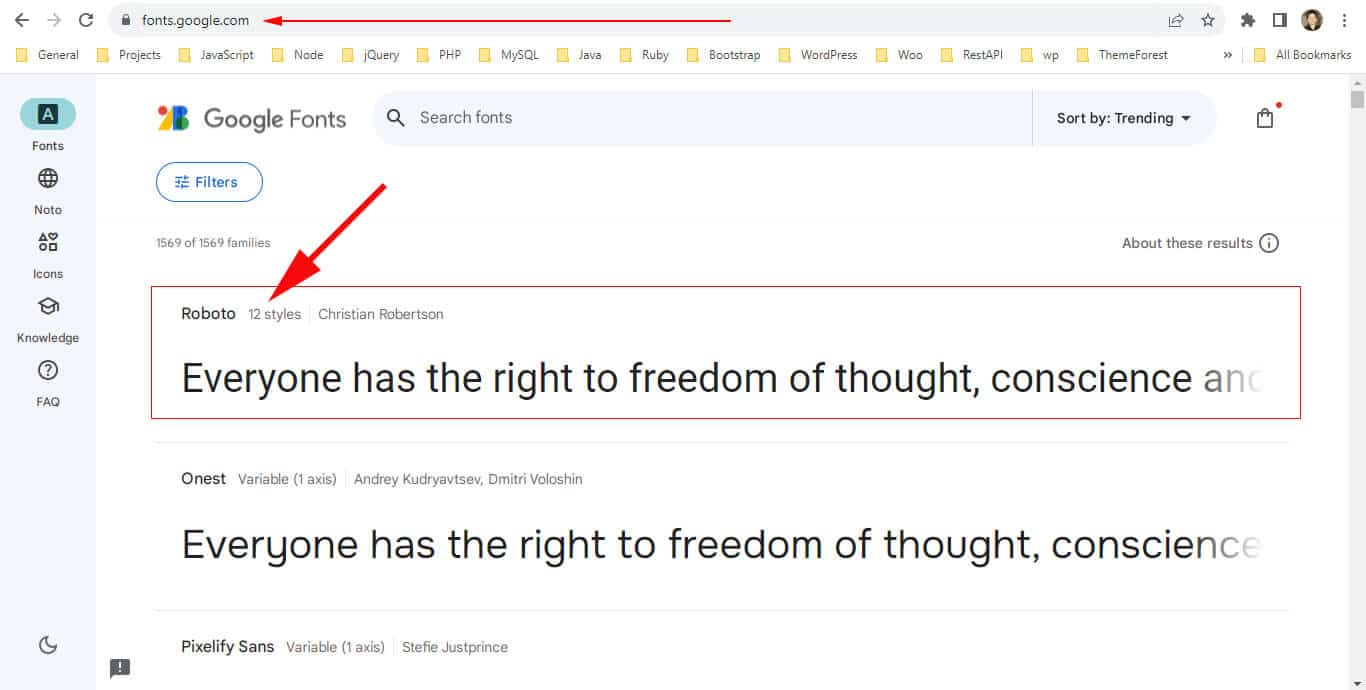
Some fonts have only one style. But most fonts have multiple styles.
Select one or more font styles
In my example, Roboto has 12 different styles. Select the styles that you want to use (see the screenshot below as an example).
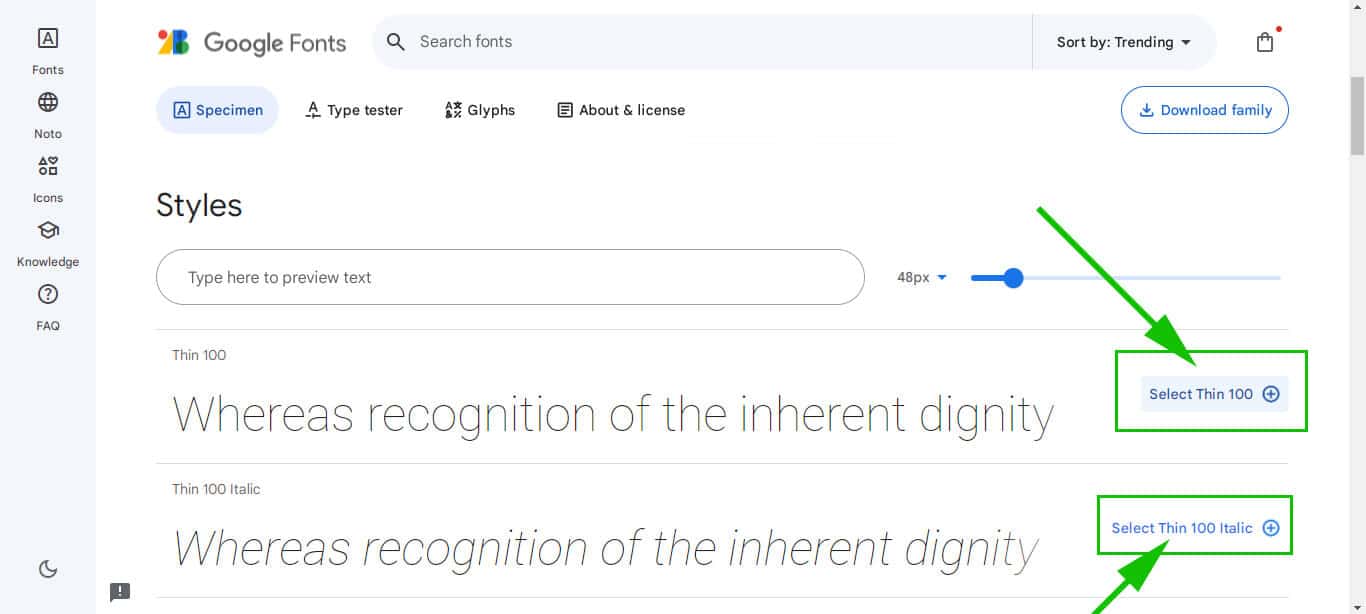
After selecting font style(s), a right sidebar will open and it will give you the links that you need to copy and paste into the <head> tag of your HTML file.
Choosing multiple fonts
Note that you can always go back and choose more fonts. For example, in the above, I only chose Roboto. But now I can go back to the home page and choose more fonts such as Open Sans. In the same vein, I can choose its different styles.
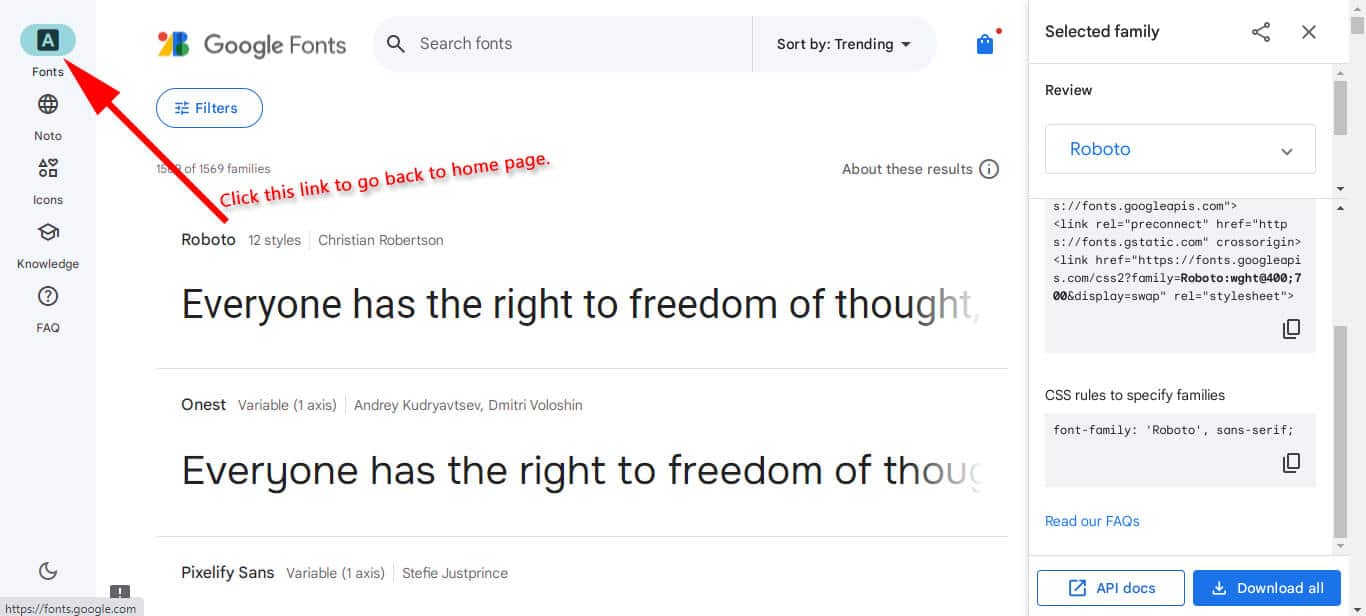
After you finish choosing fonts and selecting their styles, you’ll find the links in the right sidebar (as you saw in the above screenshot). If you don’t see the right sidebar, click the icon/link at the top-right corner (View selected families) as you see in the screenshot below.

Either way, copy the link tags and paste them in between the <head> tags of your HTML/website.
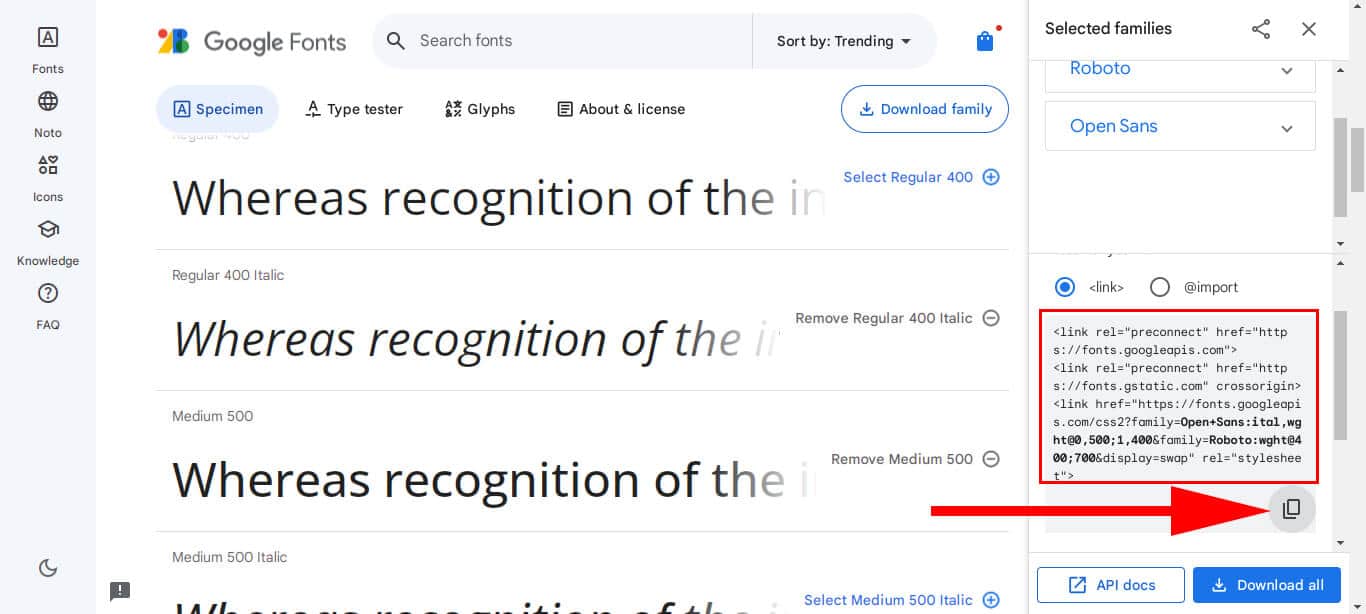
Paste font links to your HTML document
And then paste your clipboard inside the head tag (as you see below).
<head>
  <link rel="preconnect" href="https://fonts.googleapis.com">
  <link rel="preconnect" href="https://fonts.gstatic.com" crossorigin>
  <link href="https://fonts.googleapis.com/css2?family=Open+Sans:ital,wght@0,500;1,400&family=Roboto:wght@400;700&display=swap" rel="stylesheet">
</head>
That’s it!
Using fonts in your CSS
After you save your HTML, your website is ready to use those Google fonts. Go to your CSS file, select any HTML elements, and specify the font. See the following CSS as an example:
body {
  font-family: 'Roboto', sans-serif;
  font-weight: 400;
}
h1 {
  font-family: 'Open Sans', sans-serif;
  font-weight: 500;
}
Now you may ask, how you will know the font family?
Find the name of your font family (CSS rules to specify font families)
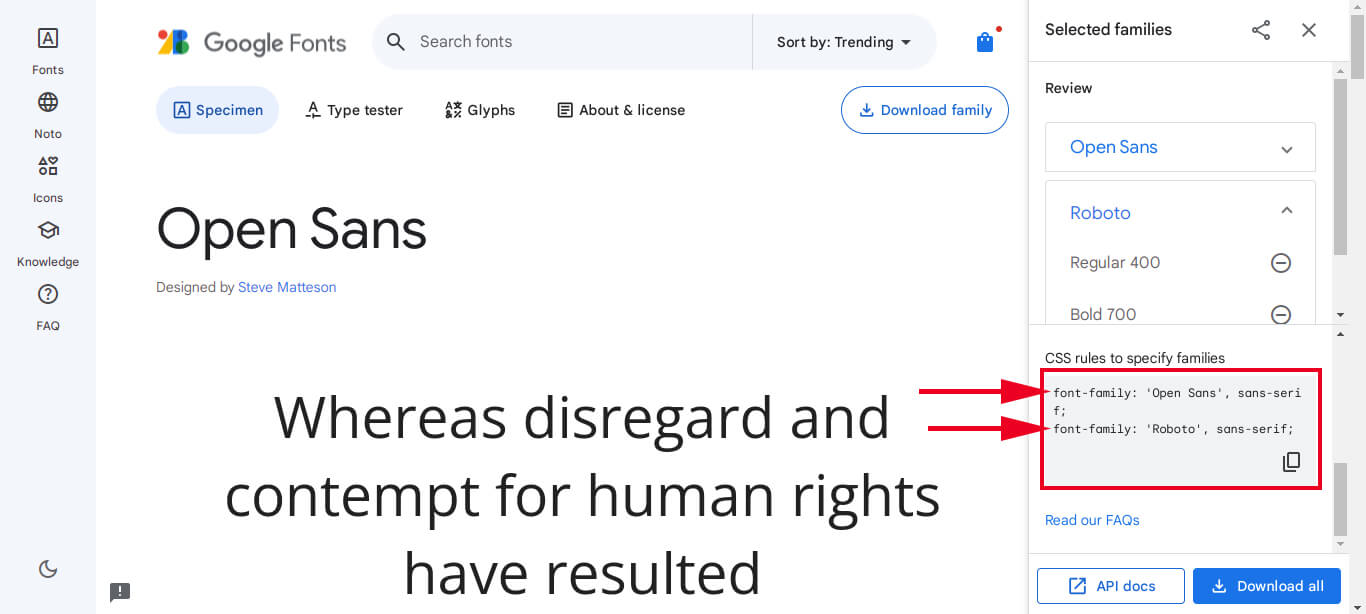
In the right sidebar scroll until the bottom, and you’ll see the font families (as you see in the screenshot below).
Clarifications about the font pre-connect relationships
You can ignore the first two lines (rel="preconnect") and the fonts will work without these two lines. But I suggest you keep them as they are. These two lines help your fonts to load faster. Until the fonts are loaded, most web browsers show blank space instead of the text. And some browsers show the text with default fonts.
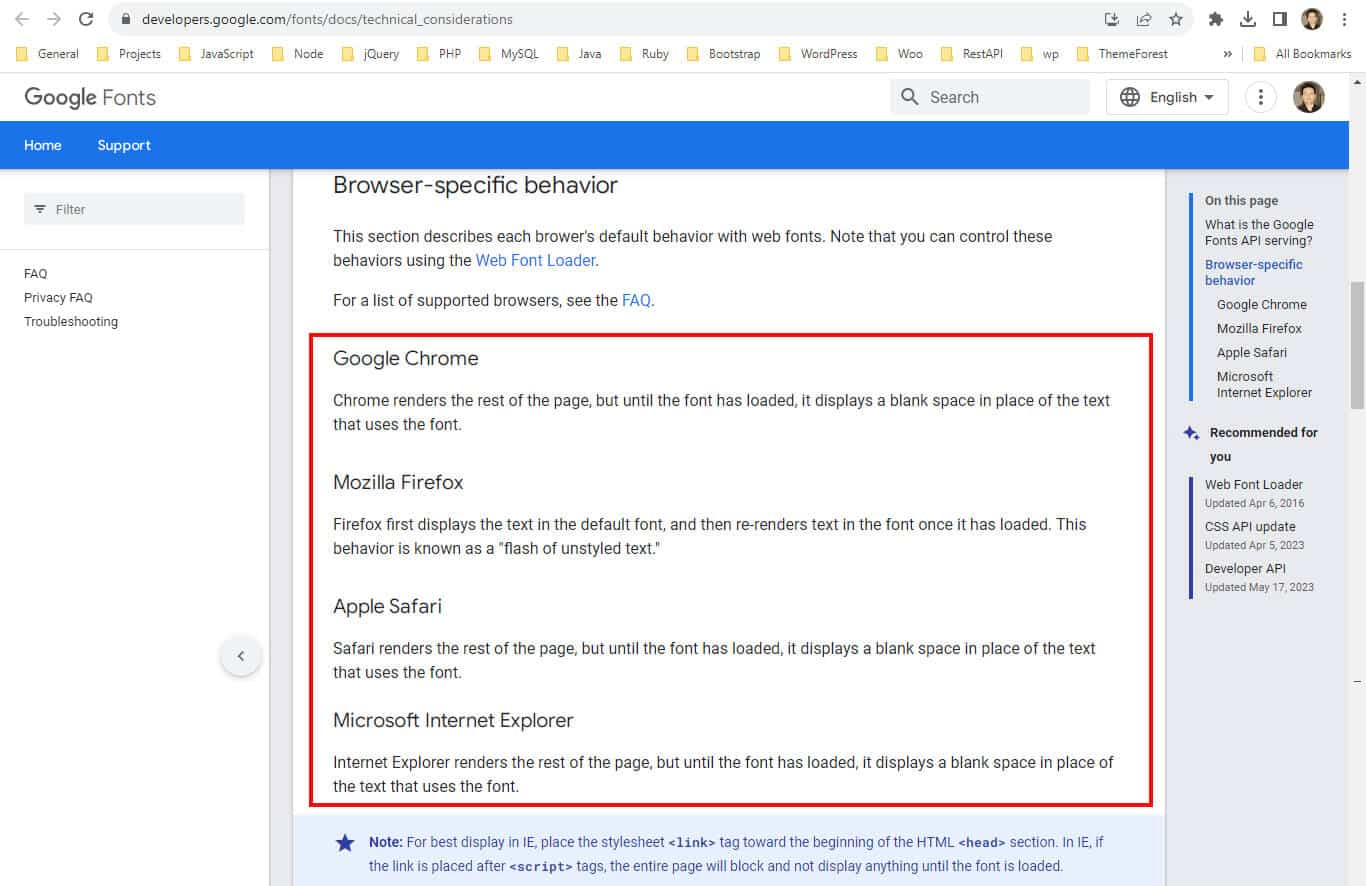
So I would suggest using the pre-connect relationship.
Conclusion
In this post, I showed you how to use Google fonts for your website. To be more specific, it’s adding Google fonts to a static website or HTML document. If you want to learn how to add Google fonts to a WordPress website, see this post instead.
If you have any questions or confusion, please let me know.


