Do you want to create a button using Elementor that allows your visitors to download a PDF or any other documents? If this is the case, this post will show you the exact steps.
Note: if the HTML download attribute does not work, see the last section to fix it.
Follow the steps below in to create a downloader button in Elementor. This exact method also works for any other file types such as DOC, DOCX, XLS, ZIP, etc.
Step-1: Upload the PDF to the WordPress media library
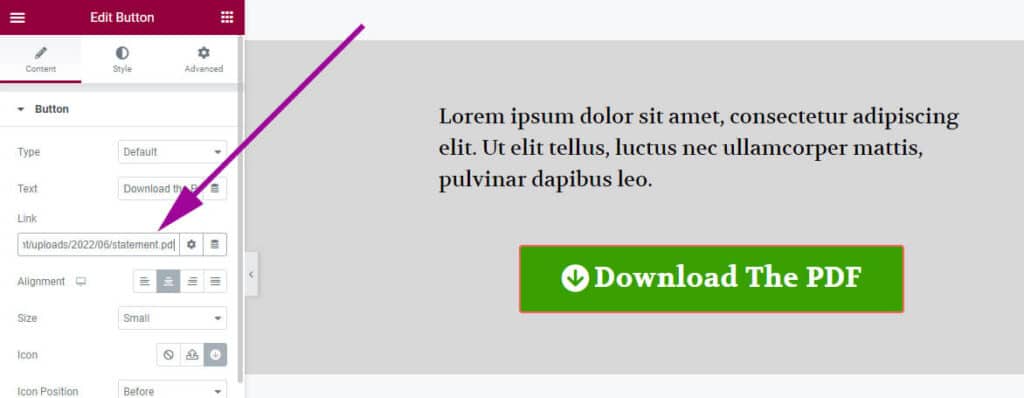
To add a downloadable PDF button in Elementor, upload the PDF file to the WordPress media library. Take a copy of the URL of the PDF file (as you see in the screenshot below).

Now go to the page where you want to add the PDF download button. Open the page with Elementor page builder. Insert a “Button Widget,” right-click on it and insert the PDF link that you have copied in the above step.
Step-3: Add a custom “download” attribute to the link
Now click on the gear icon (link options). See the screenshot below for more clarifications.
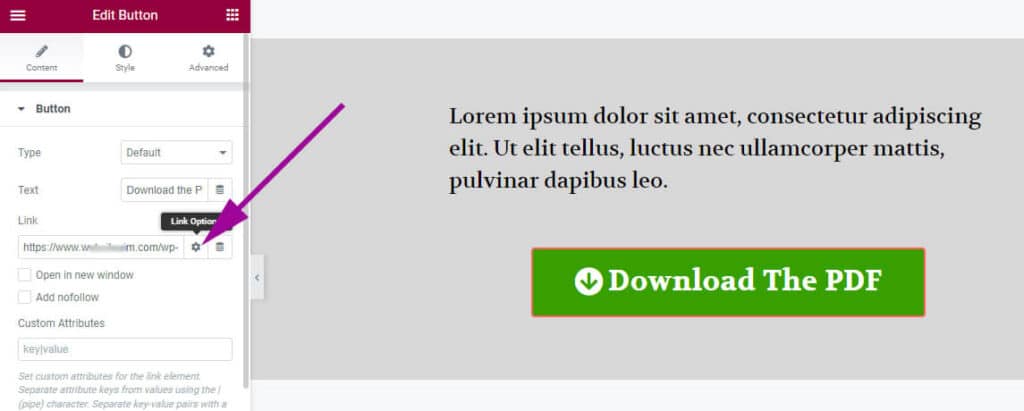
Type “download” in the “Custom Attribute” field (as you see in the screenshot below).

And save your page.
That’s it! Now go to the front end and if you click the button, it will automatically download the PDF instead of opening the file.
You can also do the same for downloading word documents, zip files, images, etc.
Similar post: How to trigger the Elementor popup after clicking any PDF link?
How to rename the file on the visitor’s computer?
If you want to rename the file on your visitors’ computer, you can add both the key & value to the “Custom Attribute.” Here the text “download” is the key. So, If you also add a value to the custom attribute, it will rename the file before downloading.
You can type “download|file_name” on the “Custom Attribute.” So whatever the name of your file in the media library, it will be saved as “file_name.pdf” on the user’s computer. Here the text “file_name” is the value. And you can change the value (file_name) to anything acceptable & meaningful.
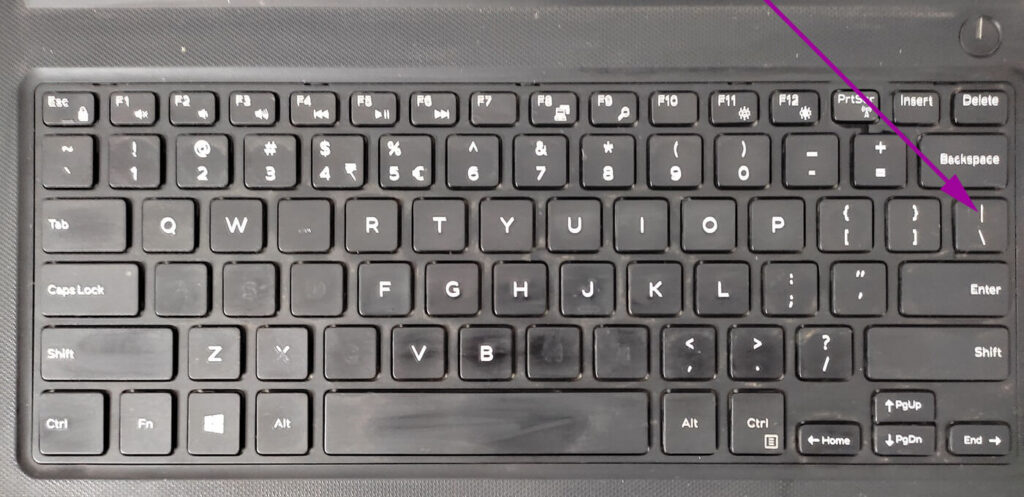
The “|” (pipe) is the separator between the key & value that you will find under the “Backspace” key & above the “Enter” on your keyboard. Just hold down the “Shift” key & press the “Pipe key.” See the picture below to understand better.
But I prefer to include the file extensions such as the “.pdf” because sometimes the web browser fails to recognize the file extensions. So if you want to add both the key & value, I advise & highly recommend you to include the extensions such as “download|file_name.pdf“
What if the HTML download attribute not working (troubleshoot)
In a few cases, you may see that your browser opens the PDF file in a new tab instead of downloading it on your computer.
If you face this issue, remove the domain name (including protocols) from the PDF link.
Instead of using:
https://yoursite.com/wp-content/uploads/2023/02/example.pdfUse the following path:
/wp-content/uploads/2023/02/example.pdfThat means you should use the relative path instead of the absolute path (if the PDF download is not starting).
That’s it!
But if the problem happens on a static HTML website then use the following anchor tag:
<a href="path-to-your-file.pdf" target="
" download>Download PDF</a>
Instead of the code below:
<a href="https://yoursite.com/path-to-your-file.pdf" target="
" download>Download PDF</a>
Conclusion
This is how you can add a file downloader button in Elementor. This way you can also make a downloadable button for other types of files such as word, excel, zip, etc. If you need to add the download button to a static HTML site or WordPress website that is not built with Elementor, see this post on how to create a download HTML link.
If you still have any questions, let me know.