This post is a beginner’s guide to using Git. You’ll learn how to use Git on your local machine, and how to push your project to a live Git hosting server like GitHub, Bitbucket, etc.
Git and GitHub are not equal. Git is a version control system. On the other hand, GitHub is one of many hosting services. See the main differences between Git & GitHub.
GitHub is the most popular, and some of the similar & other companies are Bitbucket, GitLab, etc. See some of the GitHub alternatives on another website.
How to use Git?
To use Git, you need to install it first (if you’re using Windows). But if you’re using Mac, it’s already installed on your computer and Mac users don’t need to install Git separately. However, if you don’t find it in your terminal, you do have to install it.
For more details, see how to install Git on your Windows or Mac?
After you install Gig on your computer, follow the steps below to use Git.
Add a global username & email
This is a one-time setup and you don’t need to set up your global username & email every time you work on a project.
You need to set a global username & email first because Git has to track who is making the changes. And that’s why it’s important.
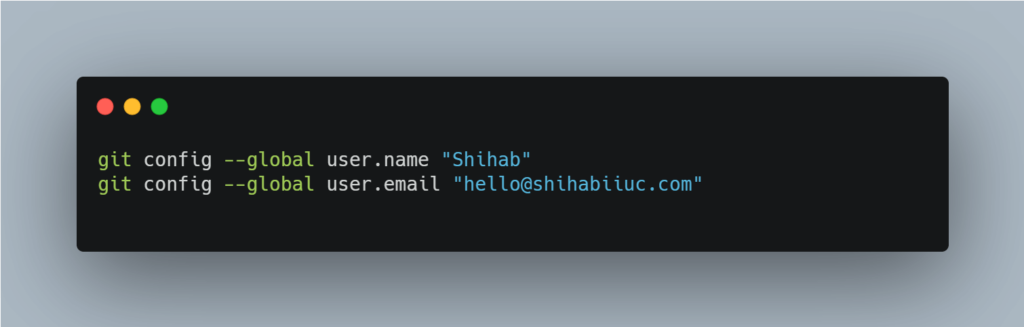
To set a global username & email, open your command line (Git Bash, Terminal) and type the following two commands:
Step 1:
git config --global user.name "YOUR NAME" and hit enter.
Step 2:
git config --global user.email "YOUR_EMAIL" and hit enter.
Don’t forget to replace (YOUR NAME & YOUR_EMAIL” with your actual name & email. A global username can also contain your full name that includes spaces such as “John Doe.” However, I prefer to use my first name (nickname).
That’s it for setting up your global username & password for the rest of the time. And you don’t have to do this again (as mentioned earlier).
When you’re setting up your global username and email, it does not matter where the cursor is pointing to.
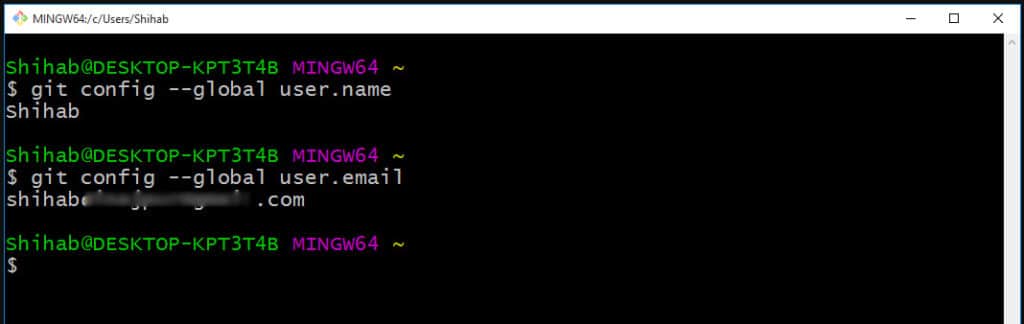
To check your Global username & email, type the following commands:
git config --global user.nameand hit enter (this will display your global username)git config --global user.emailand hit enter (display your global email)
However, checking this global username and email is not mandatory but good to know.
Initiate a Git repository
Open your terminal (Git Bash) and navigate to your project. And initiate Git using the following command:
git init
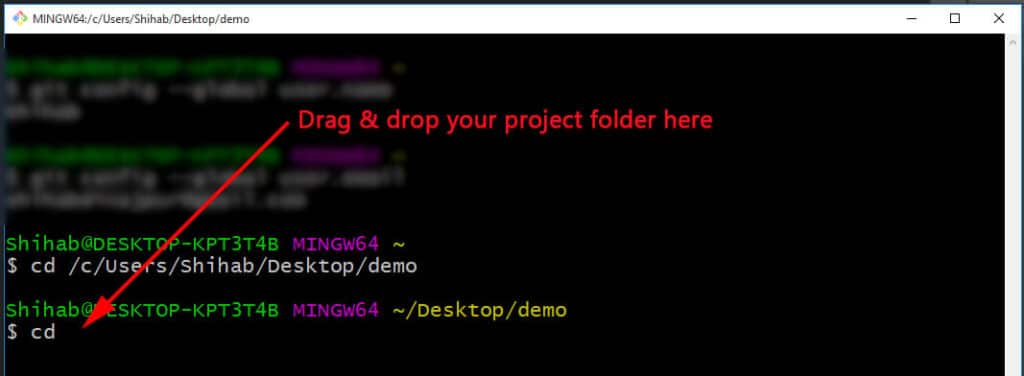
If you don’t know how to navigate to a project/folder or open it in your command line, do this:
Type “cd” and space and drag & drop the project folder to the command line. This will automatically point to the project folder (as you see in the screenshot below).
Add GitHub (or similar) remote origin URL
Before pushing your project, you need to create a git repository on GitHub (or another similar repository hosting). If you don’t know, see how to create a repository on GitHub.
Command to add the remote repository:
To add the remote repository (GitHub) to your project, type the following command:
git remote add origin URL
Don’t forget to replace the “URL” with the actual repository link.
After you create a repository, you will also find the URL on the same page (as you see below).
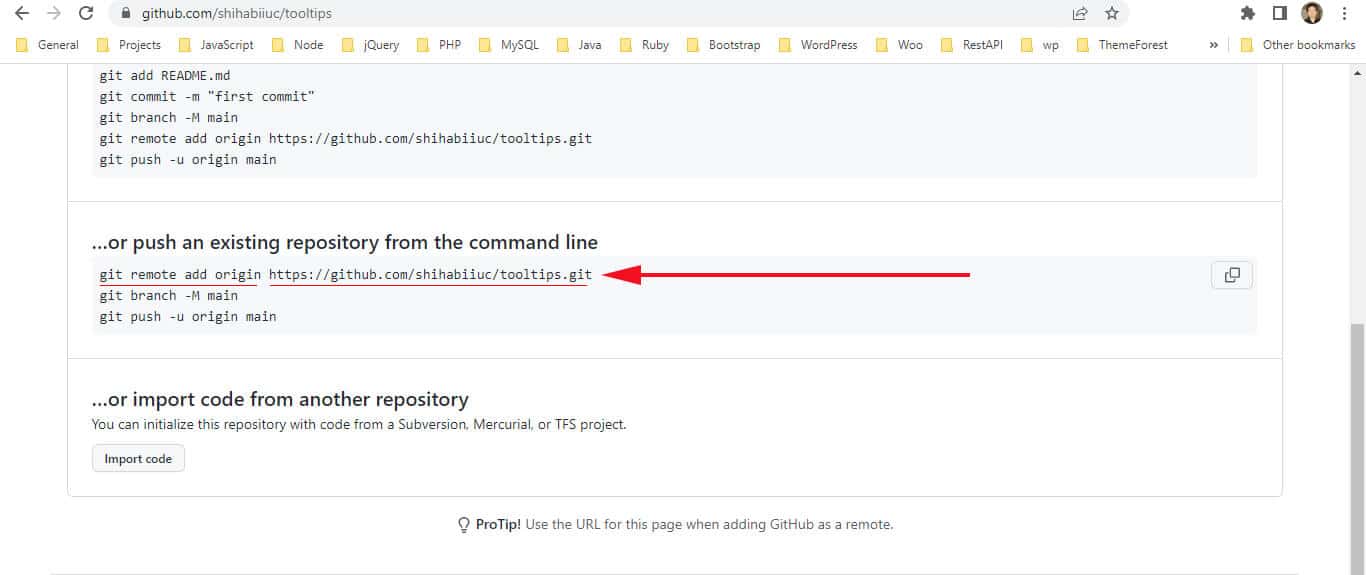
Or open any repository and at the end of the URL put a “.git“, this will give you the remote origin URL.

To change this remote origin URL, see this post. However, you don’t need to change it now. But if you clone someone else’s repository, you have to change the remote URL to push to your repo.
Stage the changes
After you make changes to your project files and want to leave your desk, you may want to push or commit those changes. But before pushing or committing those changes, you need to stage the change.
I know it looks very confusing but it’s simple in action.
In plain English, stagging is adding all/specific files to the queue.
For example, you edited 5 files. Now you can track all those 5 files or 3 of them or whatever you like. This is called staging. See it in action below.
Command to stage all files
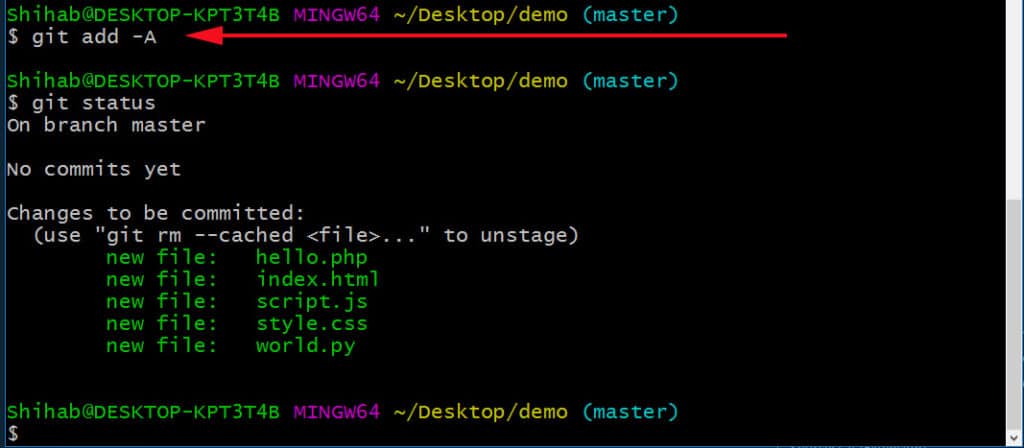
To stage all the files use the following command:
git add -A
Command to stage certain files
If you want to track only two specific files such as “hello.php & index.html“, use the following command:
git add hello.php index.html
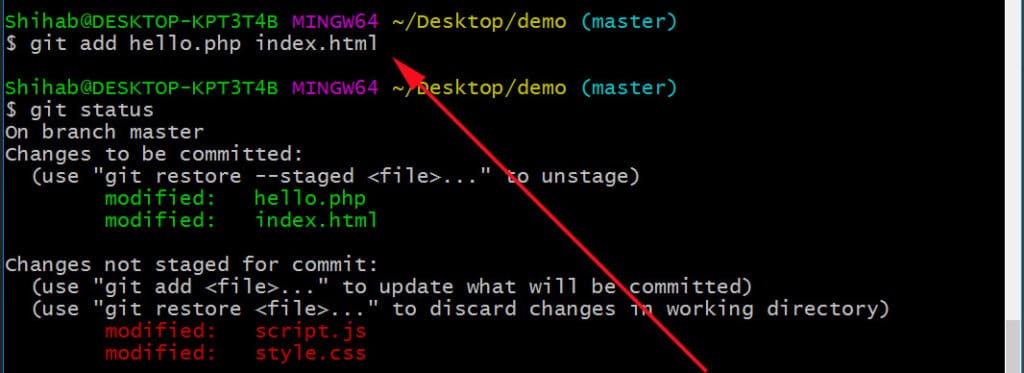
In the above command, you’re tracking two files and ignoring other files from tracking.
Commit
In plain English, Git commit is just a piece of text for your self-note.
For example, you edited the footer of your website. So your “commit” will be as follows or something similar:
git commit -m "Edited the footer"
The custom message in the quote could be anything, but the first portion (before the quotation), will remain the same as you see above.
Push (to GitHub)

Here is the moment some of you may have been waiting for. Until this point, you made a “commit” and your code is safe.
But what will happen if you lost your computer? Or if you want to collaborate with other people?
This is where GitHub (and other similar Git hosting companies) comes into play. That means you can push your code to a remote server, clone & pull from there, collaborate with others, and the list goes on.
Now type the following command to push the project to the GitHub repository:
git push origin master
Pro tip: After you push to the GitHub repository, you can create a static website from the repository. Go to settings from the top navigation and activate “Pages” from the master branch. For more detailed instructions, see another post.
Can you use Git without GitHub?
If you’re just getting started, you may wonder if you can use Git without GitHub. The answer is yes, you can use Git without GitHub.
But there is a caveat! If you do not use GitHub (or a similar service), the following things will happen:
- If you lost your computer, you won’t be able to restore your projects.
- Other people won’t be able to collaborate on your projects.
- You won’t be able to check the history or past commits.
And the list goes on.
If you’re familiar with computer hardware, think of the RAM (random access memory) as the Git and Hard Drive as GitHub. This is just an example.
Git saves your project into your machine (computer) locally. And GitHub saves your project on a live hosting server permanently.
Here I want to point out that there are other alternatives to GitHub out there. Such as Bitbucket, GitLab, etc. GitHub is one of the popular services. Also, these are free (mostly).
In a nutshell, Git without GitHub (or a similar service) is incomplete.
Conclusion (summary of these commands)
It’s hard to memorize these things. But the good news is you don’t have to memorize any of those. You will get familiar by doing and practicing.
See the whole workflow and the list of commands you used in this post:
git init
git remote add origin https://github.com/shihabiiuc/preloader.git
git add -A
git commit -m "I updated the sidebar and color"
git push origin master
Note that you don’t have to add the remote origin URL every time. You need to add the remote URL for the first time. This is also applicable for the Git initialization (git init).
In your daily life, mostly you need the following three git commands:
git add -A
git commit -m "Your custom message"
git push origin master
If you want to see the most commonly used git commands, see this post. You can also download a PDF file of these commands.
This is how to use Git & GitHub.
Learn more about Git
- What is Git and why it is used?
- How to install Git on Windows & Mac?
- How to use Git with Visual Studio Code?
- How to use Git and GitHub?
- What is the difference between Git and GitHub?
- How to connect local Git to a remote server?
- How to change Git remote origin URL?
- How to create a Git repository on GitHub?
- Git add all (stage all changes)
- How to undo the git add -A command?
- How to undo the last Git commit?
- How to change the git commit message?
- How to remove or unstage a file from Git commit?
- How to git push after rebase?
- Git switch branches: How to checkout the git branch?
- How to merge a git branch to master?
- Git branch: create, checkout, merge, list, command, delete & push
- How to clone a Git repository?
- How to git pull to override the local project?
- How to remove file from Git?
- When should you use git rebase?
- Git commands & explanation (downloadable cheatsheet included)
- How to create GitHub Pages?
Conclusion
I tried to give you a clear picture of Git & GitHub and their usage. Also, I provided additional resources so you can take your experience to the next level. If you have any questions, please let me know.
And if this post helped you, please share it on your website.