In this post, I will show you how to connect local Git to a remote repository. And this remote repository could be GitHub, Bitbucket, GitLab, or anything else. The process is the same.
Connect your project to a remote Git repository
Before you do anything, make sure Git is installed on your machine. Otherwise, see this post to install Git on your machine (both Windows & Mac) and for the first time Git configuration.
To connect your local Git repo with a remote server, follow the steps below:
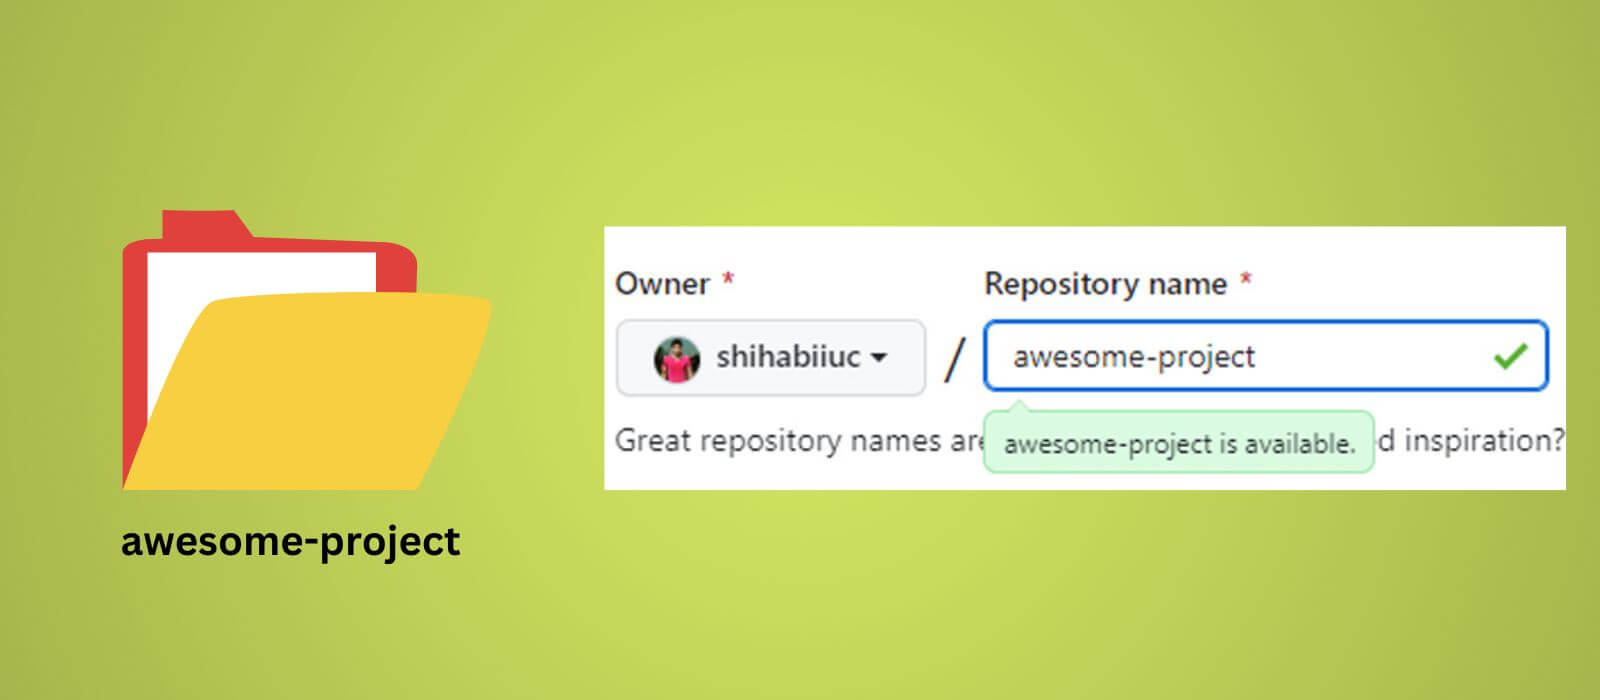
Create a remote repository with the same name as the local project
Before you connect any project to a remote server, your first instinct should be to create a repository. There are many free Git hosting servers out there. GitHub & Bitbucket are the two most popular of them.
If you want to use GitHub as your remote server, see this post to learn how to create a repository on GitHub.
Make sure you named the repository the same as your local project. For example, you have a project folder called “super-cool-website” on your computer. So your repository name should be the same as the project folder. And this repository could be on GitHub or somewhere else.
Also, make sure that there is no space in the local project or remote repository names.
Add the remote origin to your project
After you create a Git repository on GitHub, Bitbucket, or anywhere, you’ll get a remote origin URL. This URL ends with “.git” as you see below.

Now open your command line or terminal or Git Bash, and make sure that it’s currently pointing to the appropriate folder. And type the following command:
git remote add origin your_repository_url
Don’t forget to replace the “your_repository_url” with the actual URL.
The above command will add your local project to the remote server. If you’re using other than GitHub as your remote server, the process is the same as this one.
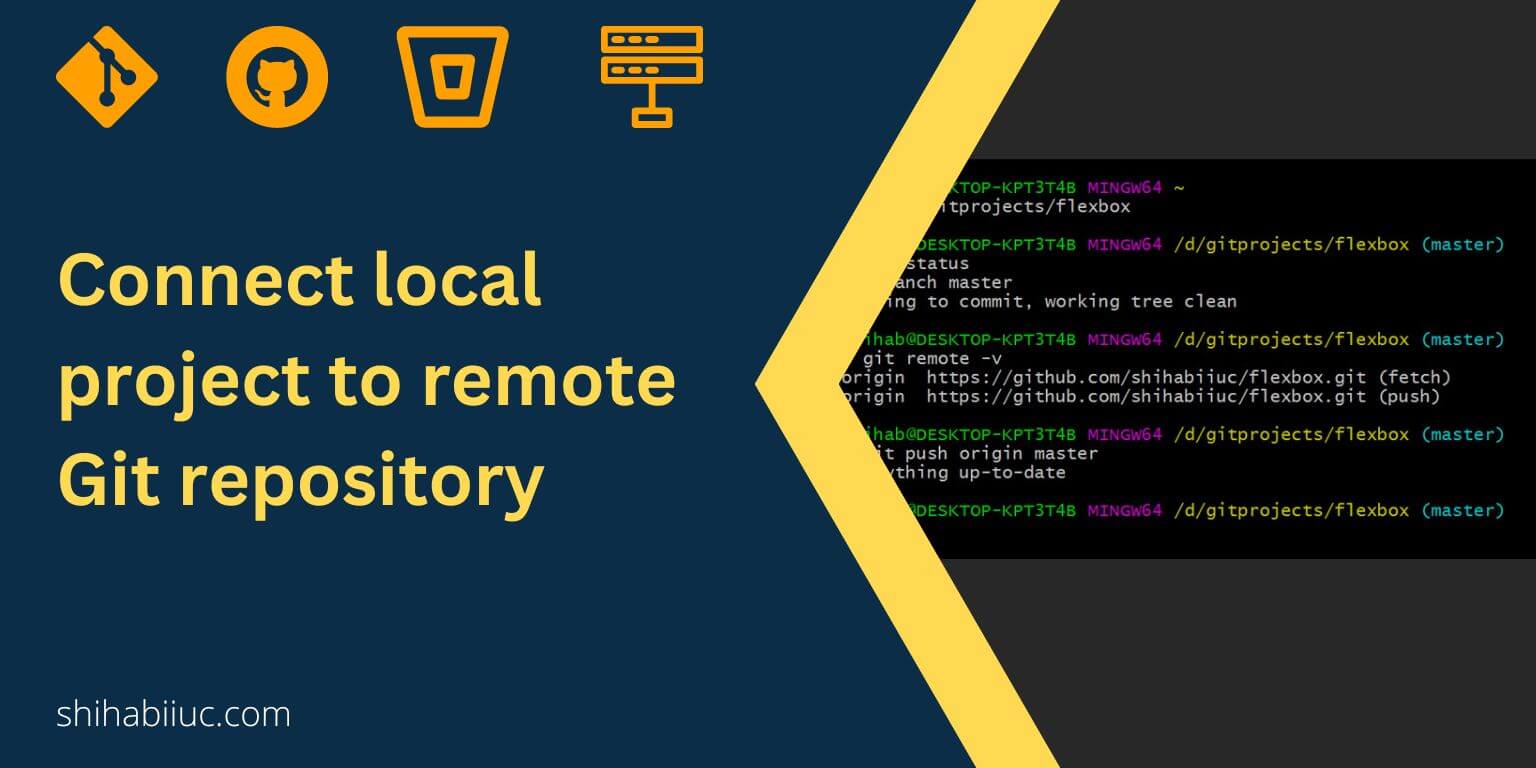
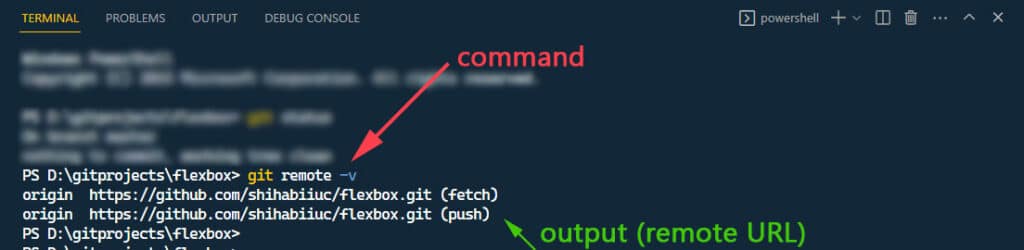
To check if the URL was correctly added or not, you can type the following command:
git remote -v (this is not mandatory to check but something good to know).
To change this remote origin URL in the future or on a different project that you cloned, see this post to learn how to change it.
Push to the remote server/repository
This is the moment you have been waiting for!
After you added the Git remote origin URL, you can push your local project to the remote server where you created the repository. The command is as follows:
git push origin master
Not to mention, you need to initiate Git (git init), add files to the staging (git add -A), and make a commit (git commit -m "custom message") before you push it to the live or remote server.
Here is the list of all the commands:
git init
git remote add origin your_repo_url_goes_here
git add -A
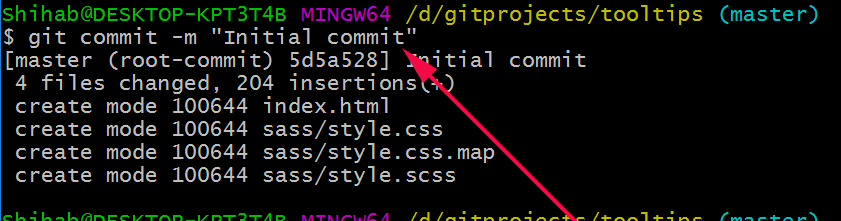
git commit -m "Initial commit"
git push origin masterFor the first push, it may ask the username & password of your remote server (GitHub, Bitbucket, etc). However, the prompt is one time and it will not ask you for the username & password each time.
This is how you can connect a local project to a remote server using Git. See the most commonly used git commands and their explanation.
For your additional information
Git may seem confusing for the first time or the moment you have just getting started. But this is not the actual case.
Even, this tiny post may seem confusing to some of you. So I listed some relevant topics below. These will help you to better understand the Git workflow and make your learning path much easier.
| How to install Git on Windows & Mac? |
| What is Git and why it is used? |
| How to use Git and GitHub? |
| Why is Git useful for an individual developer? |
How to connect Git Bash to GitHub?
Connecting Git Bash to GitHub is the same process as I showed you above (with the VSCode terminal). However, if this is still not clear to you, here is the simple step-by-step process below.
Step 1: Download and install Git from git-scm.com to your Windows computer.
Step 2: Open Git Bash (command line) from the Windows “Start” menu.
Step 3: Navigate to the project folder in the command line. You can type “cd ” and drag & drop the folder to the command line (git bash) and hit enter.

Step 4: Initiate git using the following command: git init

Step 5: Add the remote origin URL using the following command:
git remote add origin https://github.com/shihabiiuc/tooltips.git
Don’t forget to replace the above URL with yours.
Step 6: Stage all files using git add -A

Step 7: Make a commit for all the changes by git commit -m "Initial commit"
Step 8: Push the project to the GitHub repository using git push origin master
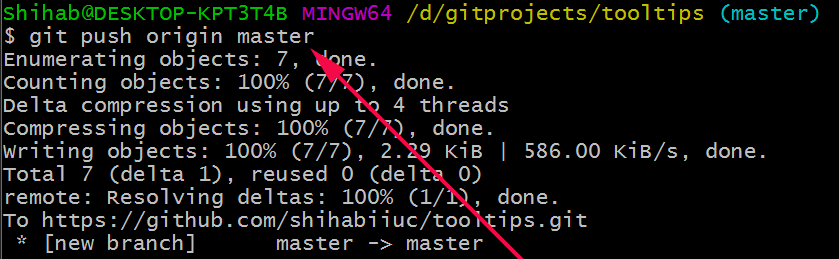
That’s it! Now if you go to your GitHub repository and refresh the page, you’ll see that the local project has been pushed to the live server.
Bonus tip: To close Git Bash, type exit and hit enter.
Video instruction
Learn more about Git
- What is Git and why it is used?
- How to install Git on Windows & Mac?
- How to use Git with Visual Studio Code?
- How to use Git and GitHub?
- What is the difference between Git and GitHub?
- How to connect local Git to a remote server?
- How to change Git remote origin URL?
- How to create a Git repository on GitHub?
- Git add all (stage all changes)
- How to undo the git add -A command?
- How to undo the last Git commit?
- How to change the git commit message?
- How to remove or unstage a file from Git commit?
- How to git push after rebase?
- Git switch branches: How to checkout the git branch?
- How to merge a git branch to master?
- Git branch: create, checkout, merge, list, command, delete & push
- How to clone a Git repository?
- How to git pull to override the local project?
- How to remove file from Git?
- When should you use git rebase?
- Git commands & explanation (downloadable cheatsheet included)
- How to create GitHub Pages?
Conclusion
Now you know how to connect your local project with a live & remote repository or server using Git. Additionally, I gave you other related information and basic startup guideline for Git. Therefore, if you still have any questions, you can always come back and ask questions.
Git saves your project locally. In other words, it saves the project on your computer’s hard drive. On the other hand, GitHub, Bitbucket, GitLab, etc save your project on a live server and helps you in many directions such as history, collaboration, fixing merge conflict, etc.
There are many benefits of using Git even if you work alone as an individual freelancer.
Also, a Git remote server protects your projects from any vulnerabilities. Even if you lost your device/computer, the remote servers can help you to restore all the projects in a couple of minutes.