To create a WordPress custom post type without any plugin, you need a little developer-level knowledge. You don’t have to be a guru. If you know how to edit your theme files, that should be okay to follow these instructions.
The custom post type in WordPress (CPT) becomes very handy when you need to publish similar types of content regularly. WordPress comes with two default post types: post & page. Aside from these two, if you need to create an additional post type, follow along with me.
In this post, I will show you how to create a custom post type (CPT) in WordPress, how to create an archive page for the custom post type & single post layout/template for individual CPT. Everything I will do without any plugin.
Assuming, you already have at least a basic understanding of WordPress theme and its file structure. Let’s get started.
How to register a custom post type in WordPress?
To create a custom post type, you have to register it first. Open your “functions.php” and write the following code in order to register a new post type. In this example, I am creating a “Portfolio” post type.
<?php
// Register new post type(s)
function wp_custom_post_type() {
  // Portfolio post type
  register_post_type( 'portfolio', array(
      'menu_position' => 7,
      'supports'      => array( 'title', 'editor', 'thumbnail', 'page-attributes' ),
      'public'        => true,
      'has_archive' => true,
      'labels' => array(
          'name' => 'Portfolio',
          'add_new_item' => 'Add New Portfolio',
          'edit_item' => 'Edit Portfolio',
          'all_items' => 'All Portfolios',
          'singular_name' => 'Portfolio'
      ),
      'menu_icon' => 'dashicons-superhero',
      'has_archive' => true,
  ) );
}
add_action( 'init', 'wp_custom_post_type' );
Here “wp_custom_post_type” is a function that registered the post type and you can name it anything you like. Just make sure you used the same function name in the hook. Reference: WordPress.Org
Since I am creating a portfolio post type, so I need a picture (featured image) aside from the title & content. If you need additional features/support, you can include them in the “supports” array. See what supports are available in custom post type.
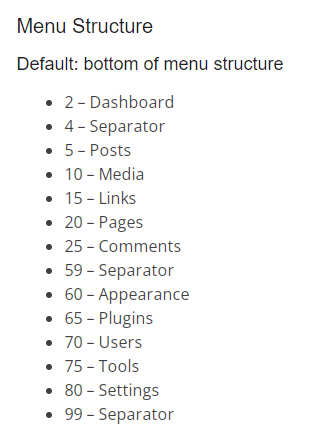
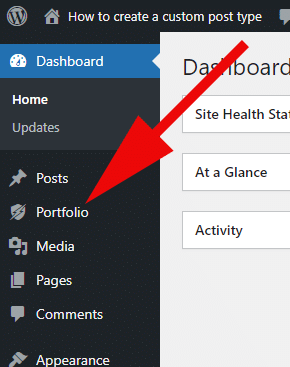
The “menu_position” determines the position of your custom post type. I want my portfolio post type under the “Post.” So I chose 7 (anything between 6-9 will work in my case). See the screenshot below to find your desired menu position for the custom post type.
The “menu_icon” gives you the opportunity to add a custom menu icon to your new post type. You can choose any icon from the WordPress Dashicons.
Save your “functions.php” file and go to the WordPress admin dashboard. Now you will see that you have successfully created a new post type.
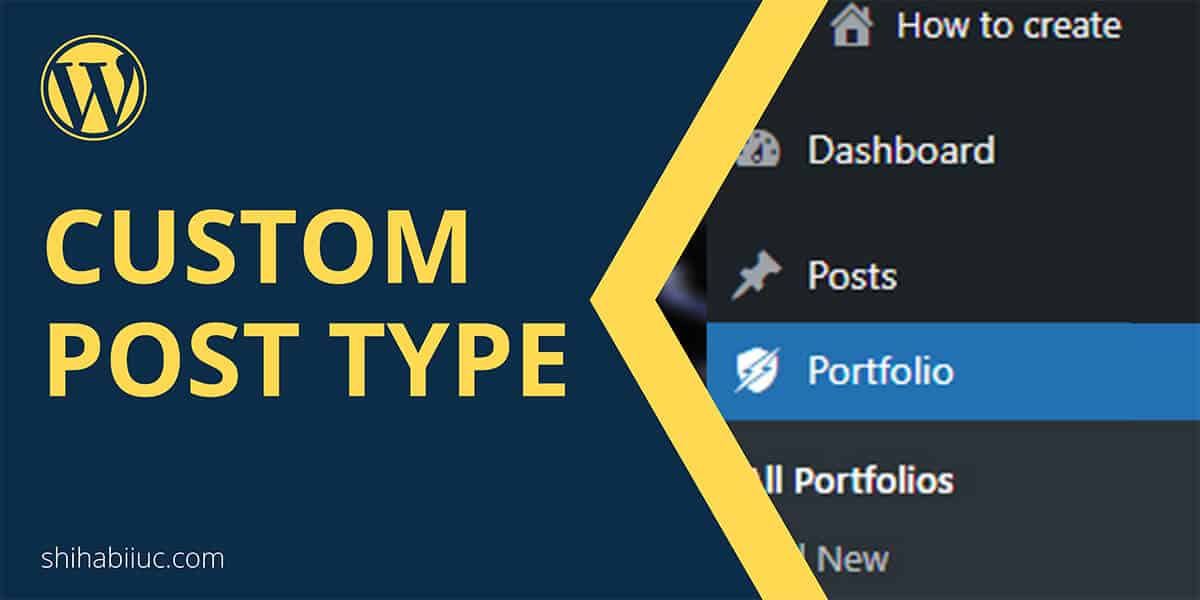
From the new (Portfolio) admin menu, you can create, edit, and delete items as you do with general posts & pages.
Go ahead & create some new items (portfolio). And in the next section, I will show how to display all the items (portfolio) in an archive just like the blog page (archive).
How to create an archive (list) for custom post type?
You have to create a new template for the archive. Here the template name is important and you should follow the template hierarchy.
The custom post type archive template naming convention is “archive-{name-of-your-cpt}.php” and as per my example it will be “archive-portfolio.php.”
<?php get_header(); ?>
<?php
  $args = array(
    'post_type' => 'portfolio',
    'orderby' => 'menu_order',
    'order' => 'ASC',
    'posts_per_page'=> '20',
  );
  $loop = new WP_Query( $args );

  if ($loop->have_posts()) :
    while ($loop->have_posts()) : $loop->the_post(); ?>

    <article class="post">
      <h2><a href="<?php the_permalink(); ?>"><?php the_title(); ?></a></h2>
      <a href="<?php the_permalink(); ?>"><?php the_post_thumbnail( 'full' ); ?></a>
      <?php the_excerpt(); ?>
      <a class="readmore" href="<?php the_permalink(); ?>">View full portfolio »</a>
    </article>

    <?php endwhile;

    else :
      echo '<p>No content found.</p>';
    endif;
?>
<?php get_footer(); ?>
This CPT archive code is very similar to the default WordPress loop as you see in your “index.php.” It just holds an extra argument in the WordPress Query class (WP_Query). See WP_Query for more information.
However, you can edit the above code to meet your unique requirements. I tried to give you a bare-bone and clear idea. So you can start from there.
Anyways, after you created the archive file, go to your website and the archive URL “www.your-domain.com/{name-of-CPT}” and in my example, the URL should be “www.my-domain.com/portfolio”
However, if you got an error or if the URL says “No content found,” then save your permalink and try again. Navigate to “Settings → Permalinks” and hit save.
This is how you can create an archive for the custom post type.
How to create a single post template for custom post type?
Just like the archive template, you also have to follow a specific naming convention for the single post template. The single post template name should be like “single-{name-of-CPT}.php” and as per my example the template name is “single-portfolio.php.”
I have written the following code to display every single post on the front-end:
<?php get_header(); ?>
<section class="single-portfolio-wrapper">
    <h3>Portfolio</h3>
<?php
    while(have_posts()) {
      the_post();
      if ( has_post_thumbnail() ) {
        the_post_thumbnail();
      } ?>
      <h1><?php the_title(); ?></h1>
        <?php
      the_content();
    }
?>
<p><a href="<?php echo site_url('/portfolio'); ?>">← Back to portfolio</a></p>
</section>
<?php get_footer(); ?>
You don’t need to write any arguments or use the WP_Query class for the single post template.
That’s it for creating the single post template for your custom post type.
Conclusion
Now you know how to create a custom post type, an archive for it, and the single post template. Therefore, if you have any issues, let me know.