Are you struggling to fill WordPress table cells with color? This post will show you the simplest solution.
Recently I needed to fill a couple of table cells with colors in WordPress Gutenberg (for an HTML color table post). Also, I did not want to use any table plugin for this purpose. Because I always try to use plugins as lowest as I can.
Anyways, I discovered that WordPress does not have any built-in feature to fill a table cell with colors. I tried to use the “Highlight” option in the WordPress table.
But the “Highlight” feature only allows you to highlight a certain text within a table cell but it does not fill out the cell with a color.
Then I started Googling to find a solution but unfortunately, there are no such posts or videos I found online. So I created my own way to fill WordPress table cells with colors. And this could also help with your project.
How to fill a WordPress table cell with color?

After you create the table, decide which exact cell or multiple cells you need to fill with colors. And then target the table cells in your CSS. You have to be a little tech-savvy to follow this method. However, you don’t have to be a guru to follow along.
In this example, I am going to fill all the table cells in the first column (the first cells of each row). Also, I will fill different cells with different colors. That means each of these cells will have unique colors.
Our first step should be to write a text in each of the cells. It could be anything and will not be visible to the public. In my case, I wrote 1, 2, and 3 accordingly but you can write anything. This is just we need something there on those cells to deal with.
Step 1: Highlight the text (in the cell) with the same text color & background color
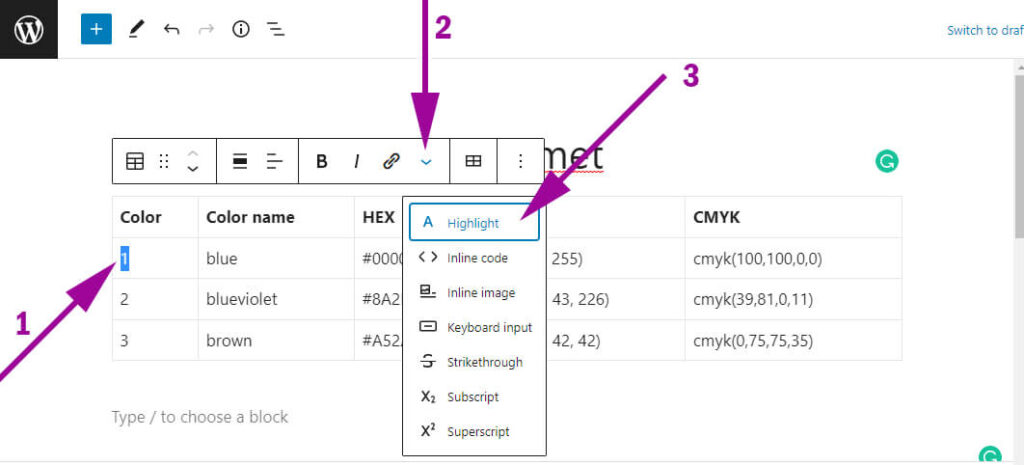
Select the text in the table cell & “Highlight” the text with the exact same color that you want. See the above screenshot for clarifications. Using the same color and background color will make the text invisible to the public and you will get your preferred color in the cell.
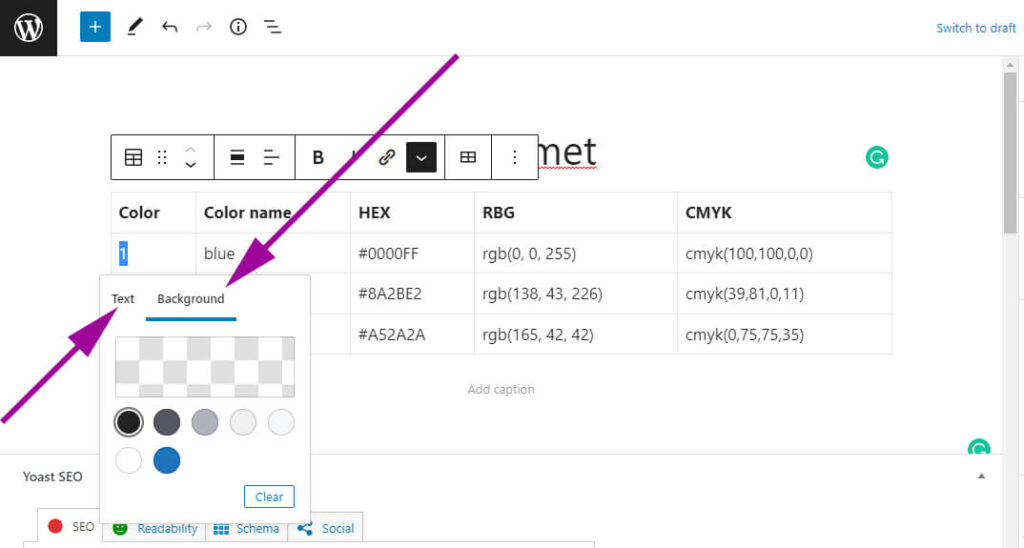
You will find the text & background color option after clicking the “Highlight.” If it’s confusing to you, see the screenshot below.
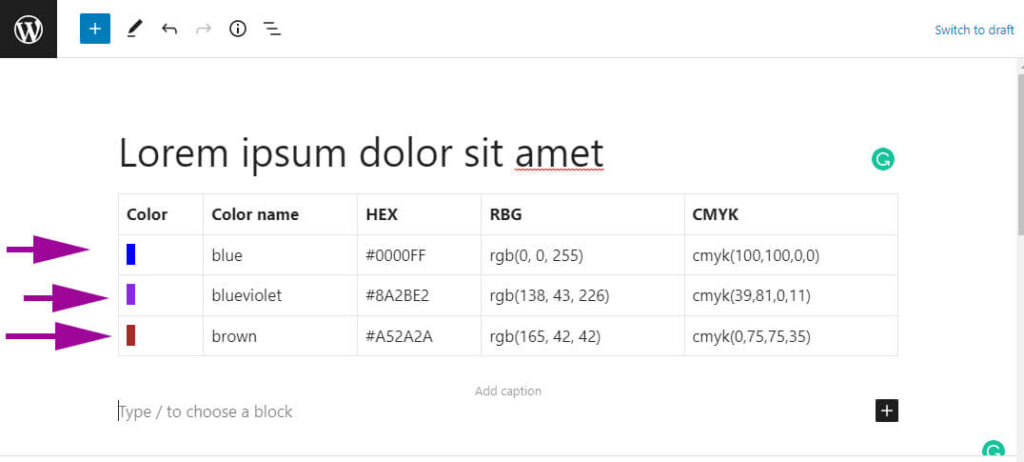
I did the same with the two other cells that I have in this example. But I used different colors in different cells. And now my whole table looks like the screenshot below.
But it has a problem. If you save the page and go to the front-end, it does not look the way we want. This is how it looks on the front-end. See the screenshot below.

But I wanted to fill the whole table cells with those colors. As I mentioned above, you need a couple of lines of CSS to achieve that. And this is what I am going to show you now.
Step 2: Position the text to acquire the whole space in the table cells
Because I want the first cells in every row to fill with colors. So I will target only those cells & the highlighted text within them (in my CSS).
Also, I will make the position of the highlighted text so it can acquire all four corners of the cell. To achieve it, here is my CSS:
tr td:first-child {
	position: relative;
}

tr td:first-child mark {
	position: absolute;
    top: 0;
    bottom: 0;
    left: 0;
    right: 0;
}
Not to mention, after you highlight the texts in the cells, WordPress wraps them with HTML “mark” tag. And this is what you see in the CSS.
Anyways, I will not use the above CSS in this format. This is just to show you and make you understand how this code work.
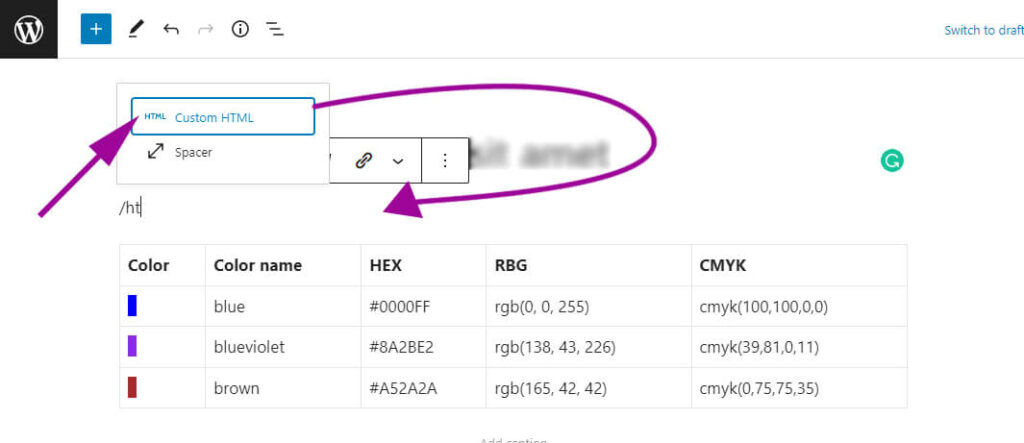
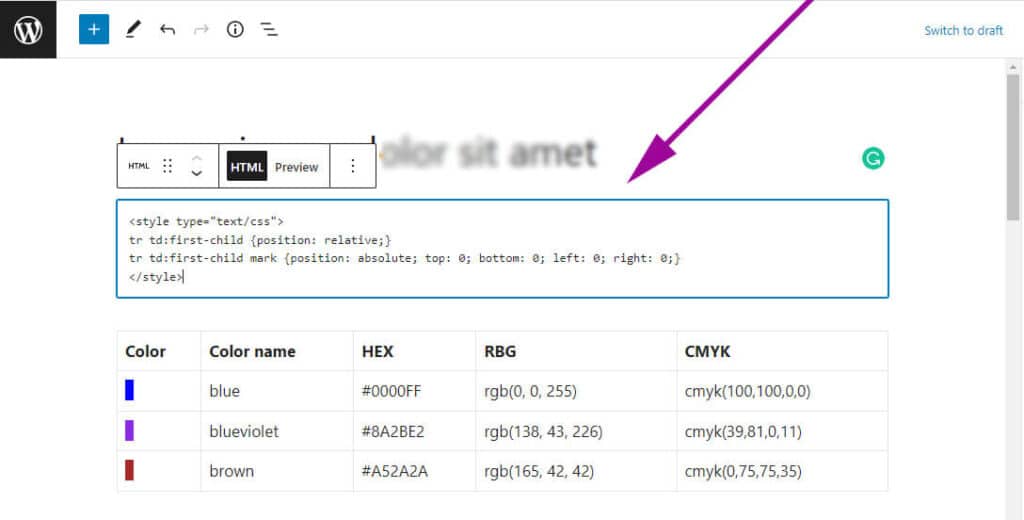
Because both we are working on WordPress Gutenberg blocks, I want to make it simpler for you. As a result, you don’t have to write the above CSS in your theme file. All you have to do is drag & drop a “Custom HTML” block before the table and paste the following code that you see below:
<style type="text/css">
tr td:first-child {position: relative;}
tr td:first-child mark {position: absolute; top: 0; bottom: 0; left: 0; right: 0;}
</style>
This is the exact code that you have seen in a different format a moment from now.
As I mentioned, drag & drop an HTML widget on top of your WordPress table (see screenshot below).
As I mentioned, paste the code that I gave you above and publish your page/post.
Now if you check your page on the front-end you will see that the cells are filled with colors like the screenshot below.

That’s it! And this is how you can fill WordPress table cells with colors. If you need to fill a different cell than mine, just update the CSS accordingly. I only have two lines of CSS in my example and there is no crazy going on. But if you got an issue, feel free to let me know.
Learn more about tables
- How to add borders in an HTML table?
- How to remove HTML table border?
- How to make a table rounded with CSS?
- How to fill a table cell with color in WordPress Gutenberg?
- How to center a table in HTML CSS?
- How to align table elements?
- How to add & align images inside an HTML table?
- TR, TH & TD workflow in an HTML table.
- HTML table background-color & background-image
- How to make a scrollable table in HTML CSS?
Conclusion
To fill the WordPress table cell with color, you have to either use a plugin or custom CSS. In this post, I showed you how to fill WordPress table cells with color without any plugins.
I used a couple of lines of CSS to fill the table cells with color in the WordPress Gutenberg block. Also, you don’t have to write the CSS in your theme file. You can insert an “HTML Widget” on your post/page and paste the CSS.
If you still have any issues filling the table cells with color, let me know in the comment. I reply to all valid comments and help as much as I can.


2 comments on "How to fill a table cell with color in WordPress Gutenberg?"
Hi,
thank you for this. It almost helped me to achieve what I wanted. Only one problem left: I want to leave text in those colourful cells. This command makes the text align left and up. Do you think you can edit the code that the text stays cantered in the cell?
Thanks in advance!
Yes, you can edit the code to make them center aligned. You can contact me on Skype to get customized/extra help.