In this post, I will show you how to add images to HTML table cells. Also, you’ll see how to align them exactly the way you want.
You can check the live demo of the example tables in the link below.
Let’s get started.
How to add/insert images to the table?
Adding images to a table is very similar to inserting an image on any HTML document. Take a <img> tag inside the <td>. This is how you can insert images on HTML tables. Let me give you an example.
HTML
<table>
<tr>
<th>Column 1</th>
<th>Column 2</th>
<th>Column 3</th>
<th>Column 4</th>
</tr>
<tr>
<td><img src="./img/guava.jpg" alt="guava" /></td>
<td><img src="./img/mango.jpg" alt="mango" /></td>
<td><img src="./img/lemon.jpg" alt="lemon" /></td>
<td><img src="./img/dragon-fruit.jpg" alt="dragon fruit" /></td>
</tr>
<tr>
<td><img src="./img/cat.jpg" alt="cat" /></td>
<td><img src="./img/dog.jpg" alt="dog" /></td>
<td><img src="./img/horse.jpg" alt="horse" /></td>
<td><img src="./img/rabbit.jpg" alt="rabbit" /></td>
</tr>
<tr>
<td><img src="./img/bitter-gourd.jpg" alt="bitter gourd" /></td>
<td><img src="./img/carrot.jpg" alt="carrot" /></td>
<td><img src="./img/broccoli.jpg" alt="broccoli" /></td>
<td><img src="./img/eggplant.jpg" alt="eggplant" /></td>
</tr>
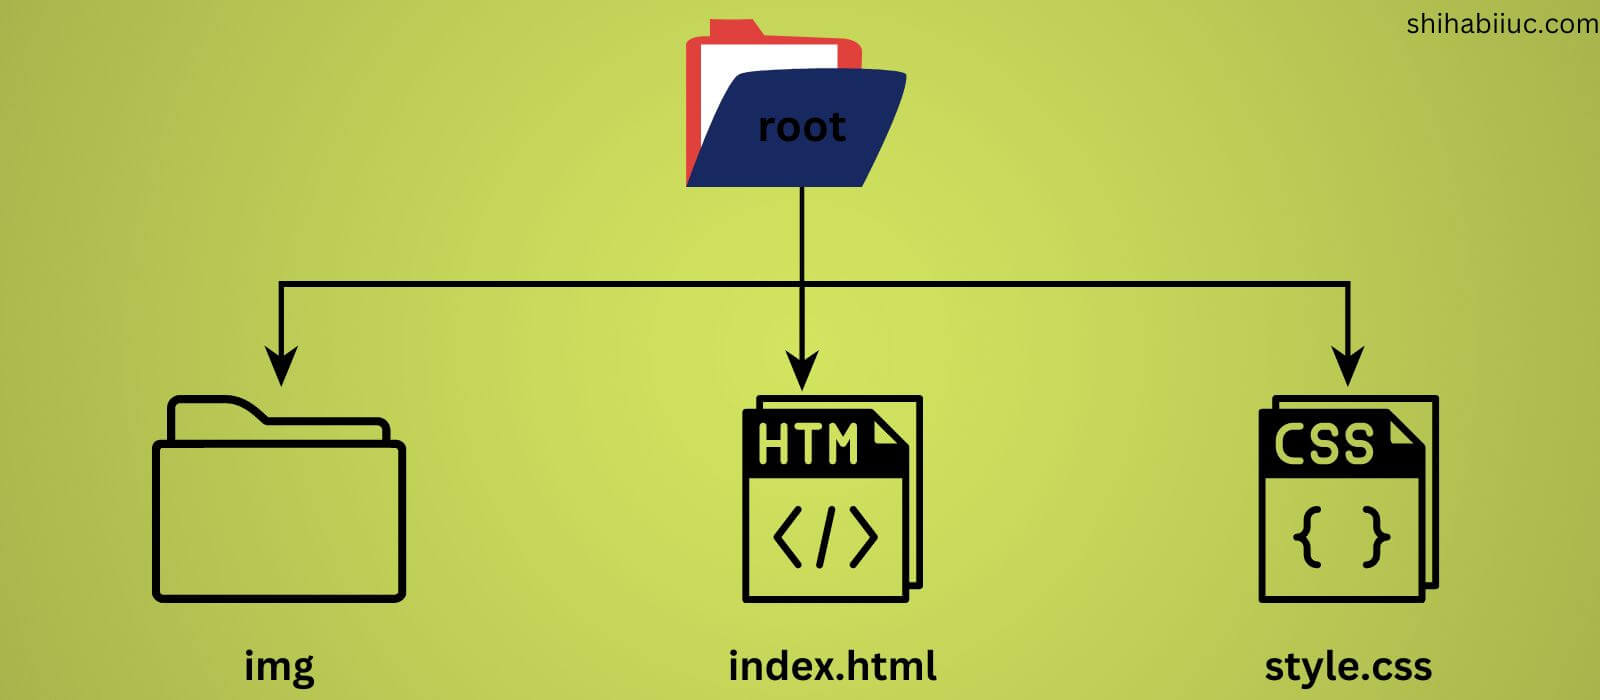
</table>As you see in the above HTML, I have an “img” folder that contains all the images. I also have index.html & style.css files in the root directory. However, you may have a different setup and it’s totally fine. Just make sure to update the image paths.
But if you want to follow my project structure, see the infographic below to better understand the files and folder structures.
If you want to download the placeholder images that I used in this project, please go to this URL.
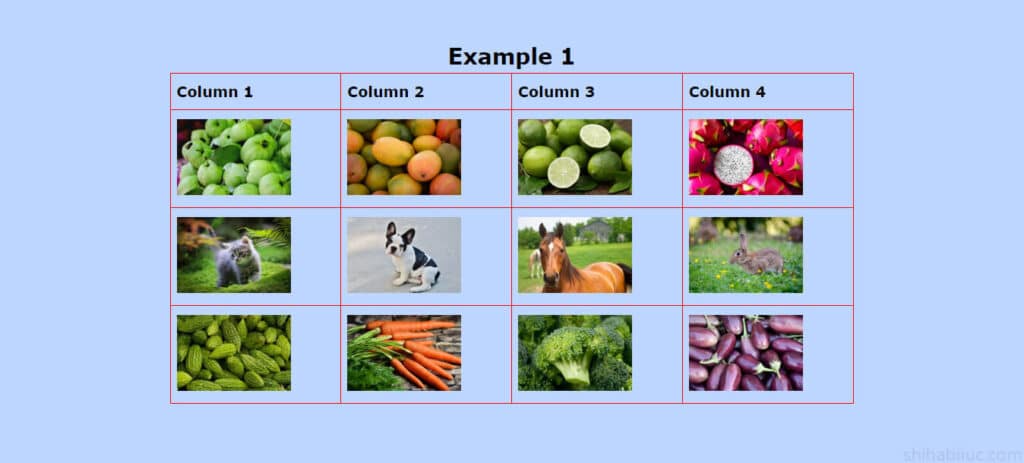
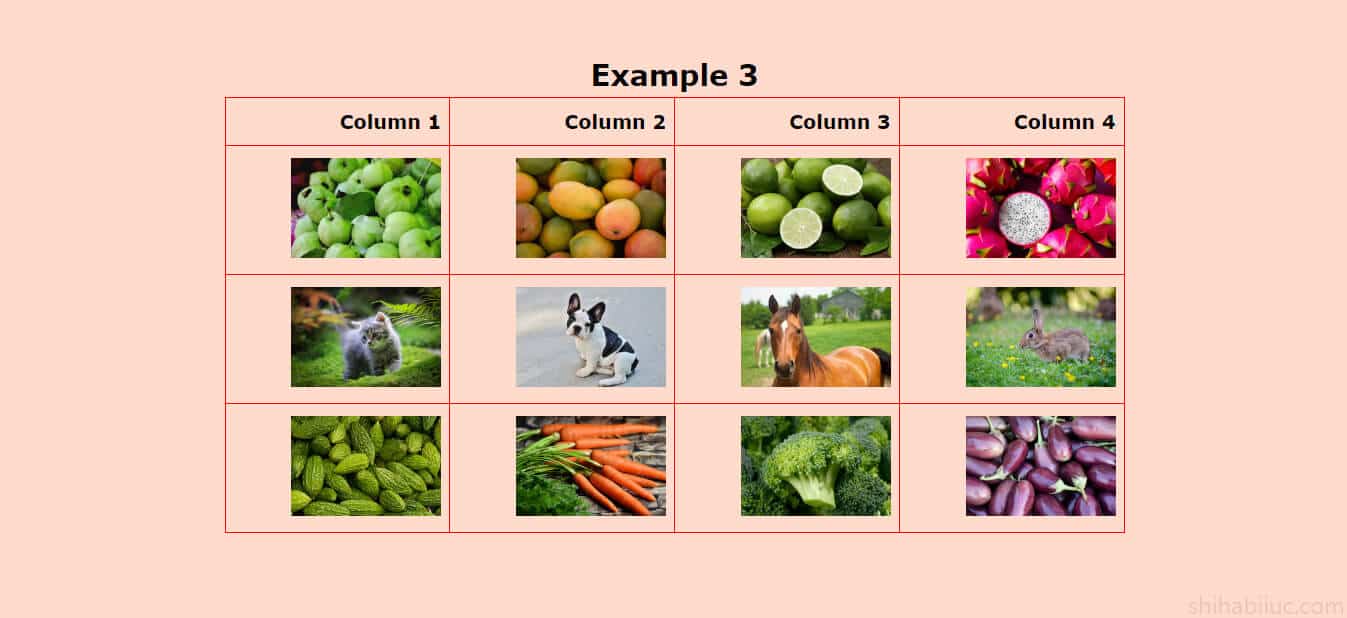
Alright, after you save your HTML file, you’ll have a table that has 12 images, four columns & three rows (as you saw in the screenshot above). However, your table style may look different than mine.
If you want a similar look to the table as mine, you can use my CSS.
CSS
table {
  border-spacing: 0;
  border-collapse: collapse;
  margin: 0 auto;
  width: 100%;
  max-width: 900px;
}
table tr td,
table tr th {
  border: 1px solid #ff0000;
  padding: 12px 8px;
}
table tr td img {
  width: 150px;
  max-width: 100%;
}
table tr th {
  text-align: left;
}
After you save the above CSS on your project, you’ll have the same table style as mine.
How to align images inside the table cells?
Now you know how to insert images within HTML table cells. Now the question is how you can align them properly.
Except for the table header (<th>), cells are left aligned. I will show you how to align the table cells/images in the center and right (horizontally).
For this example, I will use the exact same HTML markup and will only change the CSS.
table {
text-align: center;
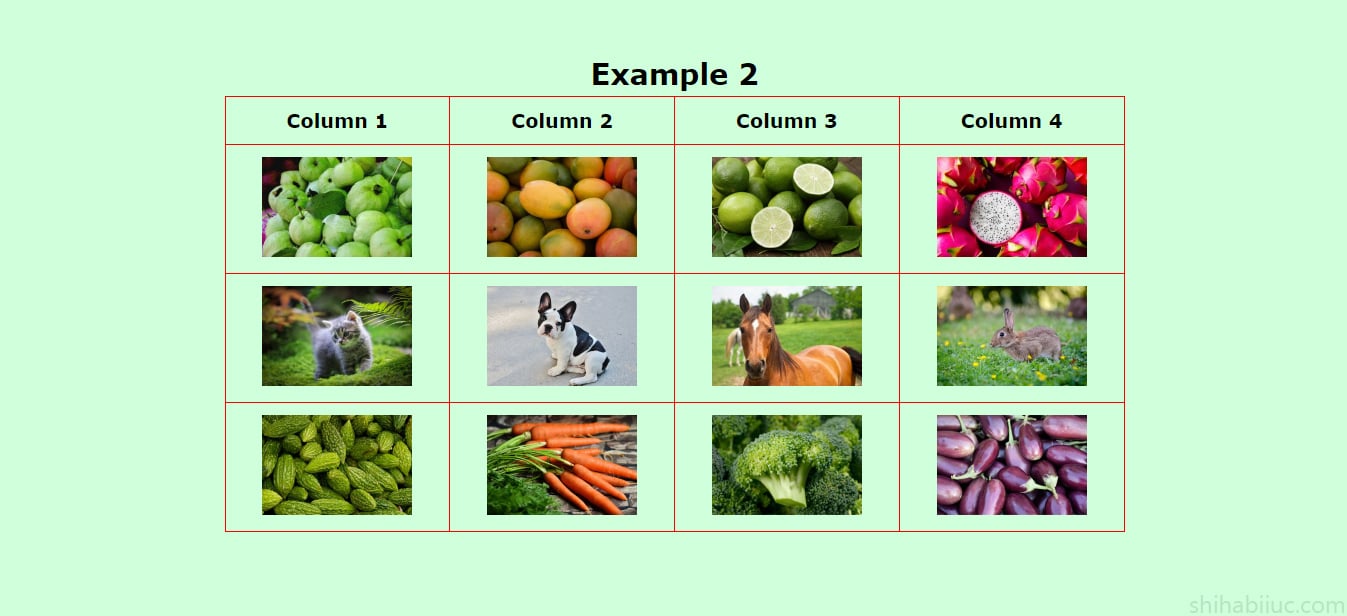
}In addition to the previous CSS (example 1), I only added one line of CSS to make all the texts & images center-aligned (as you see above). After adding table {text-align: center}, my table looks like the screenshot below.
Likewise, if you want to make all the images & texts right aligned, write the following line of CSS:
table {
  text-align: right;
}
With the above line of CSS, your table will look like the following screenshot below.
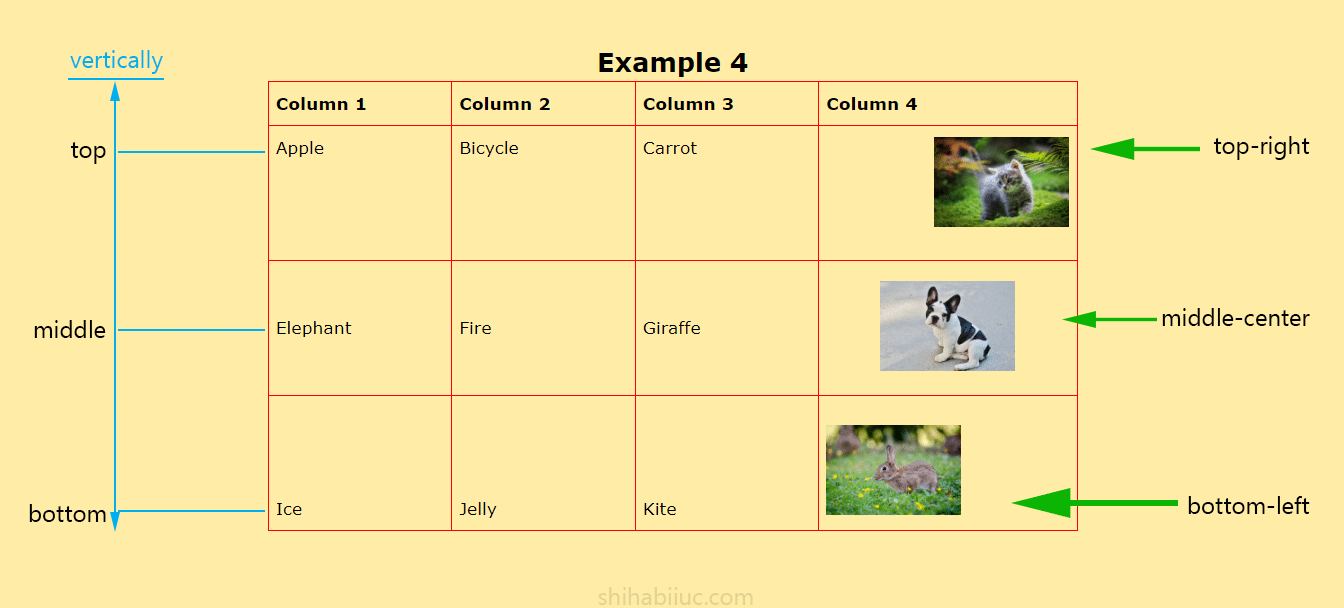
Now you know how to align the images & text horizontally. But if you want to learn how to align the images vertically, please see this section of another post.
Learn more about tables
- How to add borders in an HTML table?
- How to remove HTML table border?
- How to make a table rounded with CSS?
- How to fill a table cell with color in WordPress Gutenberg?
- How to center a table in HTML CSS?
- How to align table elements?
- How to add & align images inside an HTML table?
- TR, TH & TD workflow in an HTML table.
- HTML table background-color & background-image
- How to make a scrollable table in HTML CSS?
Learn more about images
- How to add images to an HTML table?
- How to create an image hover animation effect only with CSS?
- How to position text over an image with CSS?
- How to change an image on hover (CSS)
- Center an image in various directions & methods
- How to right-align an image in HTML CSS?
- How to create a hero banner image using HTML CSS?
- How to wrap text around an image in HTML?
- How to rotate text & images using CSS?
Conclusion
In this post, I showed you how to add images to the HTML table cells and align them. I gave you all the code, placeholder images, etc. Also, I created custom infographics to better explain the purpose. Even though the topic was simple. However, I tried to make it super simple so that beginners can also understand this post.
Therefore if you still have any questions, please let me know.

