To install WordPress on Bluehost, you have to add the domain as an addon. And then you have to install WordPress.
Your primary domain comes with WordPress preinstalled on Bluehost. But if you want to create another website on the same Bluehost account, you have to install WordPress manually.
How to install WordPress on Bluehost?
Our first step should be pointing the domain to Bluehost. To install WordPress on Bluehost, follow these steps with me:
1. Add Bluehost Nameservers to your domain
Before you install WordPress, make sure you have connected the domain to Bluehost. Note that you don’t need to install WordPress manually for the primary domain.
You only need to manually install WordPress for addon domains.
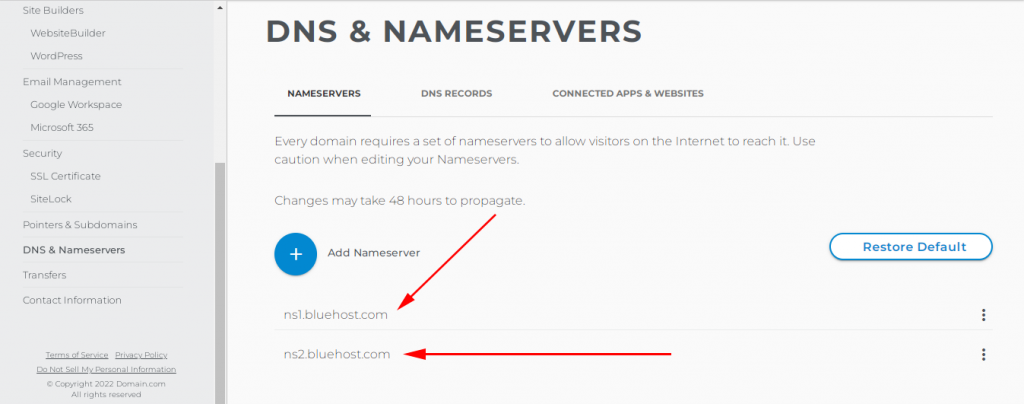
Anyways, first of all, login to your domain registrar and replace the Nameservers with Bluehost. If you don’t know, the following are the Bluehost Nameservers:
- ns1.bluehost.com
- ns2.bluehost.com
2. Assign the domain to Bluehost
In this second step, log in to your Bluehost account, and navigate to “Domains → Assign” and type the domain name in the field “Use a domain that is not already associated with your account.“
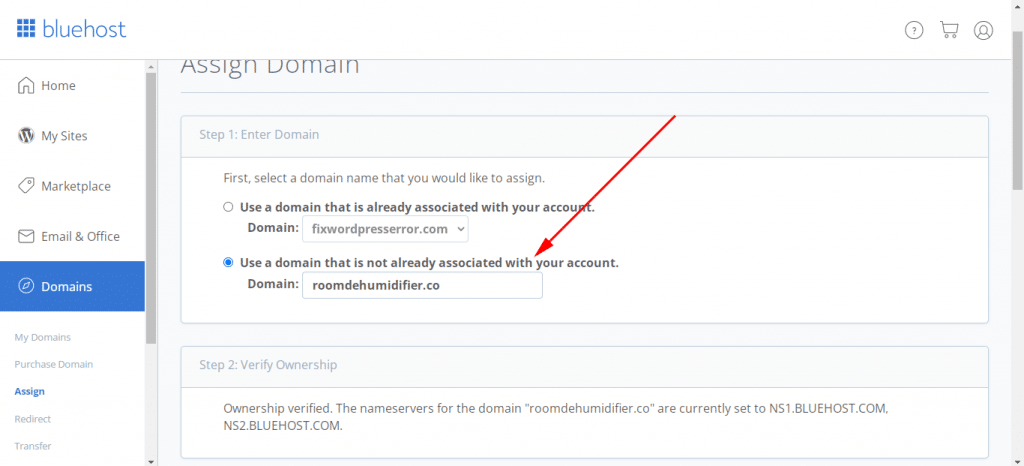
If the Nameservers have been propagated, the domain ownership will be verified. Otherwise, you have to wait until the propagation. The maximum time for the propagation is 48 hours but normally it takes 30 minutes in most cases.
Anyways, once you verify the ownership, leave all the fields as they are and hit the “Assign this Domain” button.
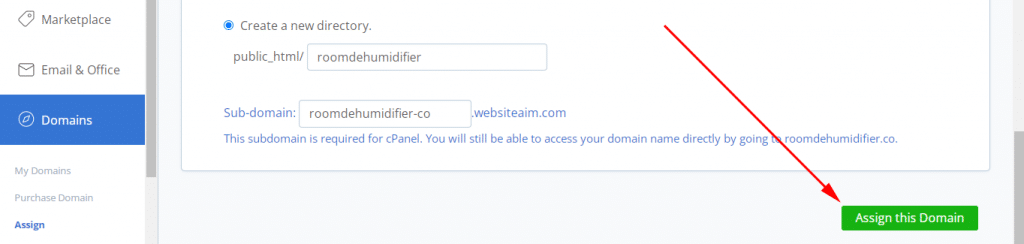
It may take 1 or 2 minutes to add this domain to your Bluehost account as an addon.
Please note that you can’t assign an addon domain to the “Basic Package” and you need at least a “Plus Package” on Bluehost. You can only add additional domains to the basic package as the “Parked Domain” and parked domain works as a copy of your primary domain.
3. Install WordPress to the addon domain
In this third step, navigate to “My Sites” and click the button “Create site.”

In the next window, choose “Limitless customization” and click “Get started.”

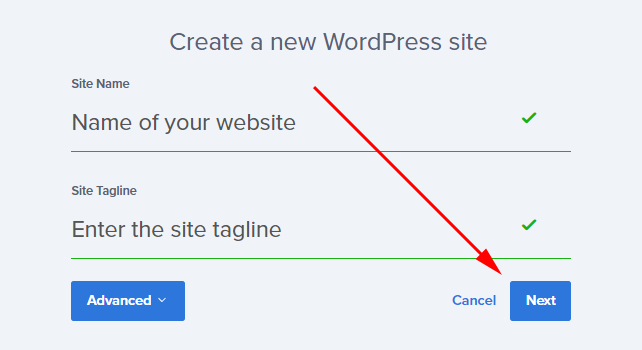
Next, enter the “Site Name & tagline” and click on “Next.” Note that you can change the site name & tagline later (on the WordPress dashboard).
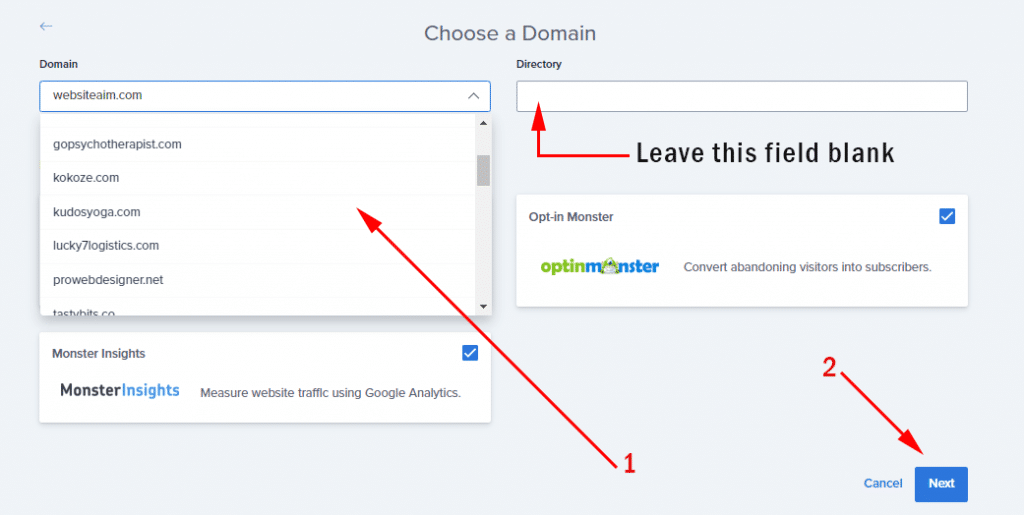
Next, choose the domain that you added earlier (from the dropdown). Leave the “Directory” field blank & click “Next.”
In the next window, Bluehost will ask you about the type of website. You can choose the type of your website such as blog, e-commerce, etc. But you will find an option to skip it. I always choose “skip this step” and you should too.

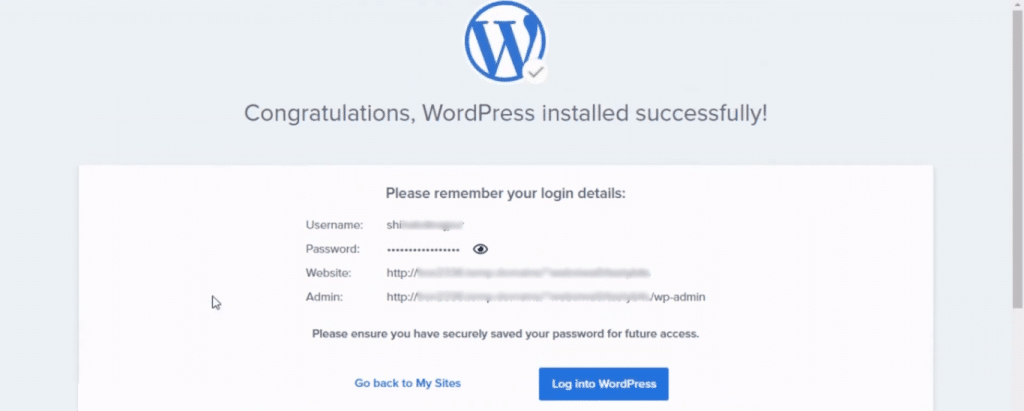
This is the last step. After you hit the “Skip this step” link, it will complete the process of WordPress installation.
And Bluehost will give you a confirmation about the installation (just like the screenshot below).
This is how you can install WordPress on Bluehost.
- How to transfer a website from one Bluehost account to another?
- Do you need SiteLock Security on Bluehost?
- Is Bluehost Codeguard Basic worth it?
- Which Bluehost plan is best for small businesses?
- How to cancel your Bluehost account?
- How to remove a website from your Bluehost account?
- How to point a domain to Bluehost?
- How to install WordPress on Bluehost?
- How to change the primary domain on Bluehost?
- Answers to the most common questions about Bluehost
- Bluehost alternatives
Conclusion
Now you know how to install WordPress on Bluehost. Also, you have video instructions along with all the steps mentioned step by step. Therefore if you still have any questions, let me know.