This post will show you how to create a testimonial slider using only HTML, CSS & Javascript. The full source is available to download. So you can upload this slider to your own projects.
A few keynotes about this slider:
- It’s fully mobile responsive.
- No extra framework or library is required.
- Equal height and no jumping when changing slides.
- Fast loading speed.
- GitHub repository & live preview.
- Beautifully designed.
Before we dive in, let’s see the testimonial slider in action. So you’ll know what to expect.
Create the testimonial slider step by step
Aspernatur modi quisquam autem illo sapiente reprehenderit. Tpsume dolor sit amet consectetur adipisicing elit. Consectetur voluptates sit consequuntur quasi eum veniam earum enim nam vitae dolore praesentium minima commodi. Voluptates sit consequuntur sit amet voluptates sit consequuntur.

CEO, American talcum powder
Lorem ipsum dolor sit amet consectetur adipisicing elit. Consectetur voluptates sit consequuntur quasi eum veniam aspernatur modi quisquam autem illo sapiente reprehenderit, earum enim nam vitae minima commodi dolore praesentium 💥

GM, British talcum powder
Consectetur voluptates sit consequuntur quasi eum veniam aspernatur modi quisquam autem illo sapiente reprehenderit

MD, German talcum powder
You can create a professional testimonial page only using HTML & CSS but in order to create a testimonial slider or carousel, you definitely need JavaScript. Otherwise, it won't be possible to change slides. However, you don't have to be a guru in JavaScript to create a slider.
I will show you how easily you can create it.
In my example, I have 3 slides or testimonials. But you may have more. You will see how to do that in a while. I want to show you the project setup.
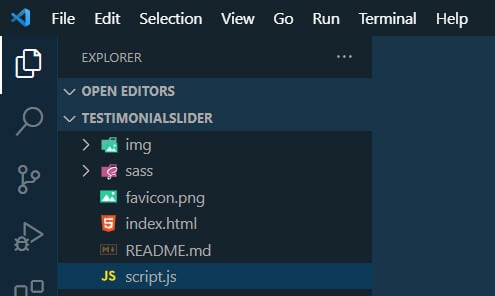
You may have a different project structure. The above is mine.
Please ignore the file "README.md" because it's not part of this testimonial as I have created it for my GitHub repository. Also, you can ignore the "sass" folder if you're not using SASS or SCSS. I have my stylesheet inside this folder (style.css). And all of my images such as customer photos live in the "img" folder. Finally, the "favicon.png" is a site icon (Favicon) that you can ignore as well.
See my code for the testimonial slider below.
HTML
<div class="slideshow-container">
  <div class="mySlides fade bg1">
    <div class="numbertext">1 / 3</div>
    <blockquote class="text">Aspernatur modi quisquam autem illo sapiente reprehenderit. Tpsume dolor sit amet consectetur adipisicing elit. Consectetur voluptates sit consequuntur quasi eum veniam earum enim nam vitae dolore praesentium minima commodi. Voluptates sit consequuntur sit amet voluptates sit consequuntur.</blockquote>
    <img src="./img/photo-3.jpg">
    <p class="designation">CEO, American talcum powder</p>
  </div> <!-- .mySlides -->
  <div class="mySlides fade bg2">
    <div class="numbertext">2 / 3</div>
    <blockquote class="text">Lorem ipsum dolor sit amet consectetur adipisicing elit. Consectetur voluptates sit consequuntur quasi eum veniam aspernatur modi quisquam autem illo sapiente reprehenderit, earum enim nam vitae minima commodi dolore praesentium 💥</blockquote>
    <img src="./img/photo-4.jpg">
    <p class="designation">GM, British talcum powder</p>
  </div> <!-- .mySlides -->
  <div class="mySlides fade bg3">
    <div class="numbertext">3 / 3</div>
    <blockquote class="text">Consectetur voluptates sit consequuntur quasi eum veniam aspernatur modi quisquam autem illo sapiente reprehenderit</blockquote>
    <img src="./img/photo-5.jpg">
    <p class="designation">MD, German talcum powder</p>
  </div> <!-- .mySlides -->
  <a class="prev" onclick="plusSlides(-1)">❮</a>
  <a class="next" onclick="plusSlides(1)">❯</a>
</div> <!-- .slideshow-container -->
<br>
<div style="text-align:center">
  <span class="dot" onclick="currentSlide(1)"></span>
  <span class="dot" onclick="currentSlide(2)"></span>
  <span class="dot" onclick="currentSlide(3)"></span>
</div>
If you want to add more slides, copy & paste the "mySlides" <div> how much time you need. And update the texts & images accordingly.
CSS
.slideshow-container {
  max-width: 900px;
  position: relative;
  margin: auto;
  padding: 0;
  border: 10px solid;
  border-image-slice: 1;
  border-width: 5px;
  border-image-source: linear-gradient(to left, #FF9800, #182860);
}
.slideshow-container .mySlides {
  min-height: 490px;
  display: none;
  padding: 30px 10px;
}
@media (min-width: 768px) {
  .slideshow-container .mySlides {
    min-height: 370px;
  }
}
@media (min-width: 768px) {
  .slideshow-container .mySlides {
    padding: 45px 35px;
  }
}
.slideshow-container .mySlides .numbertext {
  color: #f2f2f2;
  font-size: 12px;
  padding: 8px 12px;
  text-align: center;
}
.slideshow-container .mySlides .text {
  text-shadow: 1px 2px 3px rgba(0, 0, 0, 0.5);
  text-align: center;
  color: #FFFFFF;
  font-size: 18px;
  padding: 8px 4px;
}
@media (min-width: 768px) {
  .slideshow-container .mySlides .text {
    padding: 8px 12px;
  }
}
.slideshow-container .mySlides img {
  width: 60px;
  display: block;
  margin: 0 auto;
  border: 3px solid rgba(255, 255, 255, 0.4);
  border-radius: 24px 8px 24px 8px;
}
.slideshow-container .mySlides .designation {
  text-align: center;
  font-size: 14px;
  color: #000000;
}
.slideshow-container .bg1 {
  background: #42378f;
  background-image: url("../img/pen.png");
  /* fallback */
  background-image: url("../img/pen.png"), linear-gradient(315deg, #42378f 0%, #f53844 74%);
  background-repeat: no-repeat;
  background-position: top left;
  background-size: contain;
}
.slideshow-container .bg2 {
  background: #045de9;
  background-image: url("../img/pen-2.png");
  /* fallback */
  background-image: url("../img/pen-2.png"), linear-gradient(315deg, #045de9 0%, #09c6f9 74%);
  background-repeat: no-repeat;
  background-position: top left;
  background-size: contain;
}
.slideshow-container .bg3 {
  background: #7f53ac;
  background-image: url("../img/pen-3.png");
  /* fallback */
  background-image: url("../img/pen-3.png"), linear-gradient(315deg, #7f53ac 0%, #647dee 74%);
  background-repeat: no-repeat;
  background-position: top left;
  background-size: contain;
}
.slideshow-container .prev, .slideshow-container .next {
  cursor: pointer;
  position: absolute;
  top: 50%;
  width: auto;
  padding: 16px;
  margin-top: -22px;
  color: white;
  font-weight: bold;
  font-size: 18px;
  -webkit-transition: 0.6s ease;
  transition: 0.6s ease;
  border-radius: 0 3px 3px 0;
  -webkit-user-select: none;
     -moz-user-select: none;
      -ms-user-select: none;
          user-select: none;
}
.slideshow-container .next {
  right: 0;
  border-radius: 3px 0 0 3px;
}
.slideshow-container .prev:hover, .slideshow-container .next:hover {
  background-color: rgba(0, 0, 0, 0.8);
}
.dot {
  cursor: pointer;
  height: 15px;
  width: 15px;
  margin: 0 2px;
  background-color: #bbb;
  border-radius: 50%;
  display: inline-block;
  -webkit-transition: background-color 0.6s ease;
  transition: background-color 0.6s ease;
}
.active, .dot:hover {
  background-color: #717171;
}
/* Fading animation */
.fade {
  -webkit-animation-name: fade;
          animation-name: fade;
  -webkit-animation-duration: 1.5s;
          animation-duration: 1.5s;
}
@-webkit-keyframes fade {
  from {
    opacity: .4;
  }
  to {
    opacity: 1;
  }
}
@keyframes fade {
  from {
    opacity: .4;
  }
  to {
    opacity: 1;
  }
}
@media only screen and (max-width: 300px) {
  .prev, .next, .text {
    font-size: 11px;
  }
}
In the above CSS, you see that I have a few media queries to adjust mobile & large screen sizes. Also, I have a min-height for each slide (490px on mobile & 370px on large screens).
All your clients' testimonials will not have the same length. Some will be large and others will be short. But we don't want the slider to fluctuate or jump when they change. Rather we want all of them to be equal in height.
If you see that your largest testimonial is longer than mine, change the min-height property accordingly. And the same thing is true if your largest testimonial is shorter than mine.
JavaScript
let slideIndex = 1;
showSlides(slideIndex);

function plusSlides(n) {
  showSlides(slideIndex += n);
}

function currentSlide(n) {
  showSlides(slideIndex = n);
}

function showSlides(n) {
  let i;
  let slides = document.getElementsByClassName("mySlides");
  let dots = document.getElementsByClassName("dot");
  if (n > slides.length) {slideIndex = 1}
  if (n < 1) {slideIndex = slides.length}
  for (i = 0; i < slides.length; i++) {
    slides[i].style.display = "none";
  }
  for (i = 0; i < dots.length; i++) {
    dots[i].className = dots[i].className.replace(" active", "");
  }
  slides[slideIndex-1].style.display = "block";
  dots[slideIndex-1].className += " active";
}
The above JavaScript is independent and does not depend on other frameworks or libraries such as jQuery, Slick, Glide, etc.
You see that I have 3 functions that handle the sliding behavior. Initially, we have the slides hidden by "display: none" and show the appropriate slides using the 3rd function.
slides[slideIndex-1].style.display = "block"Download this testimonial slider code
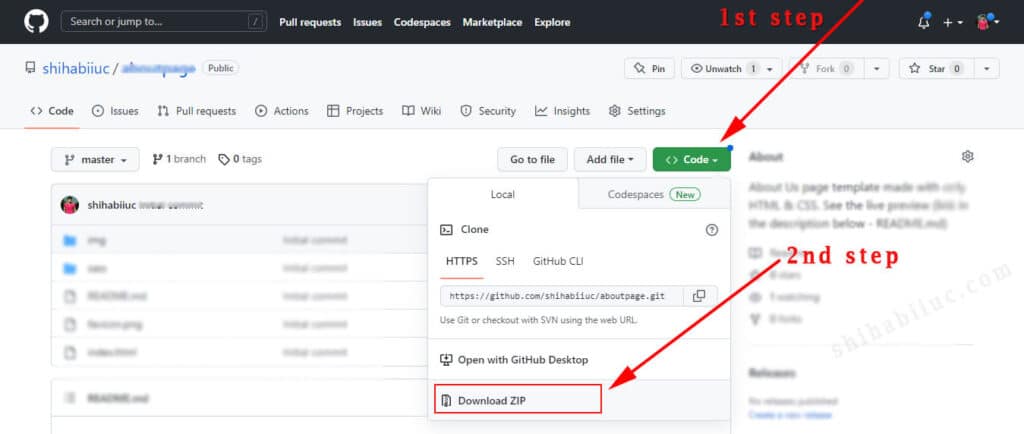
You can take my code from above (HTML, CSS & JavaScript). But if you want, you can also download the entire project from my GitHub repo.
If this is your first time using GitHub, see the picture below to learn how to download it.
Build HTML CSS projects
This testimonial slider is easy to understand and use. Also, it's professional. You can customize and use it on your own projects. You're also free to convert it to WordPress.
Now it's your turn.
Let me know how easy it was to use this testimonial slider. Do you want me to create this slider as a WordPress plugin?

