A landing page is a great opportunity to get leads and make sales. It also helps the visitors to navigate through different content of your website. Your prospects get a clear idea about what you do and why they should interact with you.
In this post, I will show you how to create a perfect landing page using only HTML, CSS & a small amount of JavaScript. I also have added a link to download the full template.
Before you get started, see the live demo of the finished page that you’re going to build.
Did you like it (live preview)? Let’s get started.
Different ways to create a landing page
There are different ways to create a landing page. For example, Unbounce, WordPress, Thrive Architect, Leadpages, and many more. But most of them require spending money to use and the cost is not so cheap.
But the landing page that you’re going to build in this post is completely free. It will work in the same process as other premium landing page builders. Perhaps, you’ll get better performance (loading speed) using this static template compared to the others.
Note that you need an account for an email automation platform like MailChimp, ActiveCampaign, Drip, Aweber, etc. In this post & template, I am using MailChimp but you can use whatever you like. MailChimp is free for up to 2000 (two thousand) subscribers.
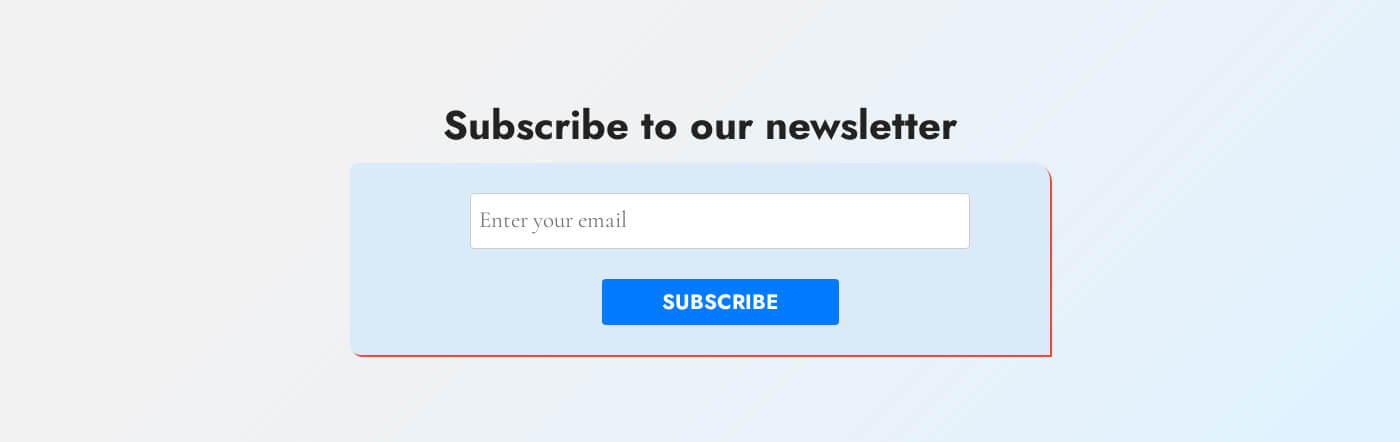
You need the account in order to collect emails as you see in the screenshot above.
Why do people create landing pages?
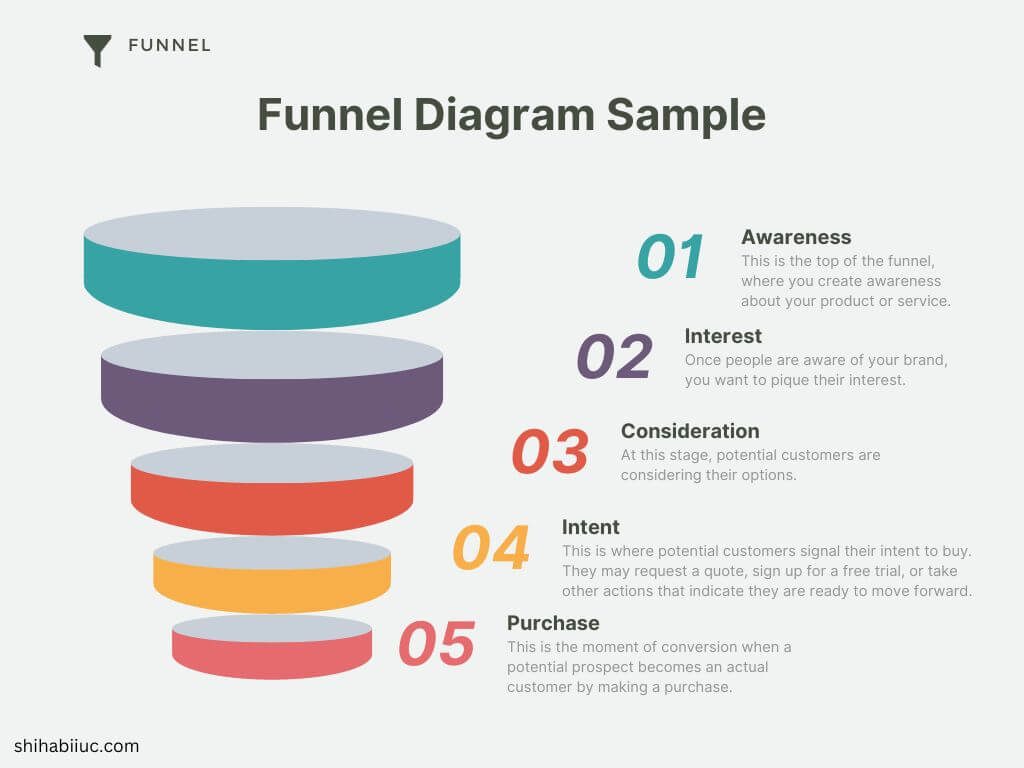
There are different goals for a landing page and it depends on how you want to make it work. Most commonly, a landing page is used to collect leads such as email, phone, and other information. So you contact the prospects or send newsletters. This type of process helps you to convert more and make more sales.
In the screenshot below, see a diagram of a simple sales funnel.
But why people will share their contact information with you?
Well, this could happen for value exchange. For example, giving a freebie e.g. downloadable digital assets. Also, they can share their contact info if they trust you or if they are interested in buying your products or services.
There are different reasons for people interact with you. It depends on the type of business, product price, usability, etc. Most importantly, you have to figure this out depending on your business.
After getting the leads, business owners keep track of every follow-up information. Lastly, it helps them to make more sales.
How do you can send people to your landing page?
During the last decade of my web development experience, I saw that most clients only focus on the design aspect. But they don’t focus on how to send a huge traffic to their landing pages. As a result, they end up with very little lead and almost no sales.
But if you’re serious about your business, you do have to send huge & targeted traffic to your lead page.
Now the problem is it’s not so easy. However, there are two main routes that you can use to get traffic:
- Creating valuable & helpful content and getting organic traffic
- Paid advertisements
I am not going into too many details as this will be off-topic for this post. But you get the idea.
Okay, discussed a lot. Now let’s build the actual template.
How to create a static & working landing page?
As I mentioned earlier in this post, there are many different ways to create a landing page. Here I am only using HTML, CSS/SCSS & pure JavaScript. If you don’t know JavaScript, you can still follow me along. I only used it for the mobile dropdown navigation, finding the scroll position & accordion.
For the animation, I used CSS keyframes. You don’t need any frameworks or libraries. Everything is vanilla in the template. So you can digest very easily and make necessary edits.
Project structure
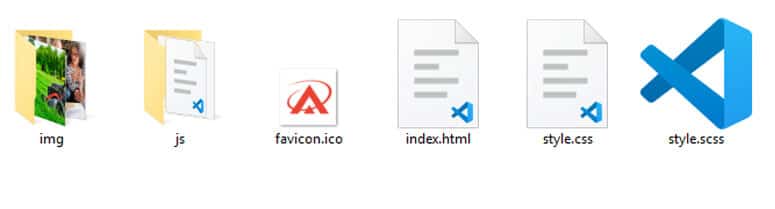
I created a folder on my computer named “landing-page” and this is the root folder.
Also, I created two other folders in the root such as “img & js” and these two contain images and javascript files respectively. The “img” folder also contains another folder named “social-icons” that contains the social icons.
Lastly, I have a favicon.ico, index.html, style.css & style.scss in the root folder. Favicon is your website identity (site icon/tab icon).
In the index.html file, I wrote the HTML. You can either use style.css or style.scss. If you know SASS, you can use the style.scss and if you don’t know, you can use the plain style.css.
HTML
For the HTML, I have the following markup:
<!DOCTYPE html>
<html lang="en">
<head>
  <meta charset="UTF-8">
  <meta name="viewport" content="width=device-width, initial-scale=1.0">
  <link rel="shortcut icon" href="favicon.ico" type="image/x-icon">
  <!-- GOOGLE FONTS -->
  <link rel="preconnect" href="https://fonts.googleapis.com">
  <link rel="preconnect" href="https://fonts.gstatic.com" crossorigin>
  <link href="https://fonts.googleapis.com/css2?family=Cormorant&family=Jost:wght@700&display=swap" rel="stylesheet">
  <!-- GOOGLE FONTS END -->
  <link rel="stylesheet" href="style.css">
  <title>Landing Page Template</title>
</head>
<body>

  <!-- from header to footer, all content goes here -->

  <script src="js/script.js"></script>
</body>
</html>
You can see the full HTML file after you download the template. In the above HTML boilerplate, I added two Google fonts.
Anyway, after that, I added the link to my style.css inside the <head> tag. And before the closing </body> tag, I added the link to my JavaScript file. That’s it.
You can see the full HTML after downloading the template or in this link.
CSS
If I paste the CSS here, this post will be quite long. You can see it here.
I added all the necessary vendor prefixes for different browsers. Also, I made the template mobile responsive. So you’re good to go.
I think all of you know HTML & CSS. My cat also knows them very well as he always follows me from different directions and sees me writing code.
But if you need any clarification, please feel free to ask.
Javascript
// NAVIGATION MENU
document.addEventListener('DOMContentLoaded', function() {
  const hamburgers = document.querySelectorAll('.hamburger')
  const mobileNavs = document.getElementsByClassName('nav-links')[0]

  for (var i = 0; i < hamburgers.length; i++) {
    hamburgers[i].addEventListener('click', function() {
      this.classList.toggle('active')
      mobileNavs.classList.toggle('active')
    })
  }
})

// ANIMATE WHEN VIEWPORT COMES TO THE SCREEN
function handleIntersection(entries, observer) {
  entries.forEach((entry) => {
    if (entry.isIntersecting) {
      entry.target.classList.add('animate')
      observer.unobserve(entry.target)
    }
  })
}
const observer = new IntersectionObserver(handleIntersection, {
  root: null,
  rootMargin: '0px',
  threshold: 0.5,
})
const animatedElements = document.querySelectorAll('.animated-element');
animatedElements.forEach((element) => {
  observer.observe(element)
})

// ACCORDION
var accdr = document.getElementsByClassName("accordion")
var i
for (i = 0; i < accdr.length; i++) {
  accdr[i].addEventListener("click", function() {
    this.classList.toggle("active")
    var content = this.nextElementSibling
    if (content.style.maxHeight) {
      content.style.maxHeight = null
    } else {
      content.style.maxHeight = content.scrollHeight + "px"
    }
  })
}
The first chunk of the above JS is for the navigation menu.
The second part finds the CSS .animated-element class in the DOM and adds another .active class when it comes to the viewport. I am doing this because of my Keyframe animation. If you don’t know, it starts to animate as soon as the page loads. But I want to prevent the default behavior and only want to animate when it comes to the viewport.
The last part is for the “Frequently Asked Questions” (FAQ) section. It’s actually an accordion. You can also create an accordion without JavaScript. However, to make it more UX-focused, I used a little JavaScript. You can learn more about creating different types of accordions in this post.
I wrote a lot of comments on the actual template file (script.js). So you’ll understand the code very easily (if you’re familiar with JavaScript).
Download the template
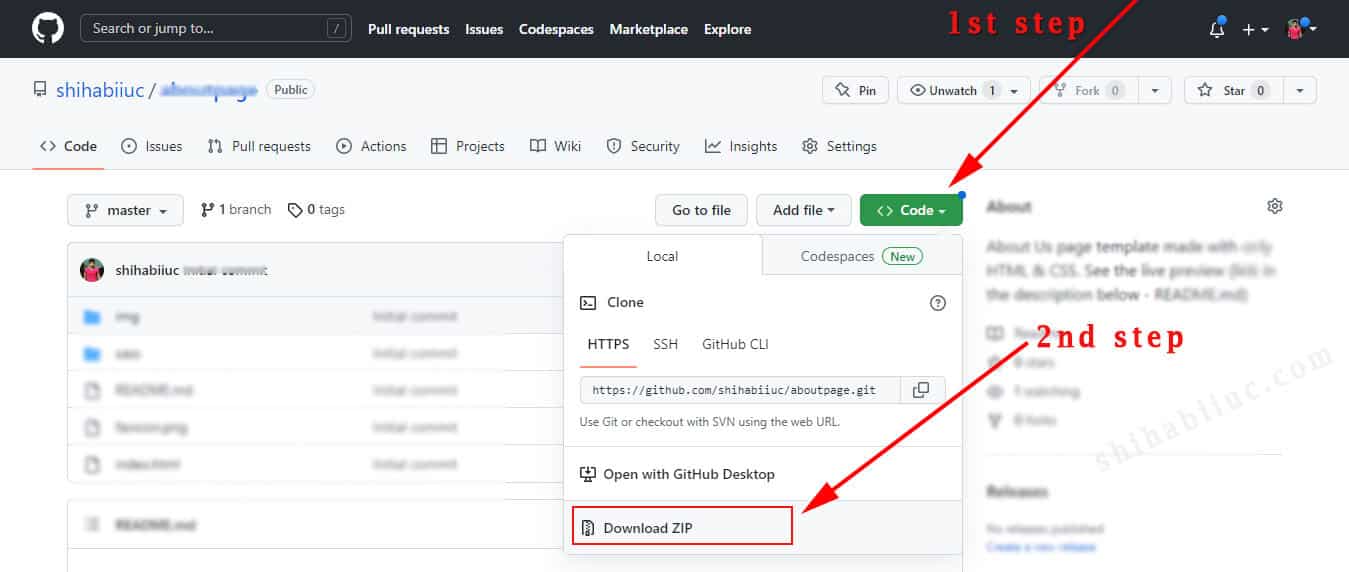
I gave you a clear overview of the landing page & the template. You can download it from the link below.
This link will take you to my GitHub Repository. If you are new to web development, see the screenshot below. It shows how to download a repository.
Build HTML CSS projects
Conclusion
In this post, I explained different ways to create a landing page, why people create it, how to send traffic to your landing page, etc. Also, I showed how I created this landing page template. And gave you the link to download the full template that you saw in the live preview.
After you download this template, open it in any code editor and make the necessary improvements. If you have any questions, please feel free to ask.
If you need help creating a customized landing page based on your unique business goal, you can contact me.