An HTML boilerplate is the startup code of your projects. These boilerplates are a very basic skeleton & code sample that is not too educational. You don’t have to memorize these. So you can copy & paste a boilerplate template to your project and start writing your code to make a static website.
Alternatively, you can generate boilerplate code using the shortcut key in your text editor.
However, I have listed different types of HTML boilerplates. You can download or copy them with one click. See the “Table of Contents” to find your desired project type and click any of the links to go to the respective boilerplates.
HTML boilerplates
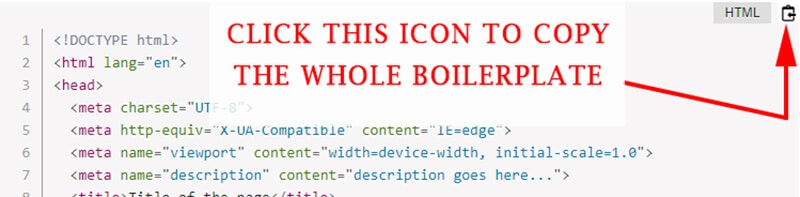
Click the top-right icon to take a copy of the code (as you see in the screenshot below).
1. Very basic boilerplate
<!DOCTYPE html>
<html lang="en">
<head>
  <meta charset="UTF-8">
  <meta http-equiv="X-UA-Compatible" content="IE=edge">
  <meta name="viewport" content="width=device-width, initial-scale=1.0">
  <meta name="description" content="description goes here...">
  <title>Title of the page</title>
</head>
<body>
	<section>
		<h1>Start your project here</h1>
	</section>

</body>
</html>
2. Include a Favicon to the boilerplate
Assuming you have the “favicon.ico” in your root directory. Not to mention, you can also use PNG or JPG for the favicon (favicon.png/favicon.jpg).
<!DOCTYPE html>
<html lang="en">
<head>
  <meta charset="UTF-8">
  <meta http-equiv="X-UA-Compatible" content="IE=edge">
  <meta name="viewport" content="width=device-width, initial-scale=1.0">
  <meta name="description" content="description goes here...">
	<link rel="shortcut icon" href="favicon.ico">
  <title>Title of the page</title>
</head>
<body>
	<section>
		<h1>Start your project here</h1>
	</section>

</body>
</html>
3. Add an external stylesheet to the boilerplate
Assuming you have a stylesheet named “style.css” in the root directory. If the file lives in the “css” folder then replace the path with “css/style.css”
<!DOCTYPE html>
<html lang="en">
<head>
  <meta charset="UTF-8">
  <meta http-equiv="X-UA-Compatible" content="IE=edge">
  <meta name="viewport" content="width=device-width, initial-scale=1.0">
  <meta name="description" content="description goes here...">
	<link rel="stylesheet" type="text/css" href="style.css" >
  <title>Title of the page</title>
</head>
<body>
	<section>
		<h1>Start your project here</h1>
	</section>

</body>
</html>
4. Add jQuery to the boilerplate

If jQuery has an immediate impact on your page or UI (such as a slider, or carousel) then it’s better to include jQuery in the <head> tag. Otherwise, place it before the </body>
<!DOCTYPE html>
<html lang="en">
<head>
  <meta charset="UTF-8">
  <meta http-equiv="X-UA-Compatible" content="IE=edge">
  <meta name="viewport" content="width=device-width, initial-scale=1.0">
  <meta name="description" content="description goes here...">
	<script src="https://ajax.googleapis.com/ajax/libs/jquery/3.6.0/jquery.min.js"></script>
  <title>Title of the page</title>
</head>
<body>
	<section>
		<h1>Start your project here</h1>
	</section>

</body>
</html>
5. Add Bootstrap to the boilerplate

This is the current version (5.2) of Bootstrap. I will update this boilerplate as soon as they release a new version.
<!DOCTYPE html>
<html lang="en">
<head>
  <meta charset="UTF-8">
  <meta http-equiv="X-UA-Compatible" content="IE=edge">
  <meta name="viewport" content="width=device-width, initial-scale=1.0">
  <meta name="description" content="description goes here...">
	<link href="https://cdn.jsdelivr.net/npm/[email protected]/dist/css/bootstrap.min.css" rel="stylesheet" integrity="sha384-iYQeCzEYFbKjA/T2uDLTpkwGzCiq6soy8tYaI1GyVh/UjpbCx/TYkiZhlZB6+fzT" crossorigin="anonymous">
  <title>Title of the page</title>
</head>
<body>
	<section>
		<h1>Start your project here</h1>
	</section>

	<script src="https://cdn.jsdelivr.net/npm/[email protected]/dist/js/bootstrap.bundle.min.js" integrity="sha384-u1OknCvxWvY5kfmNBILK2hRnQC3Pr17a+RTT6rIHI7NnikvbZlHgTPOOmMi466C8" crossorigin="anonymous"></script>
</body>
</html>
6. Add Twitter card to the boilerplate
If you want to customize the heading (title), text (excerpt), and image (thumbnail), use these meta tags in your HTML. You will see the effect after sharing the page on Twitter.
<!DOCTYPE html>
<html lang="en">
<head>
  <meta charset="UTF-8">
  <meta http-equiv="X-UA-Compatible" content="IE=edge">
  <meta name="viewport" content="width=device-width, initial-scale=1.0">
  <meta name="description" content="description goes here...">
	<!-- Twitter Card -->
	<meta name="twitter:card" content="summary_large_image">
	<meta name="twitter:site" content="@your_twitter_username">
	<meta name="twitter:creator" content="@your_twitter_username">
	<meta name="twitter:title"
		content="Your customized title goes here...">
	<meta name="twitter:description"
		content="Your customized description goes here...">
	<meta name="twitter:image" content="images/social-media-thumbnail.jpg">
	<!-- don't forget to replace the image path -->
	<!-- Twitter Card End -->
  <title>Title of the page</title>
</head>
<body>
	<section>
		<h1>Start your project here</h1>
	</section>

</body>
</html>
7. Add LinkedIn & Facebook cards to the boilerplate
If you want to customize the heading (title), text (excerpt), and image (thumbnail), use these meta tags in your HTML. You will see the effect after sharing the page on LinkedIn and Facebook.
<!DOCTYPE html>
<html lang="en">
<head>
  <meta charset="UTF-8">
  <meta http-equiv="X-UA-Compatible" content="IE=edge">
  <meta name="viewport" content="width=device-width, initial-scale=1.0">
  <meta name="description" content="description goes here...">
	<!-- Linkedin & Facebook Card -->
	<meta property='og:title'
	content="Your customized title goes here..." />
	<meta property='og:image' content="images/social-media-thumbnail.jpg" />
	<!-- don't forget to update the image path -->
	<meta property="og:type" content="website" /><!--  og:type is only for Facebook-->
	<meta property='og:description'
	content="Your customized description goes here..." />
	<meta property='og:url' content="the live URL of the page goes here..." />
	<!-- Linkedin Card End -->
  <title>Title of the page</title>
</head>
<body>
	<section>
		<h1>Start your project here</h1>
	</section>

</body>
</html>
8. Add a Google font to the boilerplate
I added Roboto font (300, 400, 700) as an example. But you can add more and make font pairs. After adding any fonts to your HTML template, you can apply them using the “font-family” property (on your stylesheet).
<!DOCTYPE html>
<html lang="en">
<head>
  <meta charset="UTF-8">
  <meta http-equiv="X-UA-Compatible" content="IE=edge">
  <meta name="viewport" content="width=device-width, initial-scale=1.0">
  <meta name="description" content="description goes here...">
	<link rel="preconnect" href="https://fonts.googleapis.com">
	<link rel="preconnect" href="https://fonts.gstatic.com" crossorigin>
	<link href="https://fonts.googleapis.com/css2?family=Roboto:wght@300;400;700&display=swap" rel="stylesheet">
	<!-- font-family: 'Roboto', sans-serif; -->
  <title>Title of the page</title>
</head>
<body>
	<section>
		<h1>Start your project here</h1>
	</section>

</body>
</html>| Learn & practice CSS with real-world examples |
|---|
| Learn basic CSS from the ground up. |
| Build real projects in HTML CSS. |
Build HTML CSS projects
Conclusion
HTML boilerplates are basic and reusable codes. You don’t need to memorize or type these codes. Also, these are not too educational. You can also generate boilerplate codes directly from your code editor. However, I listed a couple of HTML boilerplates above. You can use any one of them as per your need.