After completing the design & development of your website, make sure to do the following things before launching the website. If you don’t know, more than 90% of new websites get zero traffic. So it will be valueless if no one visits your website.
No matter how attractive the design you made or implemented cool features, you need people to interact with your website.
What to do before launching a website?
In most cases, the websites are Google-driven businesses. So you have to make sure it complies well with Google so they can crawl & index it properly. Also, there are some other important factors that I will describe one by one.
Connect your website with the Google Search Console
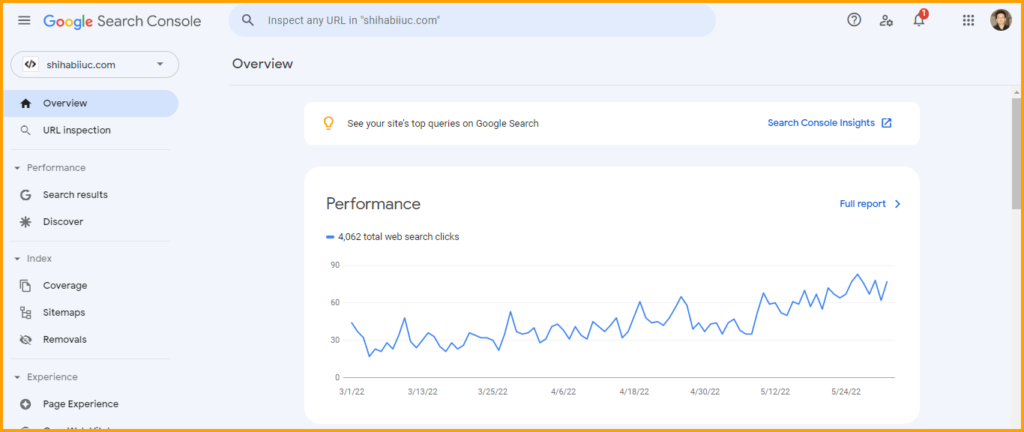
Google Search Console is one of the most effective and must-have tools for any kind of website. It allows you to submit your website to Google, and collect a hand full of real data.
To start a website effectively, you need to connect your website with Google Search Console, submit the sitemap, and familiarize yourself with it.
This is the first item on the checklist for launching a website. And it’s free. For more information about Google Search Console and the website submission process, see how to submit a website to Google Search Console for indexing.
How does Google Search Console help your website?
- You can submit your website to Google using it.
- It allows you to submit the sitemap.
- You can see the performance of your website.
- It lets you inspect URLs and you can request to crawl a certain page.
- You can see how your website appears in search results. It’s real field data that shows you the total number of clicks, impressions, click-through rate, and your position for each keyword and URL.
- Find your top-performing pages and keywords.
- It notifies you if there are any coverage issues detected and it helps you to fix the issues.
- Your users’ experience on mobile and desktop.
- It shows you the core web vital reports and a lot more.
All we have to start from scratch and create the content from our keyword research & assumption. However, we don’t know which content & keyword drives the most traffic to our websites.
And this is where the Google Search Console becomes handy. After you connect it with your website, you’ll get real-world data and from there you can make wise decisions to grow & push your website to the next level.
Create a Google Analytics property
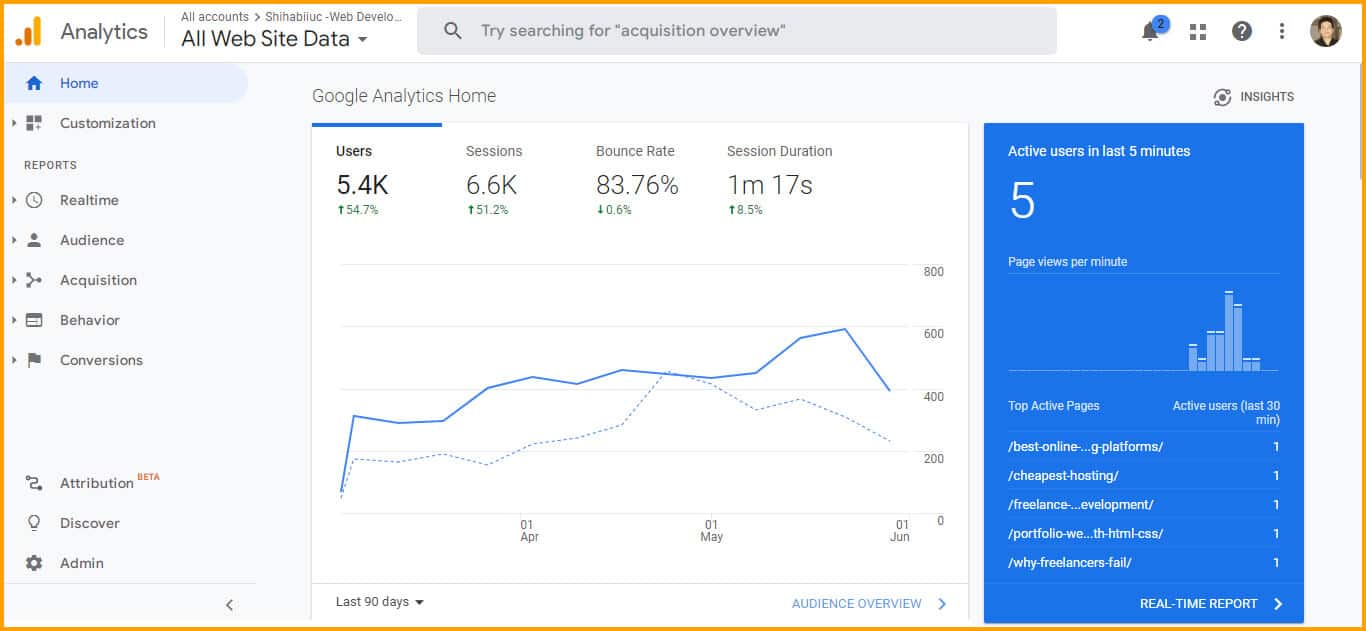
Google Analytics is also a free tool that allows you to keep track of your visitors. It also gives you the ability to monitor traffic in real-time and more.
Before you launch a website, create a new property for it so you can monitor all the traffic-related data. If this is your first time with Google Analytics, check another help post that shows you how to create a Google Analytics property.
After you create the Analytics property, you can connect your website using the tracking code or using any plugin (for WordPress users) such as Site Kit & MonsterInsights.
How does it help your website?
- It shows you the total number of visitors (users) on your website for a certain date range, total sessions, percentage of bounce rate, and average session duration.
- You can see the traffic sources of your website such as organic, referral, and social traffic.
- See the locations of the users (Sessions by country). That means you can see how much traffic comes from which country.
- You can see how many percentages of the users visited your website on desktop, mobile & tablet.
- Real-time visitor monitoring and which pages they are visiting at the current time.
- You can see demographic-related information such as the gender of your website visitors, their age, and a lot more.
All this information helps you to get a clear picture of your website. And it helps you to get field data about your visitors.
So it gives you all sorts of information about your audience that you can use to create more content for a specific group of people and grow your website faster.
Setup SEO tool (on-page)
SEO refers to search engine optimization. So doing SEO means optimizing your website for search engines such as Google, Bing/Yahoo, Yandex, etc.
An SEO tool generally refers to the plugins (WordPress) that can perform automation to optimize the site. Such as Yoast, Rank Math, All in One, etc.
There are other types of SEO tools such as SEMrush, Ahrefs, Moz, Ubersuggest, etc. These are paid tools (to get the most of them). We don’t need these tools to launch a website. These tools are mainly related to “Off-page SEO” such as keyword research, finding backlink opportunities, etc. However, I am not focusing on any of these tools. I will only focus on those things that you need to accomplish before launching a website.
If you’re creating a static website, then you have to manually add meta tags such as meta title, meta description, (meta keywords don’t have any value), properly format the headings, etc.
But if you’re a WordPress user, you can use any of the SEO plugins that I mentioned above (Yoast, Rank Math, All in One).
How does it (the SEO tool) help your website?
- It automates many of your SEO-related tasks.
- Creates sitemap automatically and updates it as soon you create a new page or post.
- It also helps you to verify your website (using an HTML tag) in Google Search Console.
- An SEO tool analyzes your website and shows readability & SEO score.
- It suggests improving your content so you can rank higher.
- SEO tools also protect your content. Therefore, if someone steals your content, you will get the rank for it. But you have to set up the “RSS” properly.
There are lots of other benefits. If you want to implement all this work manually will take huge time and effort. So it also saves time in the long run.
Any of these plugins will help you with “On-page SEO.” If you don’t know how to set up & configure them properly, I can help you one step further (free). You can download my Yoast SEO settings and import them to your WordPress website within a minute.
Just open the downloaded file in a text editor and take a copy of everything you see on the file.
Now login to your WordPress dashboard, navigate to “Yoast SEO » Tools » Import and Export,” paste everything on the field, and hit the “Import Settings” button.
These settings will save you one hour of work even if you’re an expert. It does not mean that you have to use my settings. You can use any one of the SEO plugins and set it up yourself. But whatever you do, make sure you implement “On-page SEO” before you launch the website.
Compress images for better performance

Compressing images simply means reducing the size. You may think that it will reduce the quality but not.
There are a couple of ways you can compress the images. If you’re building a static website, you can use online free tools. There are lots of them but if you ask me, I would recommend TinyJPG/TinyPNG. These two are the same website/tool and both do the same thing. That means you don’t need to go to TinyPNG to compress the JPG file.
However, if you’re a WordPress user, you can use any image compression plugin like Smush. It automatically compresses all the images that you have already uploaded. And also it will compress any images once you upload them to the media library.
How does it help your website?
- It increases the performance of your website (improves website loading speed).
- Your website visitor can see the page quickly.
- Saves bandwidth for your visitors.
- It helps you (indirectly) to reduce the bounce rate.
- It decreases the database size in the long run.
Website images are a significant factor when it comes to loading speed. Large images can slow down a website significantly.
By compressing them properly, you can display the same quality images at the lowest time possible. If an image takes 4/5 seconds to load, many of your audience will not bother visiting the page. So it’s really important to compress all the large images before you launch a website.
Also, you don’t need to load all the images as soon as a page loads. For example, we don’t need to load images from the bottom until the visitors reach the bottom of the page. That means, we only need to load images when it’s necessary. And this is what you can do by activating the lazy loading feature.
Implement caching and CDN
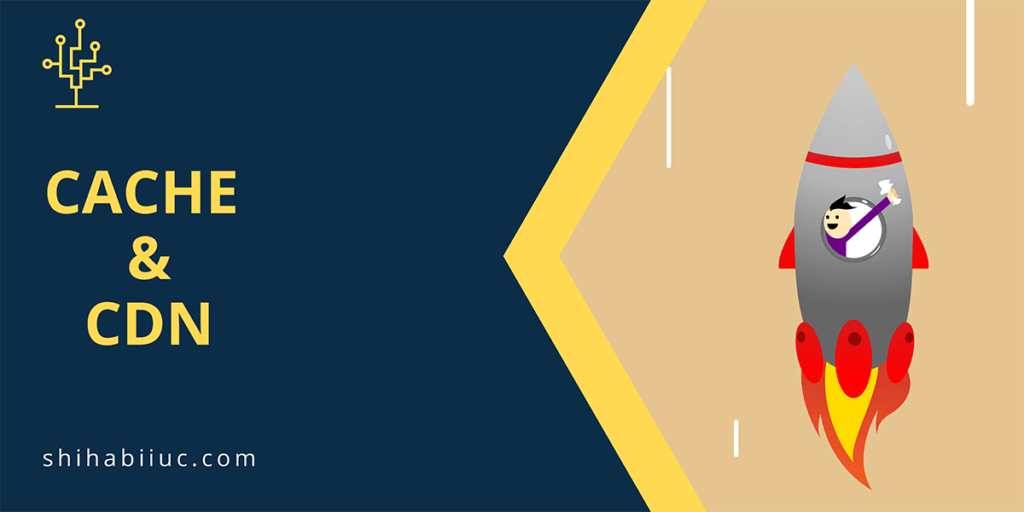
Without the technical jargon, if we think of caching, it simply means storing the website data in a temporary memory such as RAM (random access memory) or where your browser is running.
Caching helps your website load faster without making the client-side request over & over. That is why it’s very important to implement the caching features as soon as you start a website.
For example, if someone visits any of your web pages, their browser will take a copy of all the CSS. And if the same person visits another page on your website, they don’t need to download the same CSS again. Their browser will use the previously downloaded CSS to display the entire website.
On the other hand, CDN refers to the “Content Delivery Network.” Think of the CDN as the multiple branches of the main head office.
For example, you hosted your website in a certain hosting company that is located in New York City. Now imagine someone is trying to browse your website from Vancouver. That means your website is 5,000 Kilometers away from the visitor’s browser. And it will take a longer time to get a response from that person.
But it would be nice if your hosting has another branch in Vancouver, isn’t it? And this is where the CDN comes into play.
The CDN has many different servers in various locations all around the world. It serves static assets from the visitors’ nearest locations.
How do caching & CDN help your website?
- Caching decreases the website loading time.
- Your visitors get an early response both for caching & CDN.
- Some CDN providers also protect your website from cyber criminals & DDoS attacks.
There are lots of free and premium caching plugins that you can use. However, to start a website most of you may don’t need premium caching plugins. If you ask me, I would suggest going with any of the free plugins and testing the output. Such as WP Fastest Cache, W3 Total Cache, WP Super Cache, etc. But if you’re willing to use a premium caching plugin, WP Rocket is the best in my opinion. It will cost you $49 per year.
Some of the caching plugins also come with CDN integration. Otherwise, you can use Cloudflare as your go-to tool. It also has a free version that works well for small websites.
Just now you came across a lot of information regarding the caching & benefits of CDN. Do you still think of publishing your website without having these two features? I don’t know about you but I will never launch a website without integrating these two.
Prevent spammers and bot commenting

After you launch a website, the spammers and bots will try to make spam comments. And that’s why you have to be proactive before you officially launch the website.
The spammers don’t read the content on your website and mostly those are bots. They try to write the same comment on hundreds of posts and where they find commenting options.
That means those are irrelated comments. However, a few of them may look slightly related but actually, they are not.
Sometimes it’s hard to sort out the spam comments. So you need an automated system that will detect those spammers and put those comments in the spam folder.
Preventing those spammers is super important. Because those are not only irrelated to your topic but also contain bad links. And their awkward links can harm your website and lead your visitors to an unexpected situation.
How spam protection help your website?
- Your real visitors stay safe as well as your website.
- It prevents inserting bad links on your posts, pages, and media files.
- Automated spam protection saves lots of your time.
- It increases the trust and value of your website.
There are a couple of ways to prevent spammers. And most of them have their unique system and database. There are a couple of options such as Akismet Spam Protection, FireWall by CleanTalk, etc.
But in my personal experience, I found another free plugin that detects spam comments like a charm. It’s called Antispam Bee and it’s very lightweight. Most importantly, it’s very easy to set up. You don’t need any manual configuration or getting an API to make it work. All you need is to install and activate the plugin. And it will do the job precisely. See more about preventing spam comments using Antispam Bee.
Whichever option you choose, make sure you’re preventing the spam bots before you launch the website. Otherwise, both the website and the visitors may suffer.
Implement backup & restore feature
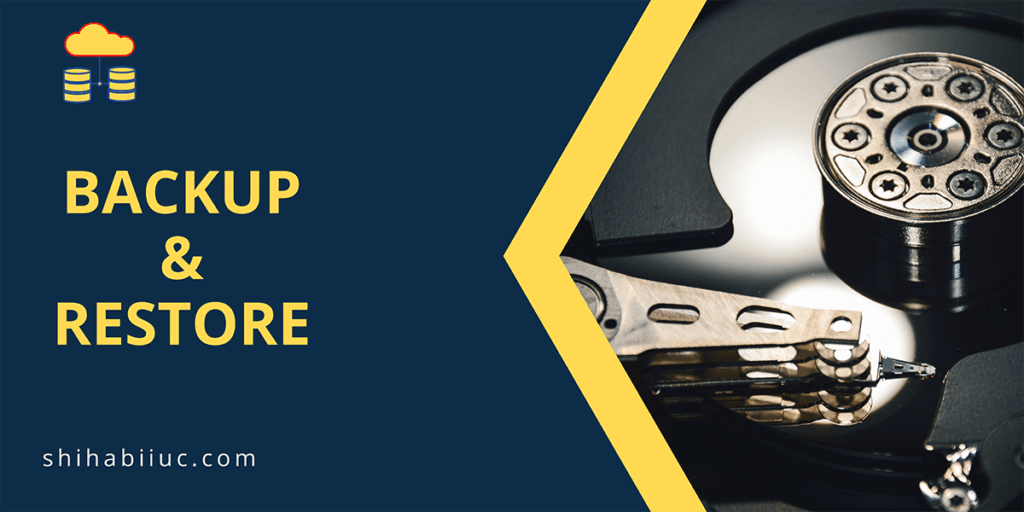
Human makes mistakes and website owners are no different. A single mistake can remove a certain number of pages, posts, and even the whole website.
On the other hand, there are attackers all over the internet. As a website owner, you may have implemented security features. All after that, still there is a chance of becoming a victim. And this is where the backup & restore system can save the day.
How can a backup system help you?
- You can get back your lost website with just a few mouse clicks.
- The backup system keeps a complete copy of your entire website including files, folders, images, themes, plugins, databases, and everything in between.
- You can restore your website if someone hacked it.
- You can restore the clean site if your site gets malware/viruses.
Having a backup system is a must for any website owner. It’s not only applicable to novices but also experts. So make sure you have made a setup for the backup system before you launch the website.
There are a couple of great plugins that can help you to automate the backup process. UpdraftPlus, Duplicator, and All-in-One WP Migration are some examples. All these backup plugins have free versions that work very well for most users.
In my personal experience, the “All-in-One WP Migration” is the best backup plugin for WordPress websites. This is just because of its simplicity and very easy-to-use process. Learn more about taking backup of WordPress website using it.
Many of the hosting companies also have built-in backup and restore systems but there is no guarantee. Also, every hosting company’s terms of service are different. In 2021, I got a client who lost his website and who had no backup. He was using IONOS (1 and 1) and once he asked the hosting company, they said that they do not keep backup for more than 7 days. But he noticed the loss after a month (approximate). So he completely lost his website.
So if you don’t want to lose your content-rich website, make sure you have a backup system in place.
After launching a website, we add more content to it and make improvements gradually. So the website becomes a valuable asset and it’s your job to protect it.
Protect website from hackers & malware

Some hackers may try to hack your website or inject malware to establish a redirection. Also, some backdated guys will visit your admin login page and try random usernames & passwords.
There are lots of negative things that can happen. So, you have to secure your website before launching it.
There are a couple of reputable companies that provide security for your website. Such as Sucuri, WordFence, etc. However, these security tools also have free plugins on the WordPress repository (Sucuri plugin, Wordfence plugin).
If you ask for my recommendation, I would suggest Wordfence free plugin.
How does it protect your website?
- It scans your website for malware and notifies you.
- Blocks malicious IP addresses and malicious traffic.
- It blocks malicious code.
- You can limit login attempts (for example- 1/3 attempts).
It’s easy to set up security plugins. You can start with the free version. Once your site grows big then you can think of additional security layers.
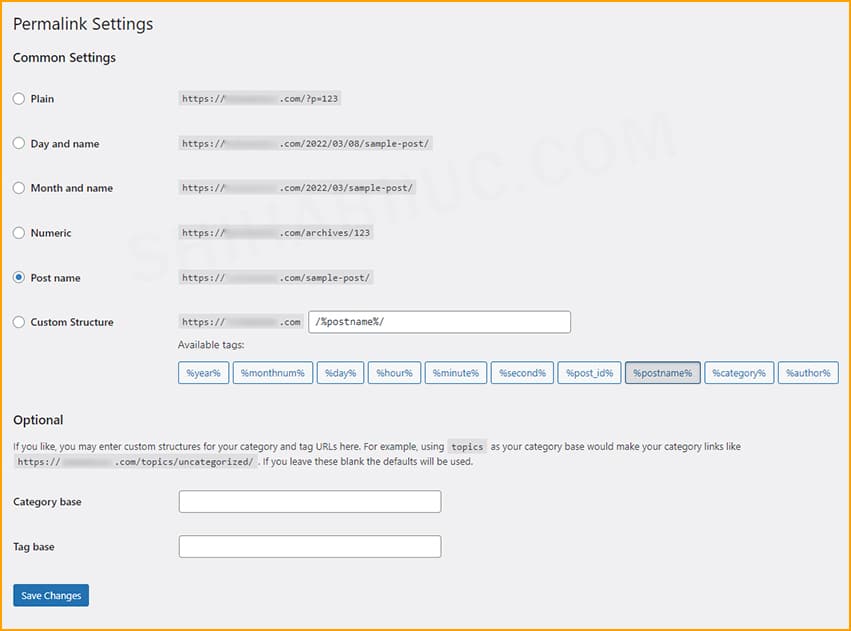
Choose the correct URL Structure
Before launching a website you need to make sure that you built an SEO-friendly URL structure. Most website owners especially newbies make this mistake. They don’t give importance to the URL structure.
However, it’s very easy for WordPress users to create SEO-friendly URLs. To do that navigate to “Settings » Permalinks” choose the option called “Post Name” and hit save. Learn more about changing WordPress post URL structure.
How does proper URL structure help for SEO?
- You can insert keywords in the URL.
- It does not contain random numbers.
- Visitors can read it properly.
- It helps search engines to better understand the topic.
- Looks good on human eyes.
It is very important to check & fix the URL structure before you launch your website. But if you publish your website and change the URL structure later, it may seriously impact search engine visibility and generate 404 errors.
So it’s one of the most important checklists.
Conclusion
launching a website with dummy text (placeholder content) is a nightmare. If you don’t know, publishing or launching a new website is a big turning point, though most of us don’t want to care about it. But in reality, it’s the birthday of a website.
You have a checklist that you should implement before publishing your website. I wrote this checklist based on 7 years of practical experience in the web development industry. And I believe it will help you in the long run.