This post will show you how to insert an image inside the button tag. Also, you’ll see different versions of it. Such as image & text (side by side) inside the button, button background image, positioning of the button text over the image, etc.
You can check the live previews of the examples in the link below.
Did you find your desired example in the live preview? Let’s get started.
I have excluded basic styles such as colors, font, border, etc from this post. This is just to make this post & concise. If you want to learn styling buttons, see another post that shows many stylish buttons.
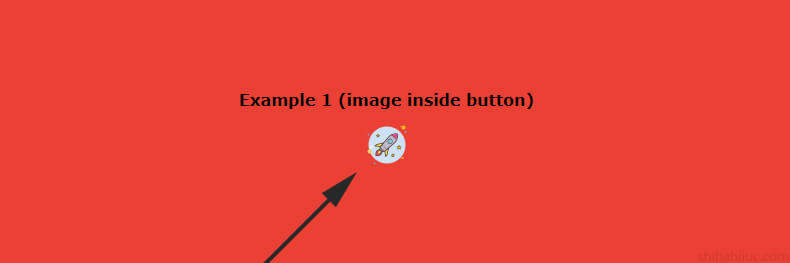
Inserting an image in the button tag is the same as you normally do. Please take a look at the following example.
HTML
<button><img src="./img/rocket.png" alt="rocket" /></button>The output looks like the following screenshot.
In this example, I don’t have any remarkable CSS. A few lines of basic stuff. See them below.
CSS
button {
  background-color: transparent;
  border: none;
}
button:hover {
  cursor: pointer;
}
End of this post, I will link to my GitHub repository for all these examples so you can explore more. Let’s move forward.
Not to mention, a button & a link is different. If you click these buttons, they will not go anywhere. Also, I did not include any action routes/attributes. Because this is not the contest of this post.
But you can wrap the button with an anchor tag to forward them to a different link. Learn more about how to create a button that works like a link.
Example 2 (image and text together side by side)
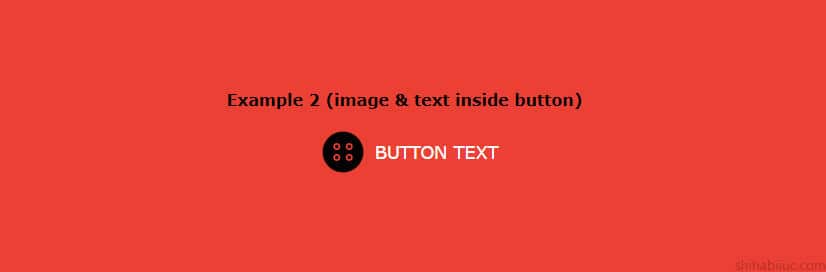
In this example, I have the following HTML.
HTML
<button><img src="./img/button-seven.png" alt="dots" />Button text</button>CSS
button {
  margin: 0 auto;
  color: #ffffff;
  text-transform: uppercase;
  /* required css below */
  display: flex;
  align-items: center;
}
The align-items: center will make the image & the text vertically center aligned. The margin: 0 auto will make them horizontally centered. Learn more about how to center a button.
With these few lines, you can align the button image & text like the screenshot above.
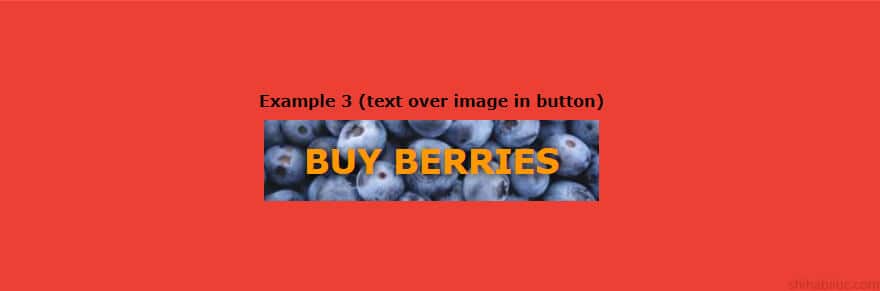
Until this point, I only inserted images directly from the HTML. But you can also insert the image as the background. By doing this, you can easily align the image exactly the way you want.
Of course, you can also align an HTML image as well. However, you should learn multiple ways to achieve your goal. Who knows which method comes in handy?
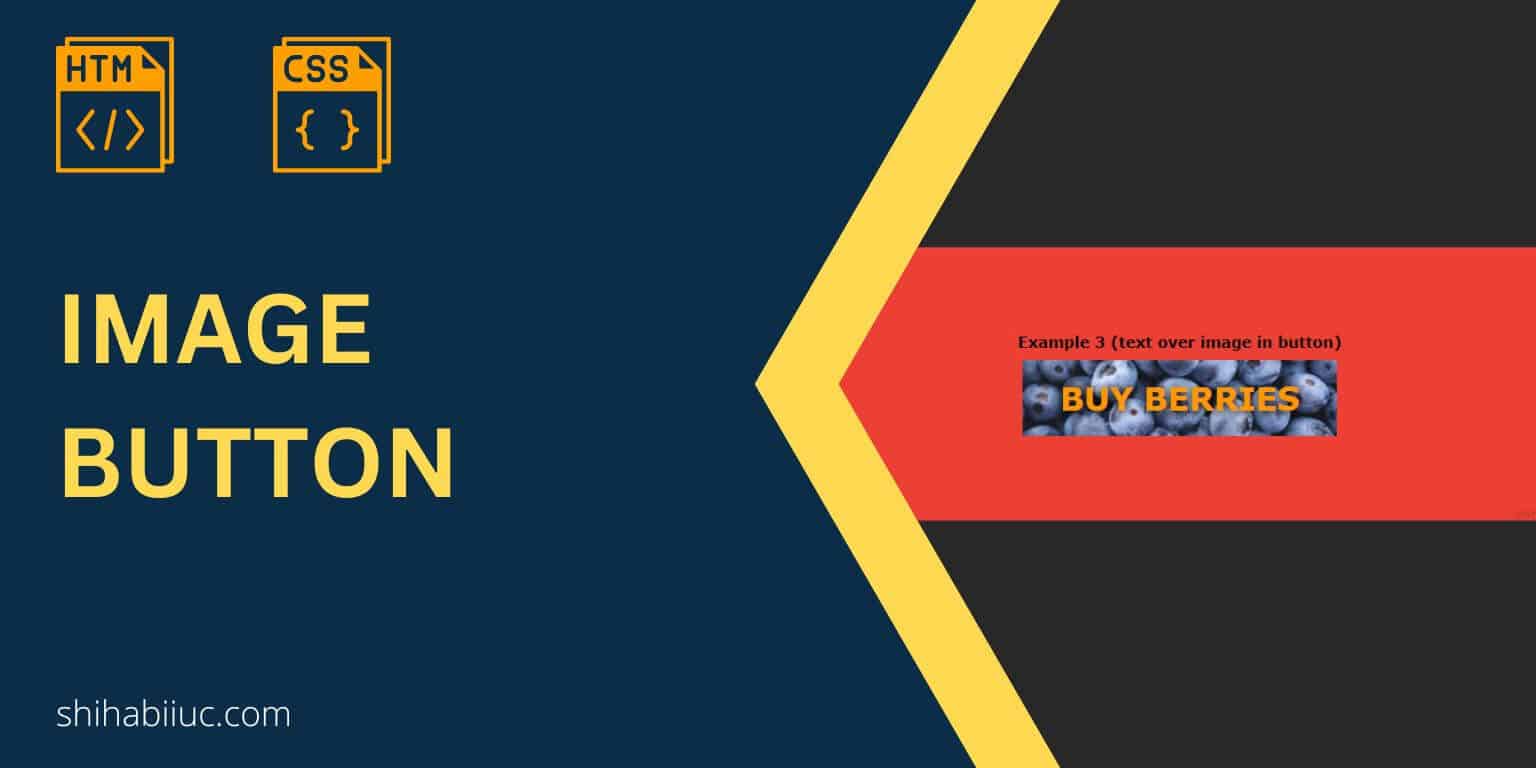
For this example, I have the flowing HTML.
HTML
<button>Buy berries</button>CSS
button {
  background-image: url("./img/berry.jpg");
  background-repeat: no-repeat;
  background-position: center;
  background-size: cover;
  padding: 20px 40px;
  color: #ff9800;
  text-transform: uppercase;
}
In this context, I don’t want to repeat the background image. So I have no-repeat. I want to position the background image center both from the horizontal & vertical directions. So I have the position to center. Note that background-position: center center is the same as background-position: center.
Lastly, I want the background image to occupy the entire image. That’s why I have background-size: cover. But if you want the image exactly as its width/height ratio, you can use contain instead. However, make sure there is no blank space around your button. Learn how to use CSS background and how to size/resize background images.
- What is the difference between a link & button?
- How to create an HTML button that works like a link?
- How to style buttons with CSS
- How to center a button in CSS?
- How to create an image button?
- Button border examples
- Rounded buttons
- How to create back to top button in HTML, CSS & JavaScript
- How to create a close button?
- How to remove the button border?
Build HTML CSS projects
Conclusion
I gave you multiple examples and the sample HTML & CSS. If you want to download all the code for the live preview template (examples). please go to my GitHub repository.
Each of these examples has different use cases based on situations. I would use the background-image approach when possible.
If you have any questions or confusion, please let me know.